• Hello Guest, welcome to the initial stages of our new platform!
    You can find some additional information about where we are in the process of migrating the board and setting up our new software here

    Thank you for being a part of our community!

Rusty 242GT project

Dude, "POR15" all bare metal before you weld and prime. Then if you do have to use polyester bog for finishing purposes, its less likely to rust out again. Remember most bogs absorb water, so if you're looking for a long-term quality finish, prep the bare metal as well as you can :)
"por15" is an awesome product, but....
i think you may have confused that with something else, or worded it differently than you though.
 
dont even know where i can buy por15. so far its been painted with a rust treatment/primer and cold gal, might yet do another layer of paint. pretty sure the rust isn't going to come back any time soon.

cut out a bunch more rust and played with my new sand blaster.

outer skin cut off, still need to cutoff rust on inner skin, and decide how much lip to trim off and if im going to flare the back of the guard a bit to help fit in some wide wheels.
DSC01972.jpg


lip above rear bumper was approx 80% dodgy patches, 15% body filler and 5% original metal. aka 100% ****ed.
DSC01973.jpg


cut the whole lot off, still more cutting back to do.
DSC01977.jpg


DSC01978.jpg


DSC01979.jpg


pile of rusty lip
DSC01980.jpg


large patch across back of the spare wheel well. need to investigate it more but might keep it
DSC01981.jpg


im going to try and find a good lip at the wreckers and convince them to let me use a battery powered angle grinder to cut it out. it would be a fair bit of effort to fold up a patch section without a big sheet metal bender and even then still not that easy. going to be a lot of welding. probably over 3m for the rear lip.

finish uni exams on the 24th then have only a limited amount of uni work for a month following that so going to work at it as much as i can then.
 
whenever i do a bit of metal work and leave the bare metal for a day or so, i give a quick spray of transtar self etching primer just to be safe. i am not sure how humid it is there though, it is pretty humid here. it would just be sad for all your work to be in vain ya know.
i will be doing this same kinda thing soon here, keep up the great pictures and all the progress!

i dono if you will be able to find por15, but it is a great project, just really hard to get off once on. i think the only way is to pretty much grind it off, and it is really damn hard, so you better be sure you want it there.
and it will have to be topcoated if it sees sunlight. you can apply it over stuff that is somewhat rough still. should look into it.
http://www.por15.com/
POR-15NewQrtGallon.jpg

i need to order some more.
 
i picked up a supra 5 speed W58 from a JZA80 (apparently a stronger version that earlier w58's), its about the strongest gearbox i can buy for a reasonable price. i paid $375 for this one, the next step up is over $2000.

DSC02016.jpg


the bell housing it came with was a pretty similar pattern to the volvo one but looks like a bigger pain to make an adapter between the engine and the bellhousing than between the bell housing and gearbox that id already been thinking. still need to find the time to get a BW55 bell housing to confirm my plans will work.

DSC02018.jpg


adapter will be alot like this, in fact this adapter should work on a 960. the BW55 has a smaller inside diameter and bolt pattern, basically just a smaller version.
A340_W58_Adapter_401A.jpg


here is how it looks through a AW71 bell housing which has the same bolt pattern as a BW55 (not orientated at the right angle but you get the idea)

DSC02014.jpg


made some progress on rust repairs

cutout almost ready to patch
DSC02020.jpg


patching all done, was a massive headache getting the patches bent to shape
DSC02027.jpg


rear painted with rust converter/primer
DSC02023.jpg


started body filling, made the mistake of putting on a lot more than i needed on so have to sand back a bunch more still to get the curves right :roll:
DSC02033.jpg
 
Looking good mate.
When using the filler you wanna go over a larger area, but don't make it thicker than you need to.
Then block it back as needed. By covering a large area with the filler you reduce the chance of seeing sunk in craters in the top coat.

Then if u want you can skim the whole area with blade putty. That will fill any slight imperfections and pin holes. Then once it's blocked hit it with the highfill.

Also remember bare steel needs etch primer/epoxy before you highfill.
 
this is kind of a fake update, basically all of the work in this post was done some time ago but been kept way to busy to do more. this post should hopefully be the beginning of a renewed push though.

I got a hold of a BW55 bell housing and it appears that it should work with an 8mm adapter/spacer. just need to find the time to draw it up in CAD.

patched most of the rust above the rear bumper. cut a large section from a donor car as it was going to be to hard to bend metal to shape. unfortunately i could not find a non rusty lip from a commando bumper car so had to settle for one from a plastic bumper car. turns out they are slightly different, the rear of the car is curved slightly more on the plastic bumper cars. ended up cutting the donor section in half and welding them on individually. as a result there is a bit of a kink in the rear lip but it should be hidden, worst case i will cut and reshape the lip a bit.

on with the pictures:

DSC02111.jpg


DSC02119.jpg


dammit turns out i haven't got any pics of the replacement lip welded in. will post when i do.

also cut out the front of the left hand butt cheek ready for patching

DSC02107.jpg


also made a few more purchases to help the project along, ive now got an air powered sanded and 300 sanding discs for it so that should help speed things along when i get onto the paint work.

also picked up a Jaycar wideband controller, been using one in my car for a couple years now without issues. got it on eBay for $30 shipped, just needs assembling together.

the biggest purchase was a Holset though, its a HX35W. hopefully with a ported 16v head and good custom manifolds i should be able to get it to spool reasonably.

specifications are:
Compressor - 56mm inducer, 76mm exducer,
Turbine - 60mm inducer, 69.5mm exducer, 12cm housing = approx A/R 0.86
Divided t3 flange

holset2.jpg


holset1.jpg
 
nice rust free lip. left the trim holes in it for now, haven't decided if i will run commando or plastic bumpers yet.
DSC02295.jpg


annoying bend caused by the different shape of commando and plastic bumper rear lip
DSC02293.jpg


ended up using 3 lengths of weld, one along the ridge on the outside of the boot, one along the edge of the boot floor and one along the bracing at the rear of the boot.
DSC02298.jpg


couple holes still to fill as i didn't cut the patch section large enough. should be easy though.
DSC02299.jpg


left butt cheek ready for patching
DSC02300.jpg


after several days work finally cleaned and organised the entire area around the 242, should make future work a bit easier.
DSC02278.jpg


DSC02281.jpg
 
Guys , if any of you that doesnt live in Europe donesnt know : Pattern parts for most cars are available as normal aftermarket parts. Shipping will probably be expensive , but look in at a place like Skandix.de if you need anything. For cars like the 240 almost a full body can be made up from repair panels
 
after sanding off and adding more filler several times finally got the rear of the right wheel arch to a shape i am happy with. primed, guide coated, sanded and primed again. ready to be finished off when the rest of the body work is done.

DSC02305.jpg


also been busy chiseling away at the tar sound deadening, done about half of the car so far. i think ill have removed about 15kg of it when i am finished. not going to put the under carpet sound deadening back in either so that should be a reasonable weight saving to.

i have a bunch more springs on their way to me.
6" 550lb main springs
8" 370lb main springs
2.71" 150lb tender springs
3.76" 150lb tender springs

will determine the spring rate of the main springs when i get them, rates are calculated from dimensions the seller measured. need to do a bunch of calculations but im thinking of using the 370lb main springs up front with the 3.76" tender springs, and the 250lb springs i already have for the rear with the 2.71" tender springs. no immediate plans to use the 550lb springs, i have a feeling they will be a bit stiff for driving on the road.

watch this space, should be a bunch of progress over the next few weeks. last day of university today so i will have all my day light hours to apply to the 242 till i find a job. although some of that time will have to go to resealing the gearbox and replacing the clutch on the 244 i DD and all the other things that i have been neglecting for to long...
 
Last edited:
the 242 is not mostly void of sound deadening, just got to finish remove the sound deadening from the roof and doors.

in progress (used hammer drill as previously shown)
DSC02318.jpg


when ive finished ill put it on the scales but feels about 20kg of weight lost so far. im not gong to put the other under carpet deadening back in either so that probably another 20kg lost there.
DSC02320.jpg


and done
DSC02329.jpg


DSC02330.jpg


with the sound deadening gone i got busy seam welding. front of the passenger compartment is done, going to do some more seam welding and extra bracing between the rear wheel wells.
DSC02332.jpg


the spot welds appear to be fine around the door and window openings but im adding some extra ones where the spacing is larger the 1". doing this by drilling through one layer then filling it with weld.
DSC02334.jpg


pulled the right side guard to get access to the rust at the front of the sill. the rust is pretty isolated so should be one of the easiest rust repairs ive done.
DSC02327.jpg


Found the the rear quarter just behind the right door has been creased before. 9 holes were drilled through it to try and straighten it and a bunch of filler put on. not sure if i will redo the repair or not yet. a bit of panel beating and i bet i can get the metal a lot straighter than it is and weld up the holes.
DSC02315.jpg


only just noticed that the brace behind the rear seat was bent, not sure how someone managed it. all the metal around it is fine. ive straightened it out and will do some welding
DSC02325.jpg


and now for something i noticed the seems kind of odd. right hand side of the roof brace is welded, left hand side is not. can move the brace around so definitely no hidden spot welds. not sure if this is intentional or not, i think i will end up welding it.

DSC02341.jpg


DSC02340.jpg
 
Last edited:
My lack of updates does not mean a lack of work done. I've been working on the 242 as much as I can.

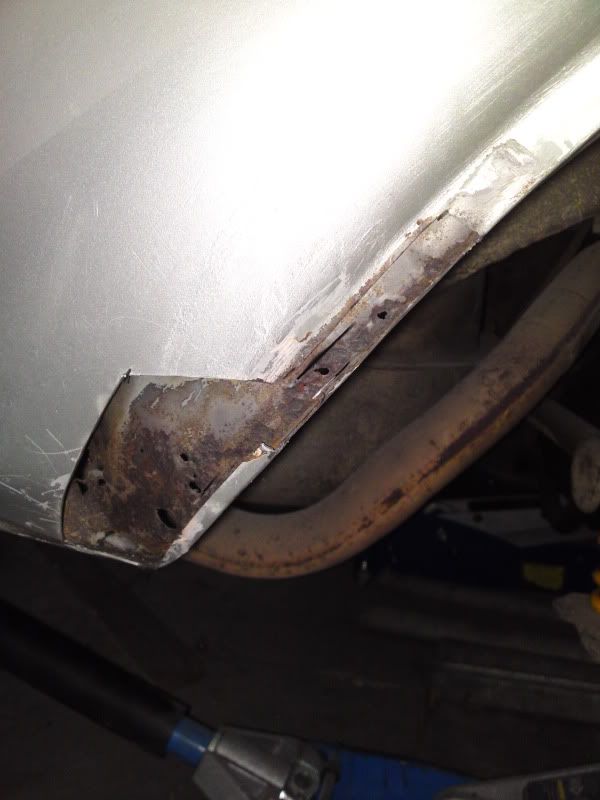
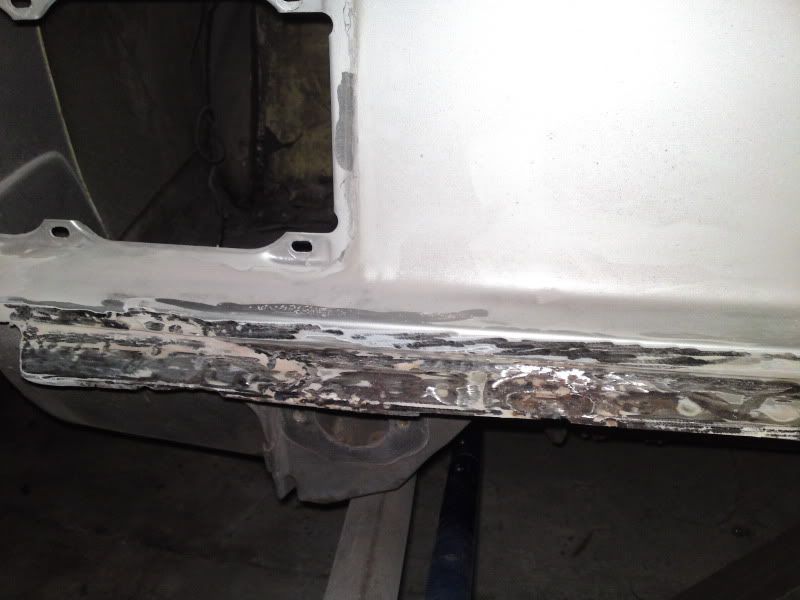
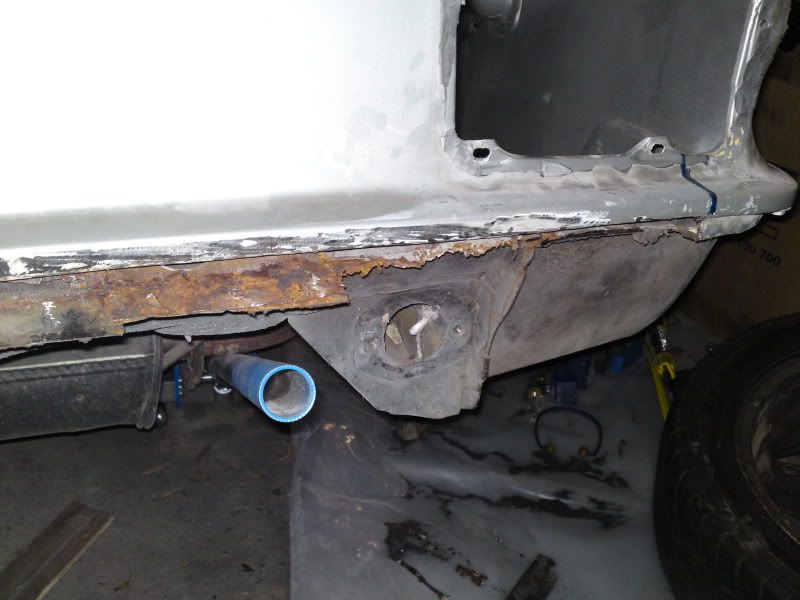
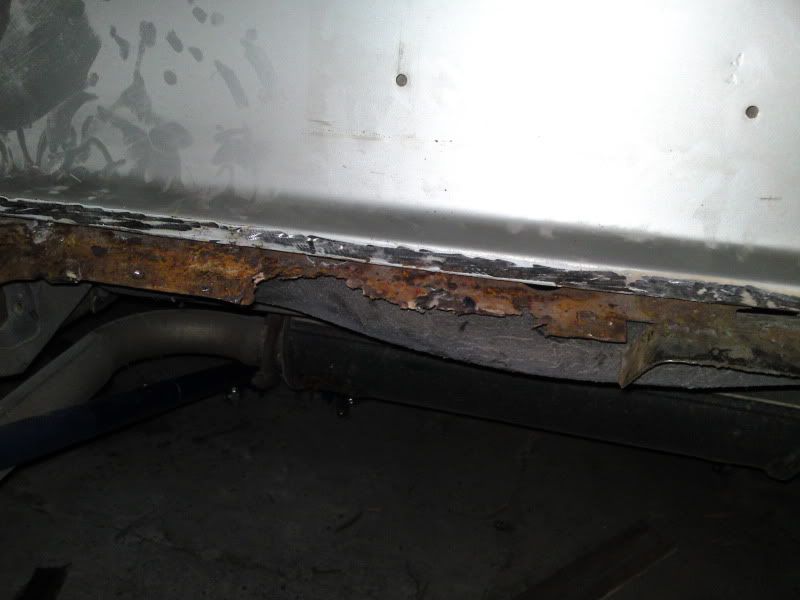
Patched up the front of the right hand sill
DSC02347.jpg


Painted up the parts of the floor that are completely done. The welds around the patched floor areas still need to be ground down on the underside and possibly touched up.
DSC02348.jpg


I made the decision to take off all the filler on the panel behind the right hand door and straighten it out as best as i could. It was bent up far more than i expected and was very difficult to get straight. As a result i ended up putting a fair amount of filler back on but at least now i know whats there and that its done properly. I welded up the holes that had been put through the panel to prevent moisture getting behind the filler on the panel.
DSC02400.jpg


I also welded up all the trim holes along both rear quarters. I did this by moving from one hole to the next and only partially welding the hole each time before repeating the process. I also used the same gradual process for grinding the welds down. As a result i was able to keep the warping to a minimum. The following picture shows an in progress shot of filling the bent panel and a little around the welded up trim holes.
DSC02380.jpg


A bit of digging at the front corner of the right rear quarter window revealed some holes and i ended up cutting out and patching the area
DSC02397.jpg


DSC02423.jpg


Trying to hide behind filler under the right bottom corner of the rear window was another dodgy rust repair. When it was patched the person doing it didn't even paint the back side :roll: I straightened out and welded up the patch and painted in behind it as best as i could using the drain hole bellow that section. A little bit of filler and everything was straightened out.
DSC02433.jpg


DSC02428.jpg


I also deleted the trim at the top of the C pillar. I welded up the hole, ground back the weld on the seam slightly and straightened it all out with some filler.
DSC02441.jpg


The preparation for painting of the rear quarter took ages because there was just so many layers of paint. I decided the take it back at a minimum to the original volvo primer layer. That meant removing 6ish layers of paint :grrr:
DSC02444.jpg


Yet another rust hole, ended up just cleaning it up and filling it with weld
DSC02449.jpg


Finally after many hours i primed the entire rear quarter as shown in the following pic. Following taking that pic i sprayed the panel with a mist of black paint and am in the process of sanding it back to find any low spots. So far so good, only identified one spot so far where its a little low around one the of trim holes i welded up.
DSC02452.jpg


With the right rear quarter more or less done i moved on the repairing rust around the rear windscreen. Yet another example of a dodgy patch in the past, bit hard to tell from the pic but there is just a bit if metal that was slipped behind a rust hole and welded in. The area now features a proper patch and painted as best as i could behind it. the rust in the rest of the lip was mostly built up again using weld.
DSC02455.jpg


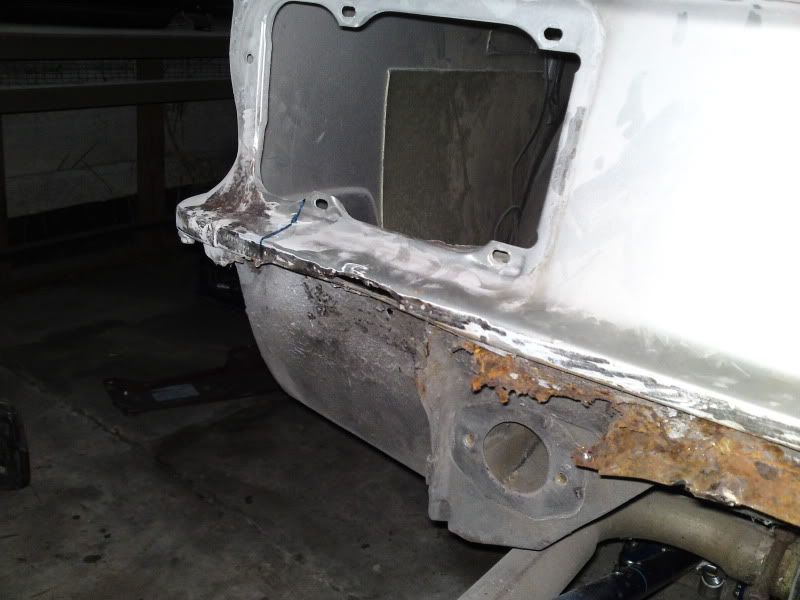
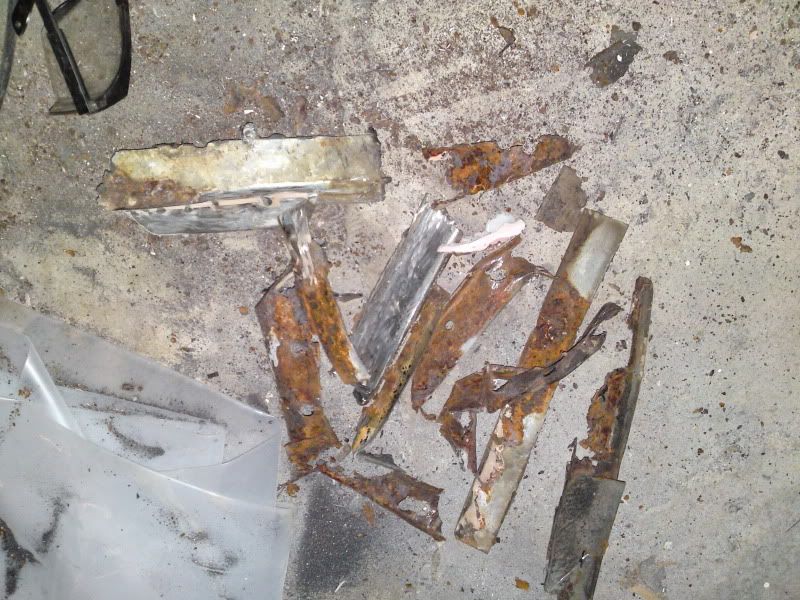
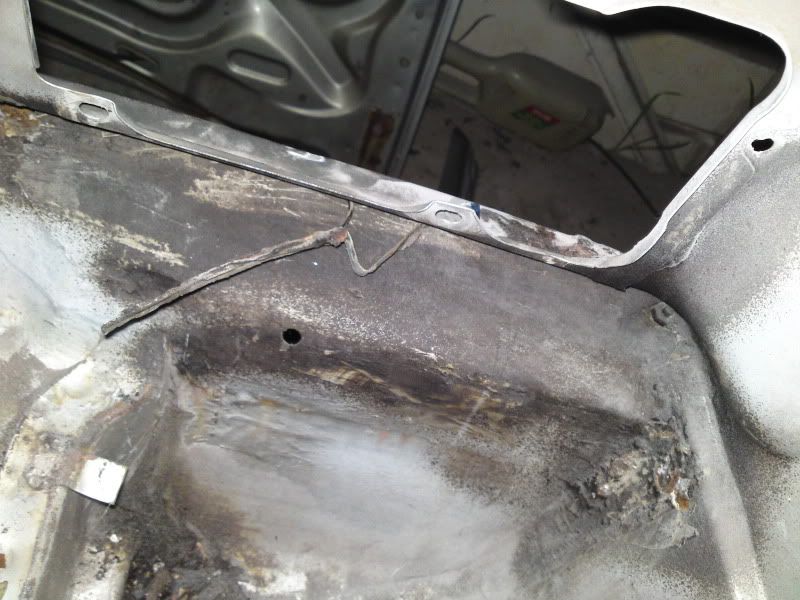
I've also made some progress on repairs to the rear of the left hand rear wheel arch. A large part of the patch came from a donor section. The rest of the patch had to be made from hand as i dont have access to a car without butt cheeks to cut up. With the inner skin patched im ready to patch the outer skin which is likely to prove challenging to get right.
DSC02465.jpg


DSC02467.jpg


As per my previous post the 4 springs arrived (purple in the pic bellow). I also picked up another pair of springs to play with on the rear for $11.25 shipped, won on ebay, 200mm long and approx 270lb/in (red in pic bellow). The yellow springs and coilover sleeves are as per purchase awhile ago. Going to buy the coilover sleeves for the front soon.
DSC02411.jpg


Also picked up another turbo this time a t4 with a dodgily modified hotside housing. I combined it with the hotside of a t3 i have and a rebuild kit to make a complete turbo. Need to work out how much power it would be good for before deciding if i will keep it and use it on the 242 or sell it on
DSC02412.jpg
 
Seconded! Top work, and the Blood, Sweat and Tears will be worth it all when you take it on cruises and to shows and folks are all "ooh, ahh" :nod:
 
i can has genuine BBS rims :-D 16x7.5" et18 5x10⁸. i wanted to get 17" rims but these came up at a good price and ticked all the other boxes, the only other option i was looking at was new BBS knock-offs at almost triple what i paid for these. They currently have 225/45R16 tyres on them.

DSC02490.jpg


I patched the front corner of the left butt cheek. i did this by cutting a flat piece roughly the right size and shape then gradually tack welded, bent and trimmed it to shape.

DSC02469.jpg


After it was in place i gradually welded it to avoid warping. im not sure if it was due to previous dodgy patching or what but even before i started patching the panel seemed to bulge out to much in the rear quarter. as a result i decided to try and shrink the bulge. i did this by laying a heavy weld in a square shape, it actually worked surprisingly well.

DSC02471.jpg


After all the patching and reshaping i laid down a layer of filler... i ended up messing around and taking filler on and off several times till i got everything the right shape. in the end the filler covers a reasonable size area but is only 1mm or so thick.

DSC02488.jpg


To continue with my sleek look i welded up the antenna hole in the rear quarter, i may end up with a radio in the car in which case i will use an internal antenna.

DSC02484.jpg


DSC02492.jpg


the rust around the windscreen and the hole at the front left corner of the boot lid is now all fixed up. patched up, skim of filler and its all looking good. need to refit the boot lid to double check the gaps around the repairs in the front left and right corners of the boot lid.

DSC02500.jpg


the trim at the top left of the rear windscreen has been deleted and filled in

DSC02491.jpg


the top part of the roof is all sanded and i only found one dent which has been filled in

DSC02495.jpg


The trim holes along the left rear quarter have all been filled in and smoothed out. ive laid down some primer and a guide coat, still need to give it a sand to see how good my efforts were.

DSC02508.jpg


Heavy rain caused flash flooding of the backyard and part of the garage turned into a river, luckily there were only a few bits and pieces on the floor that i scooped up before any damage was done. the tub full of water is from the leaking roof, really need to get around to fixing that... the right rear quarter is part way though having its guide coat sanded, only found one spot where one of my trim hole patches sits to low.

DSC02505.jpg


ive now got the coilover sleeves for the front of the car - 51mm ID and suit 2 1/4" springs

DSC02493.jpg


Also picked up a vented oil cap, not sure if i will run it or some other supplementary vent setup yet

DSC02497.jpg


ive also put in an FCP order for a bunch of stuff, including most of the stuff i will need for the 242's engine. still need to find a good block though...
 
Last edited:
Back
Top