• Hello Guest, welcome to the initial stages of our new platform!
    You can find some additional information about where we are in the process of migrating the board and setting up our new software here

    Thank you for being a part of our community!

1975 242DL Project: B230/M46/Lh2.4 Upgrade <!!! Image Heavy!!!>

polaris

Mk V
Joined
Jan 8, 2006
Location
SF, CA
The Backstory:

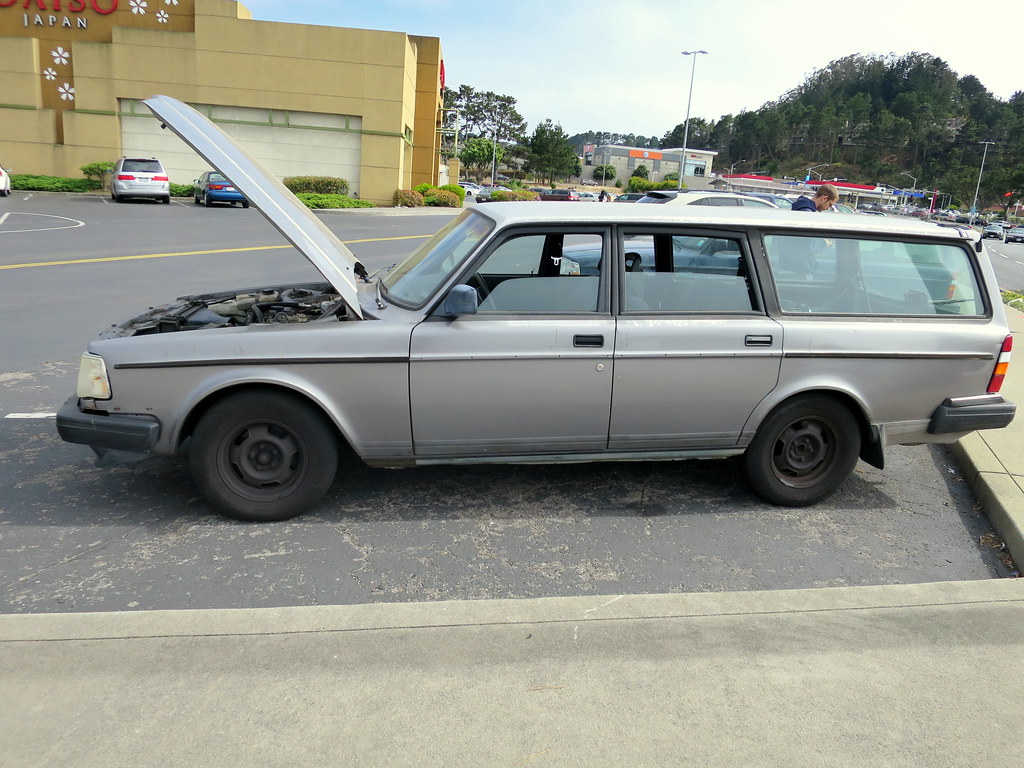
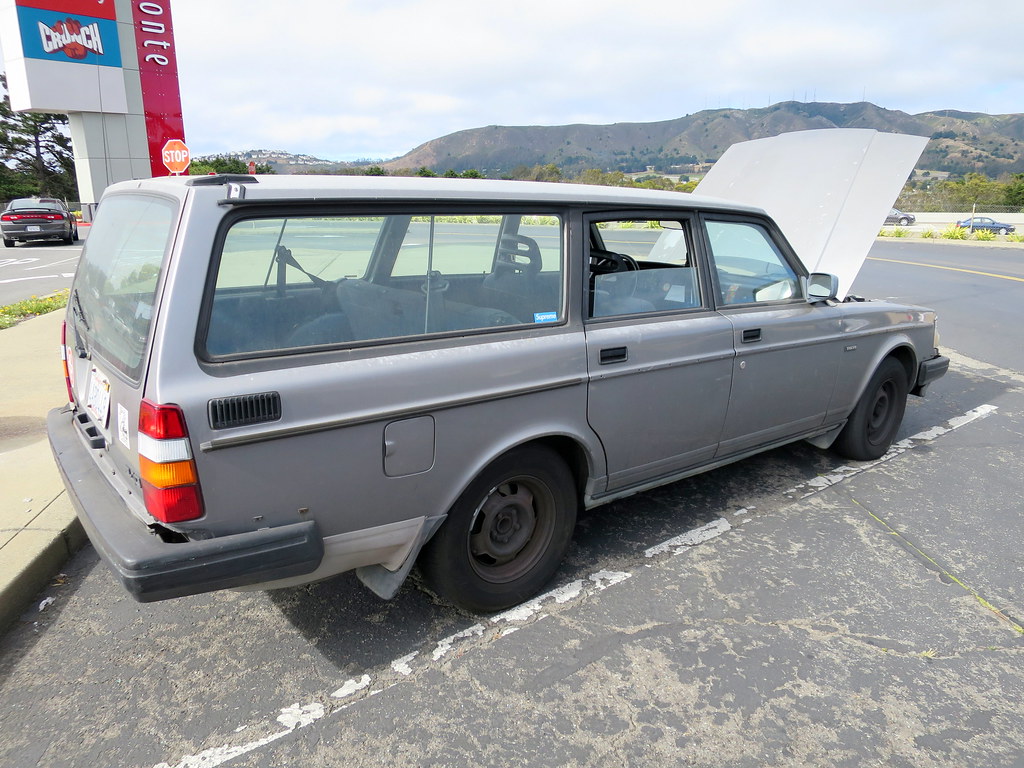
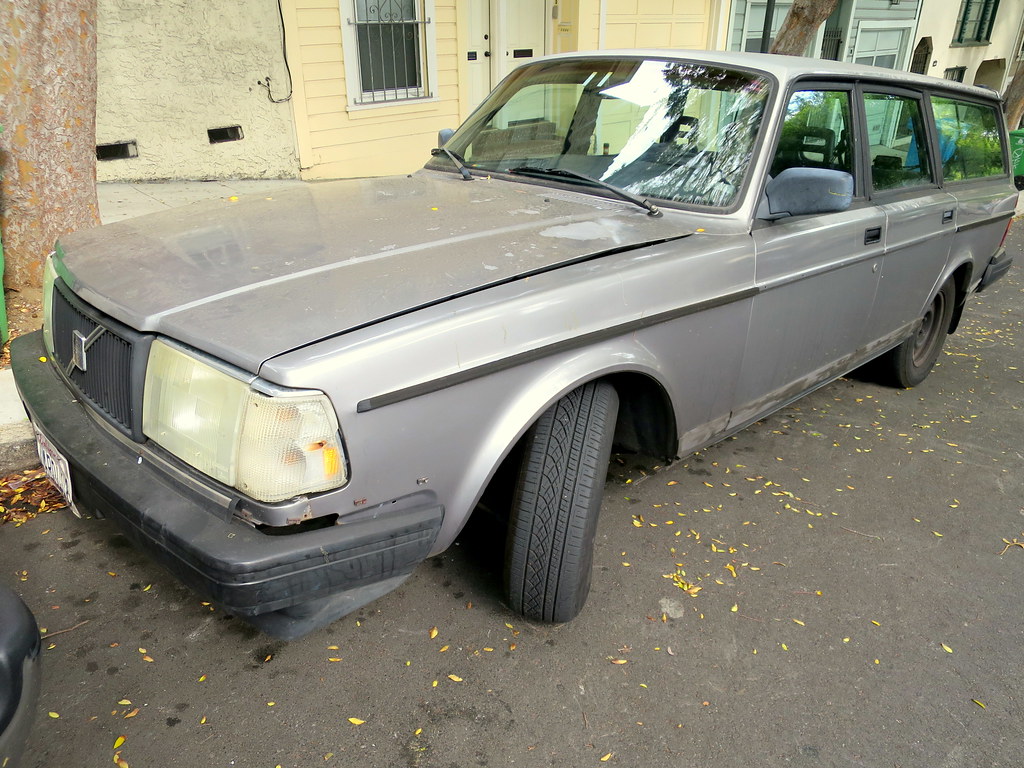
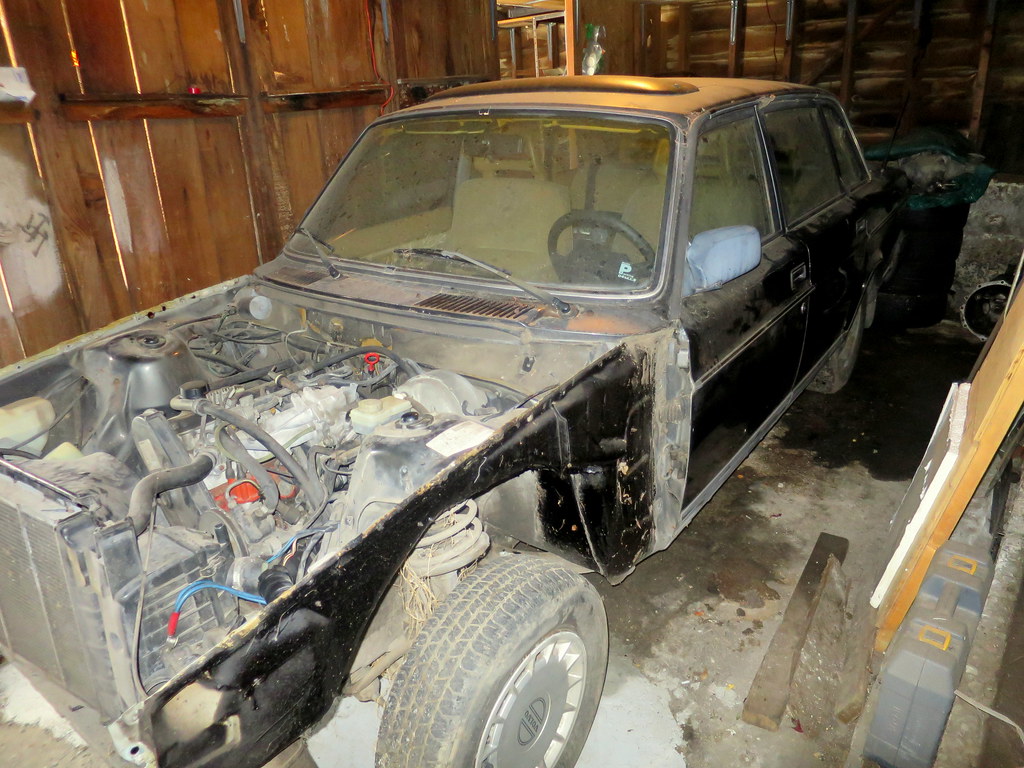
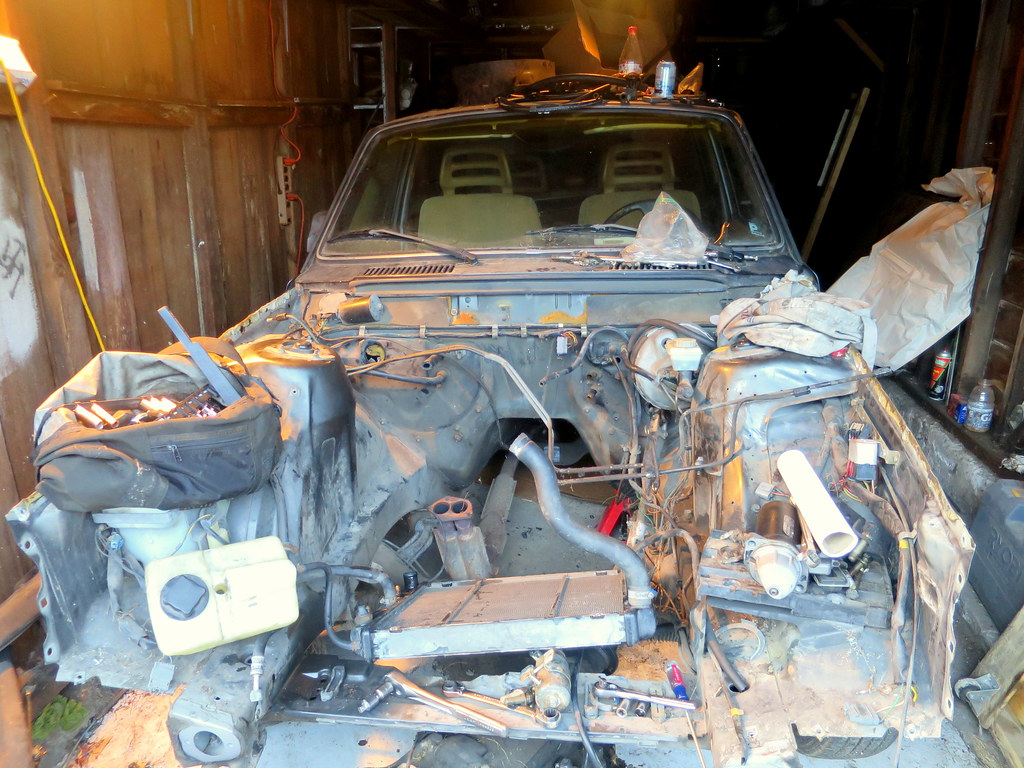
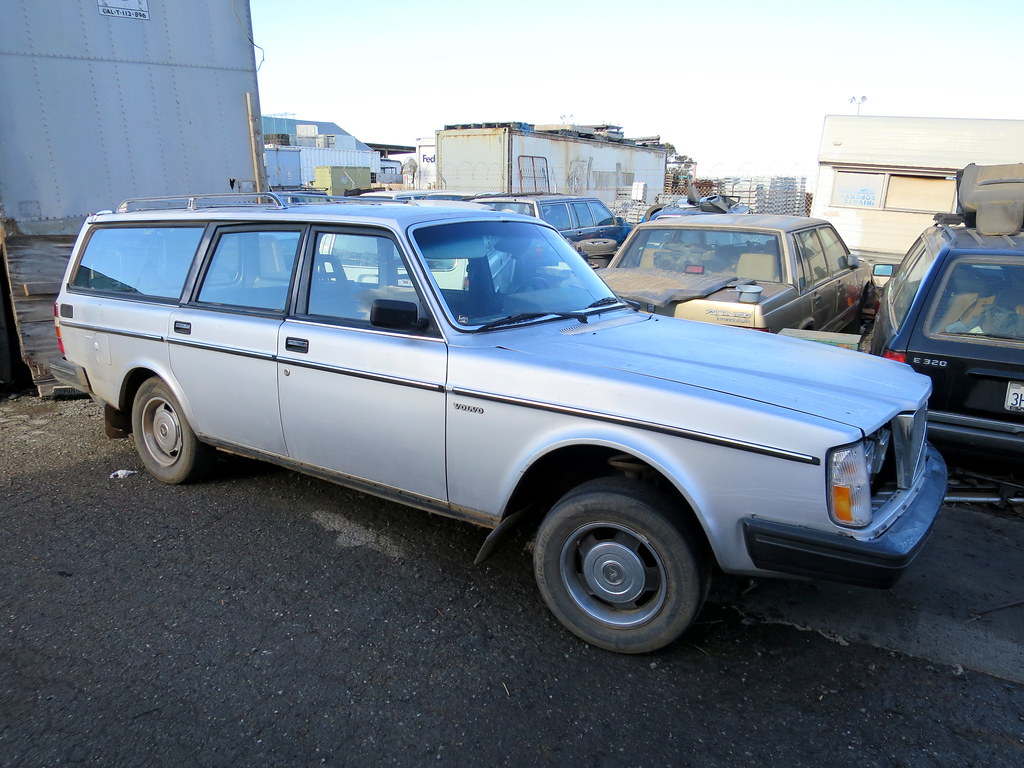
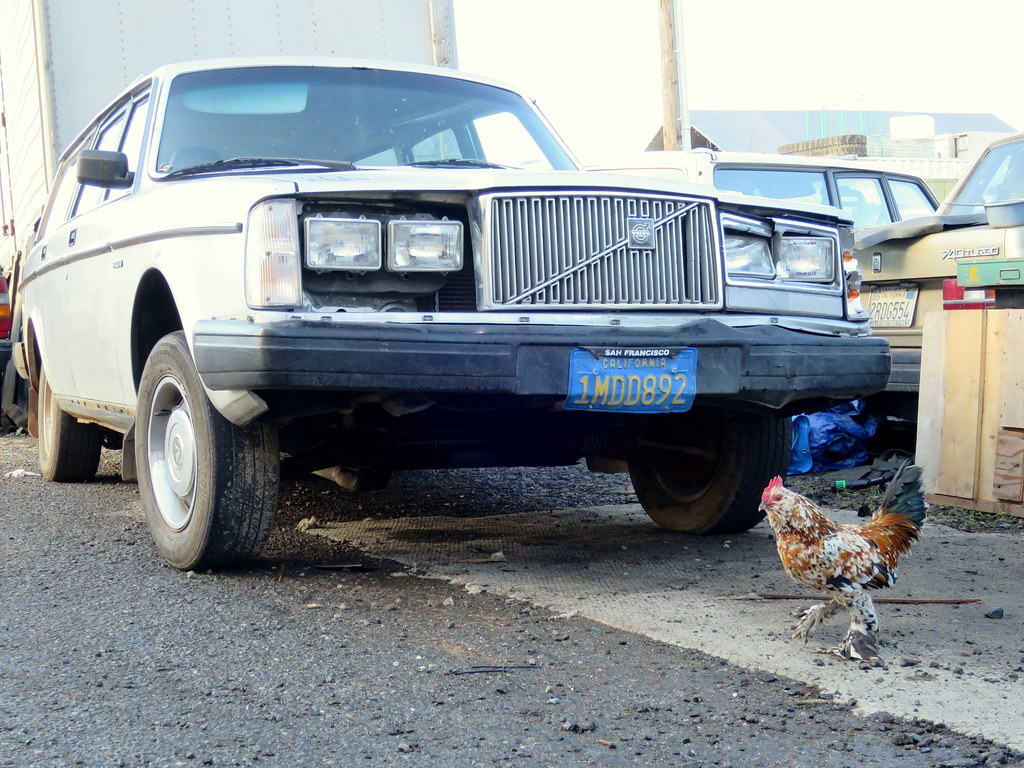
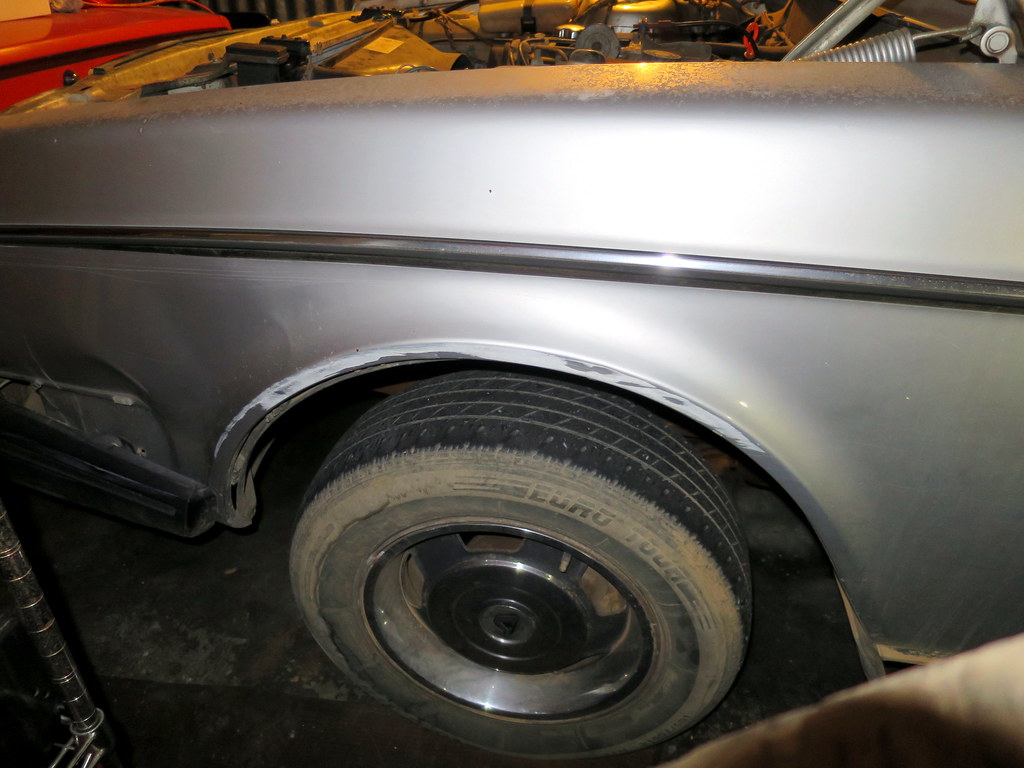
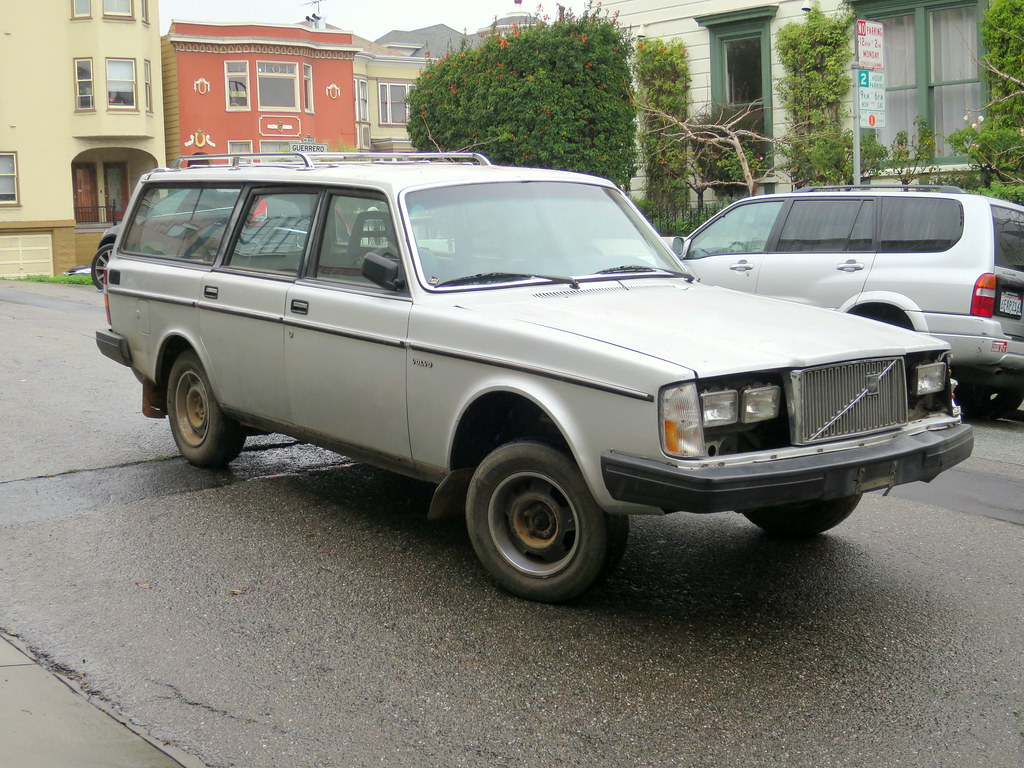
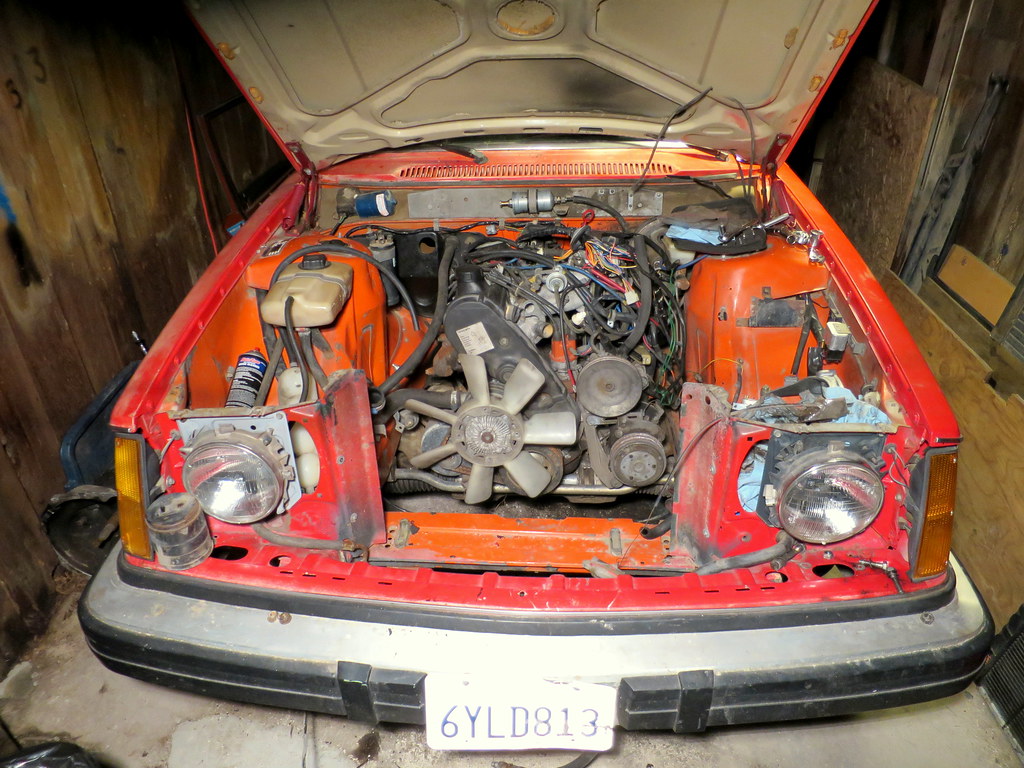
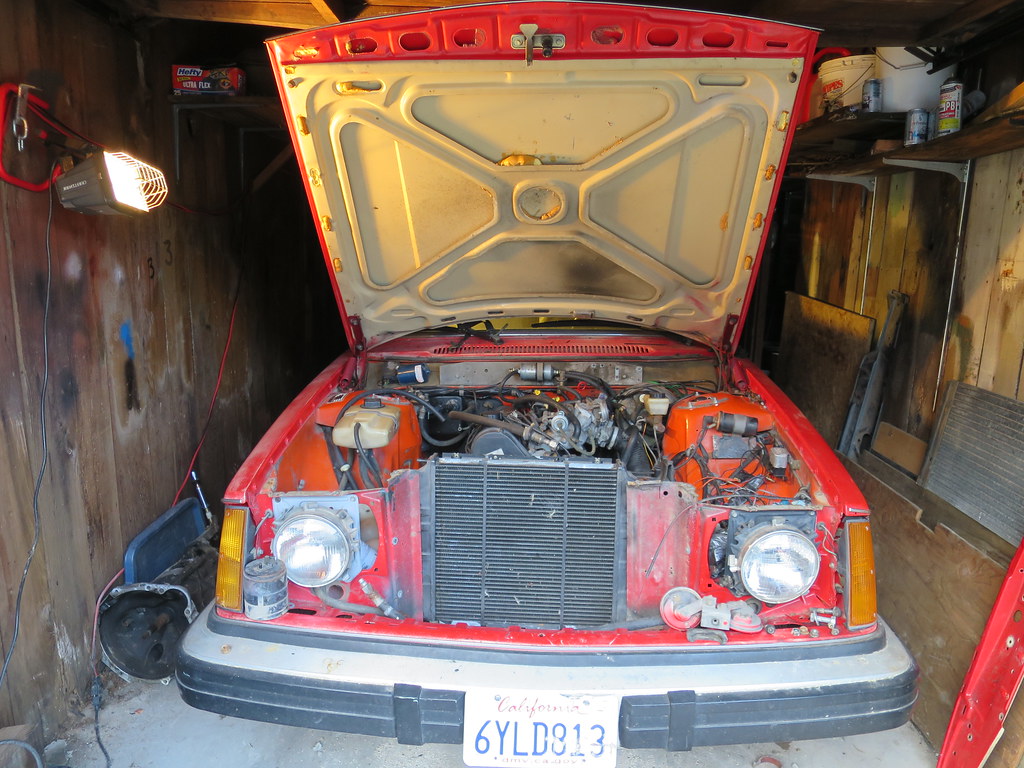
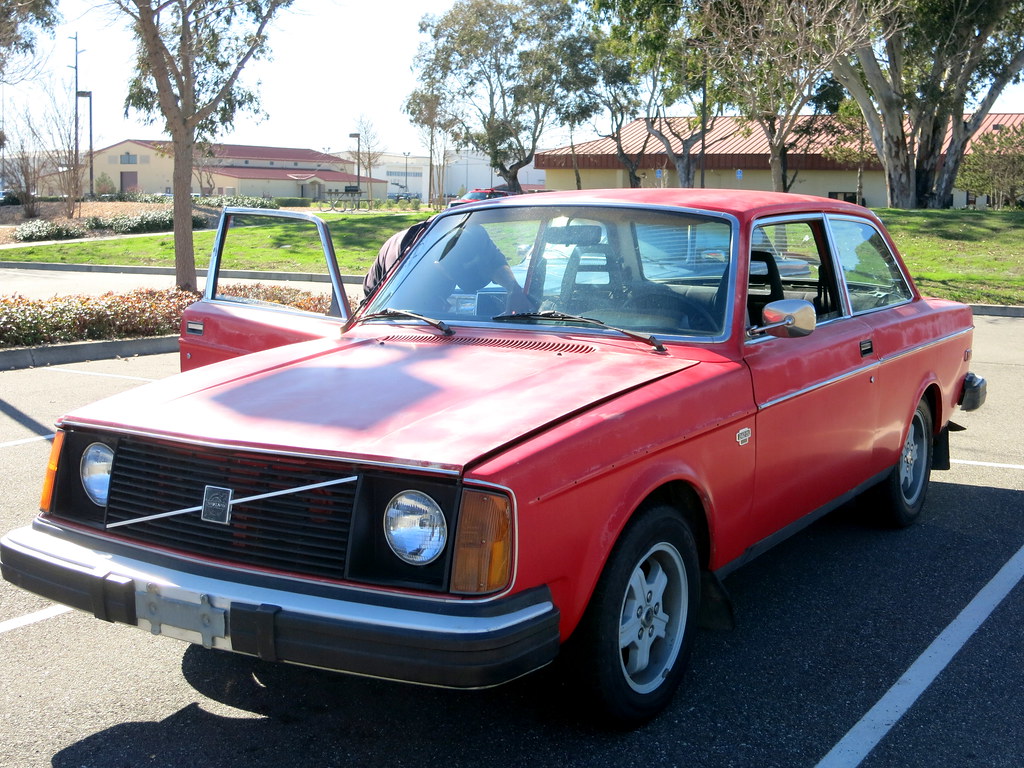
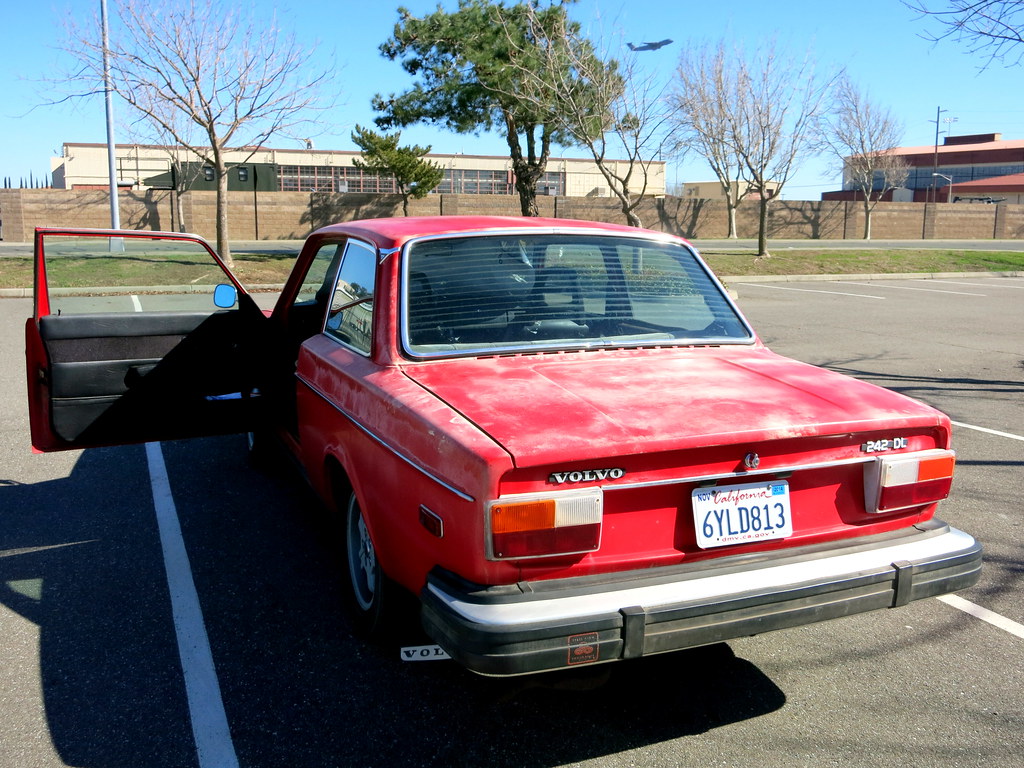
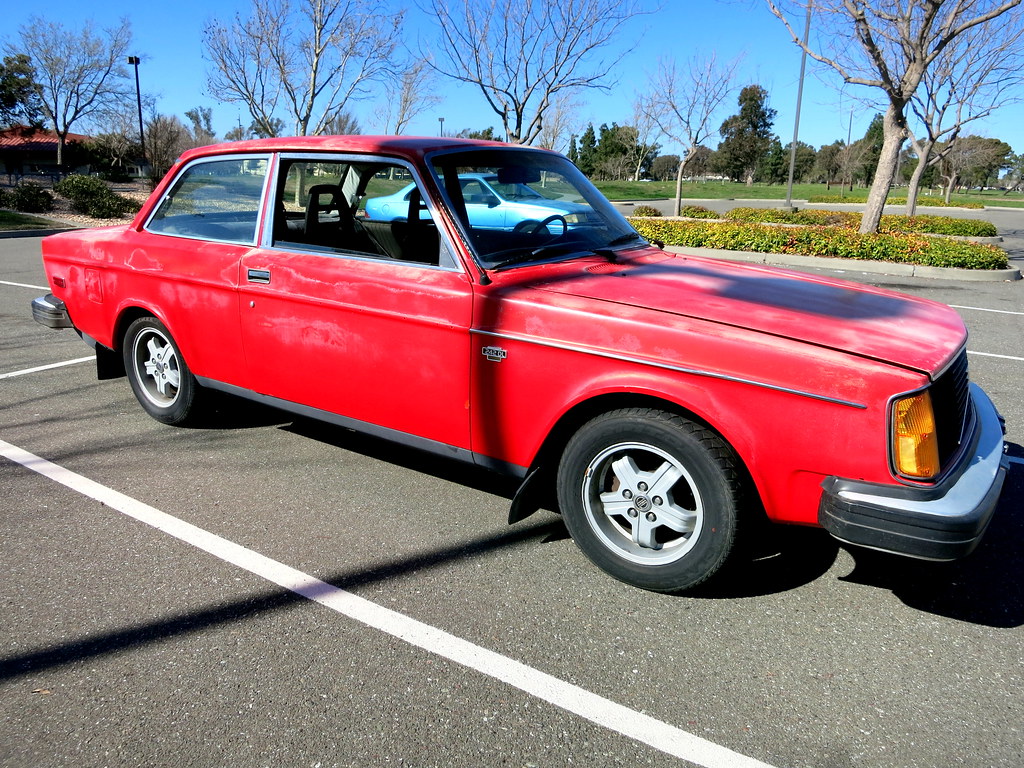
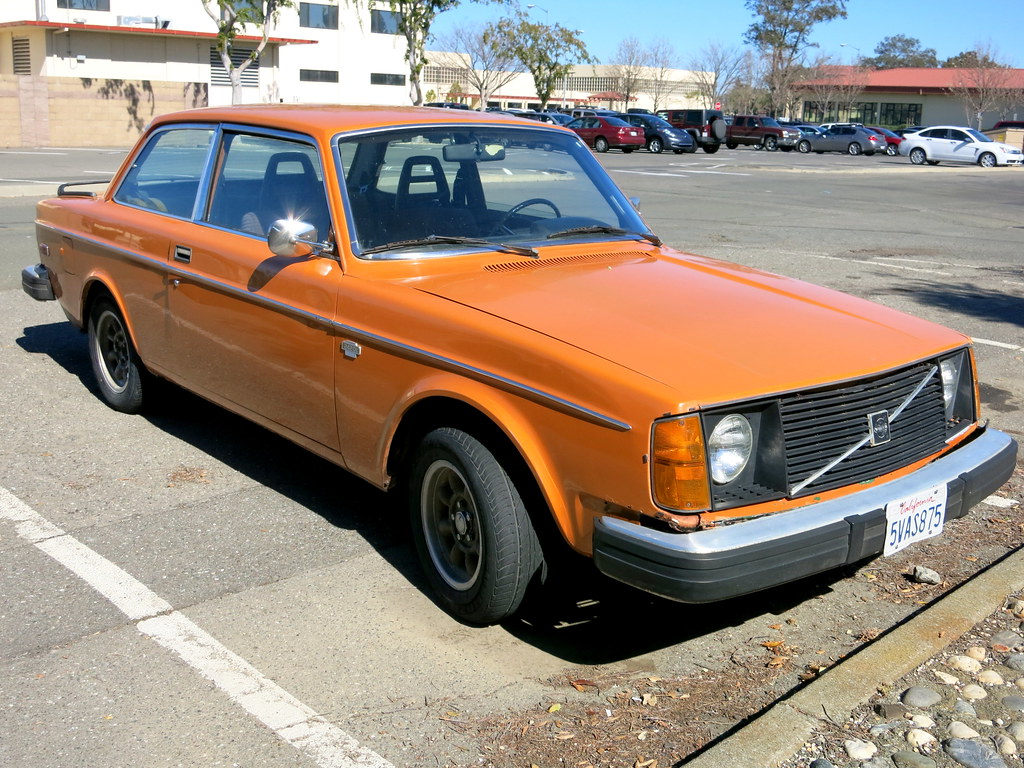
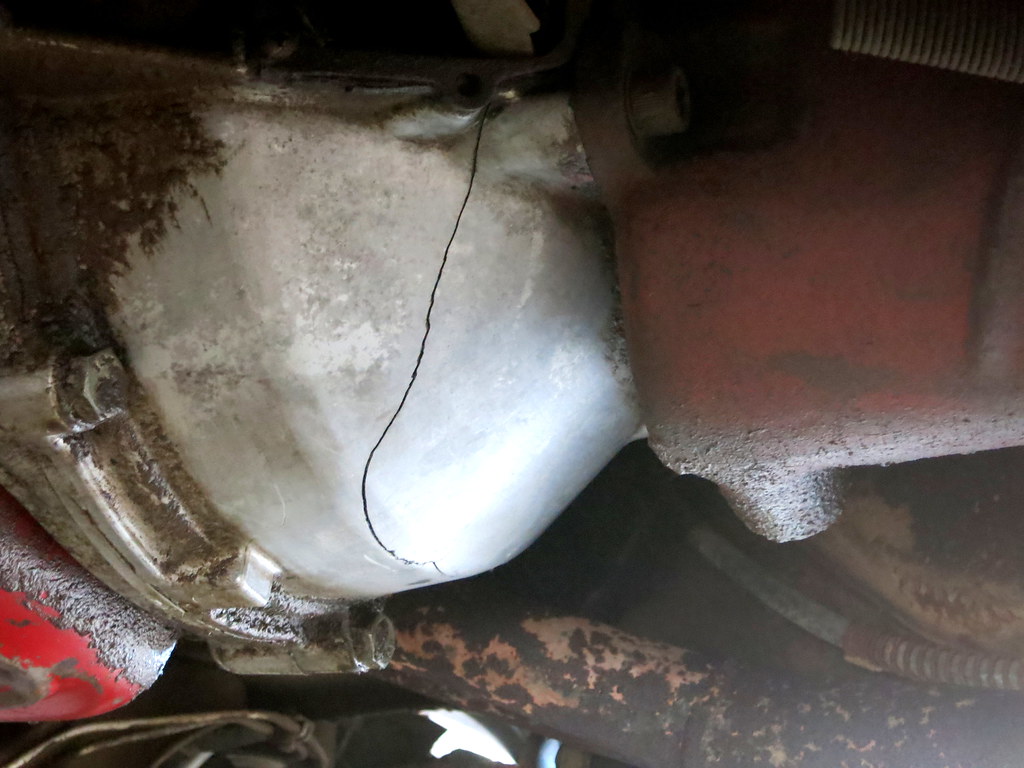
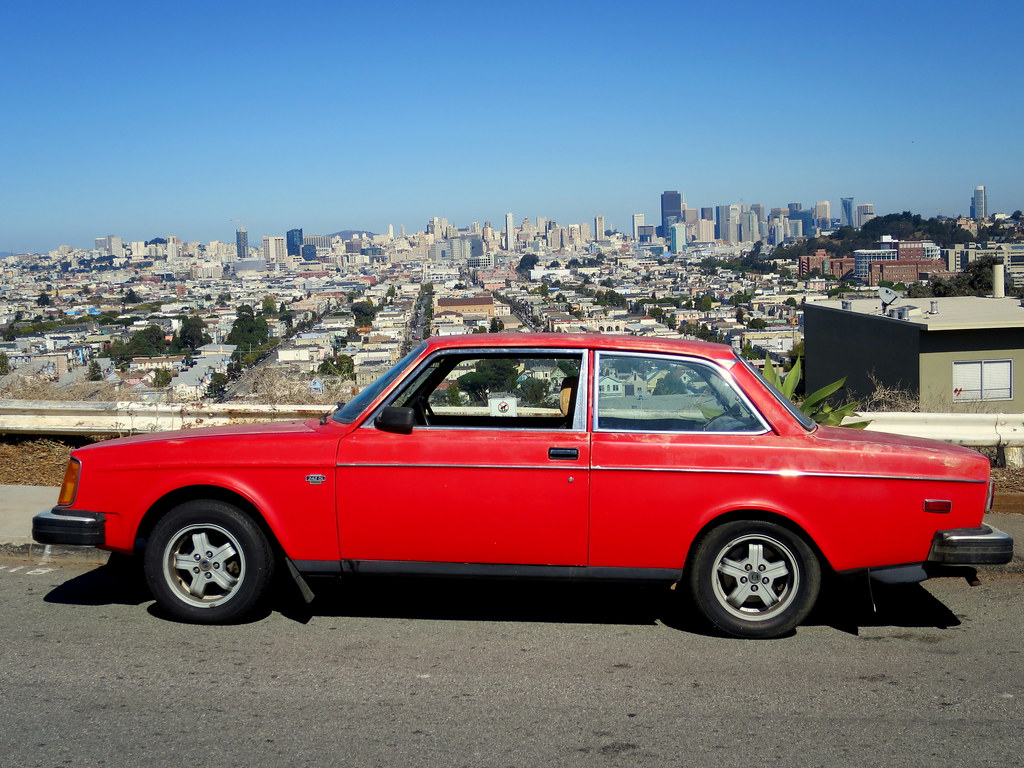
In February 2014 I saw an ad appear on Turborbircks for not one but two 1975 242s by 122power (aka Luke) located about an hour away in Fairfield, CA. The next day I was able to check them out and ended up buying one which was originally orange but had been repainted red by one of the previous owners. It had 110K on the odometer, was pretty solid and as expected with any used car some issues such as a cracked bellhousing, worn out shocks, strut bushings and other assorted things. The other car, an orange 242 was picked up by bigbret. During my test drive the orange car started loosing power and when getting to the parking lot couldn't really get above 15 mph.

I had been searching for a first-year 242 for a while, already in my stable were a 1970 142S & 1973 142E. I do like the B20 engine, but prefer the B23/230 power plants. Converting a 142 to a OHC engine would be totally doable although a fair amount of work. Figured finding a 242 would make it easier in the long run even though here in California the 1975 models are hard to procure. The main reason I was looking to find a 75 is not so much because of the exempt status it has for smog testing, but around the year qualifications for the Northern California vintage car rallys. Some of these events (California Melee, etc.) require a 1975 or older vehicle in order to participate.

12847611663_d53f454efa_b.jpg


12847534895_8e39ea957b_b.jpg


12847536985_fa9c9b08f2_b.jpg


12847533975_3ae325bcce_b.jpg


12847608033_03f2dea793_b.jpg


12847606273_9cd7d91484_b.jpg


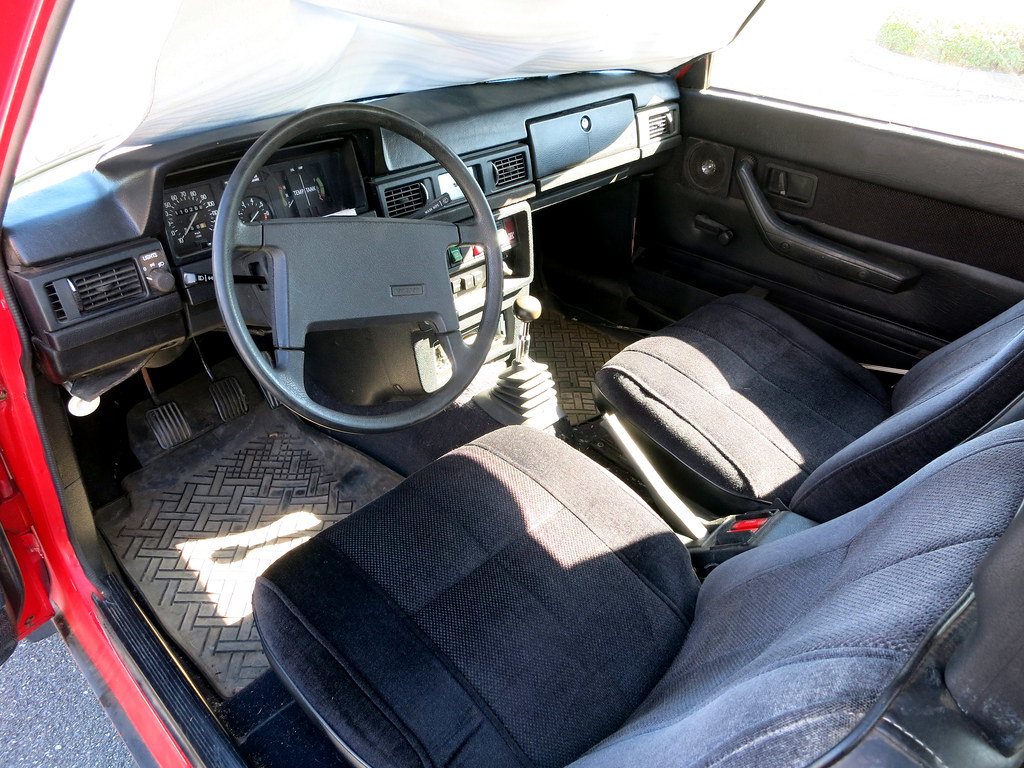
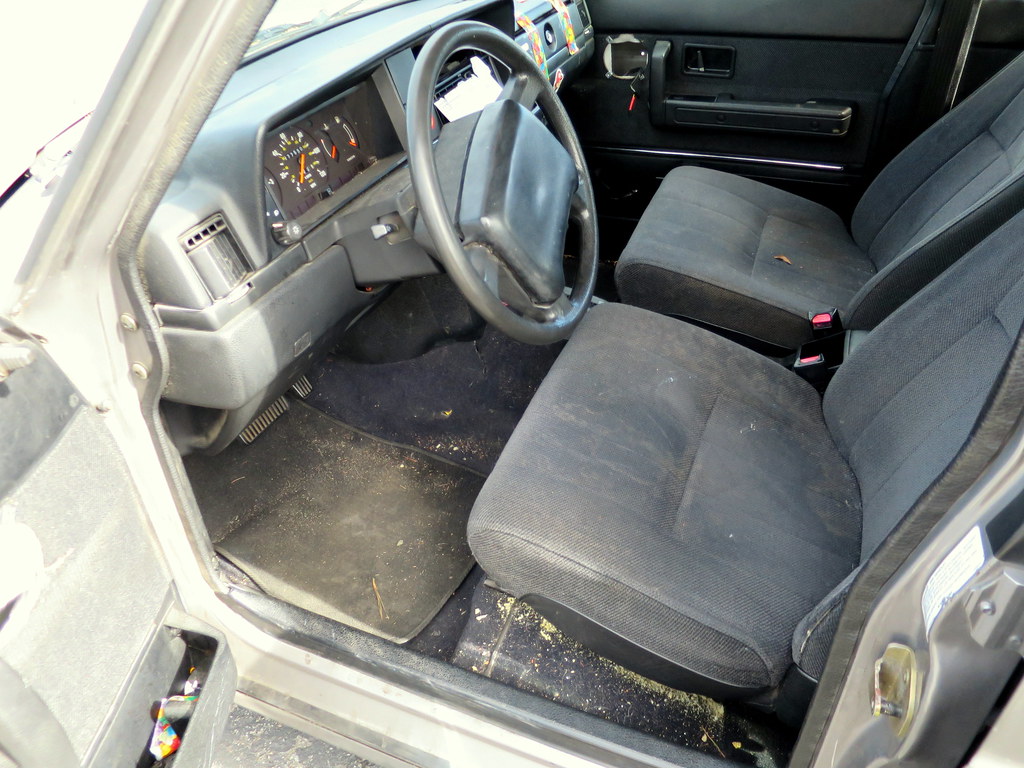
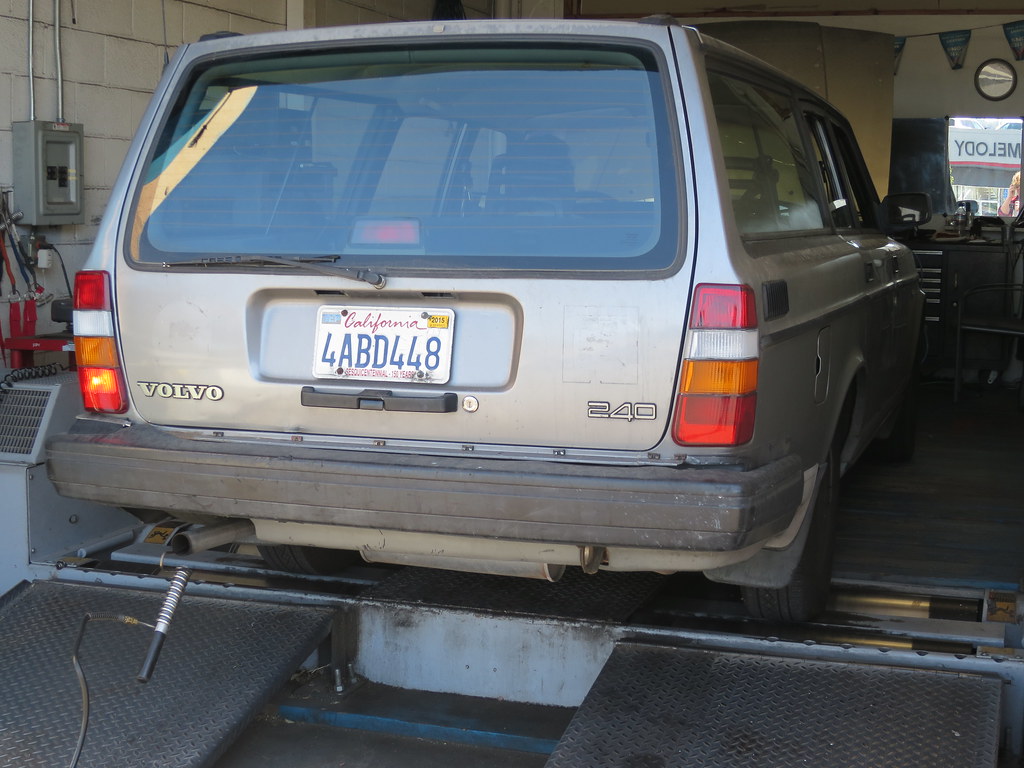
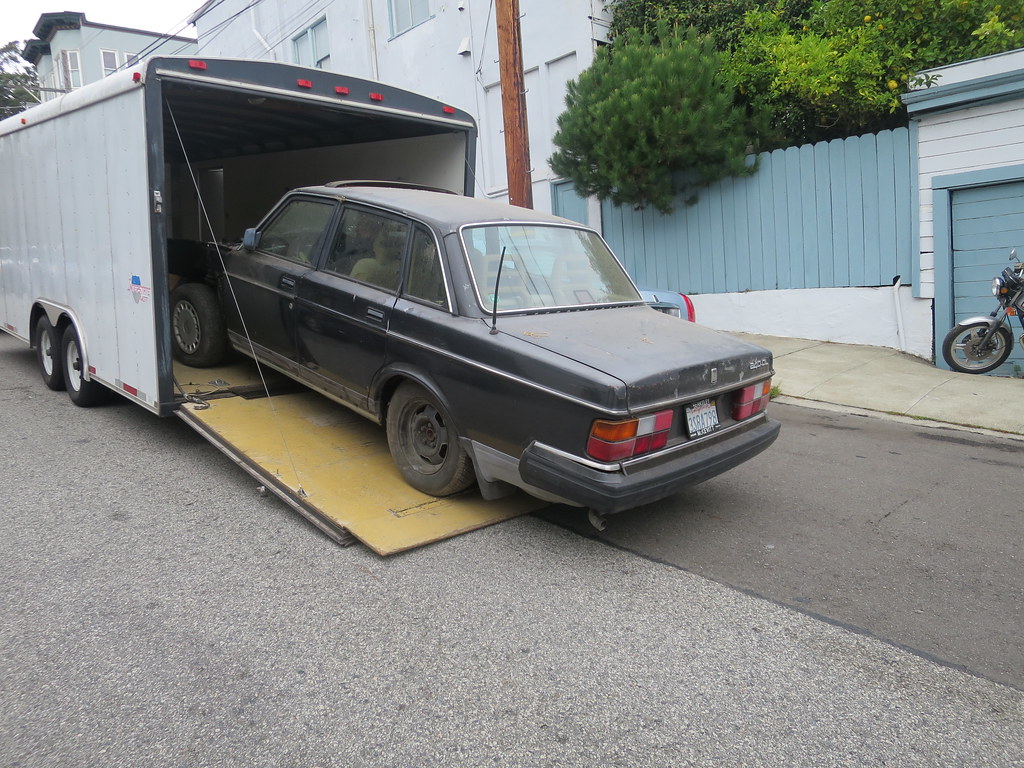
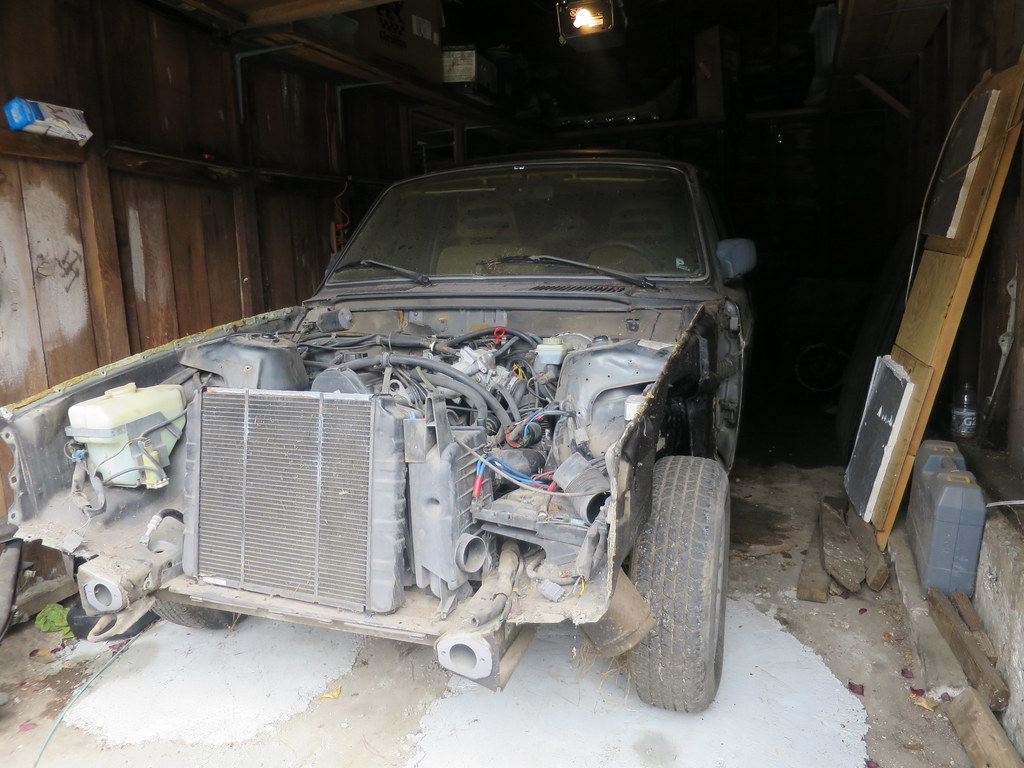
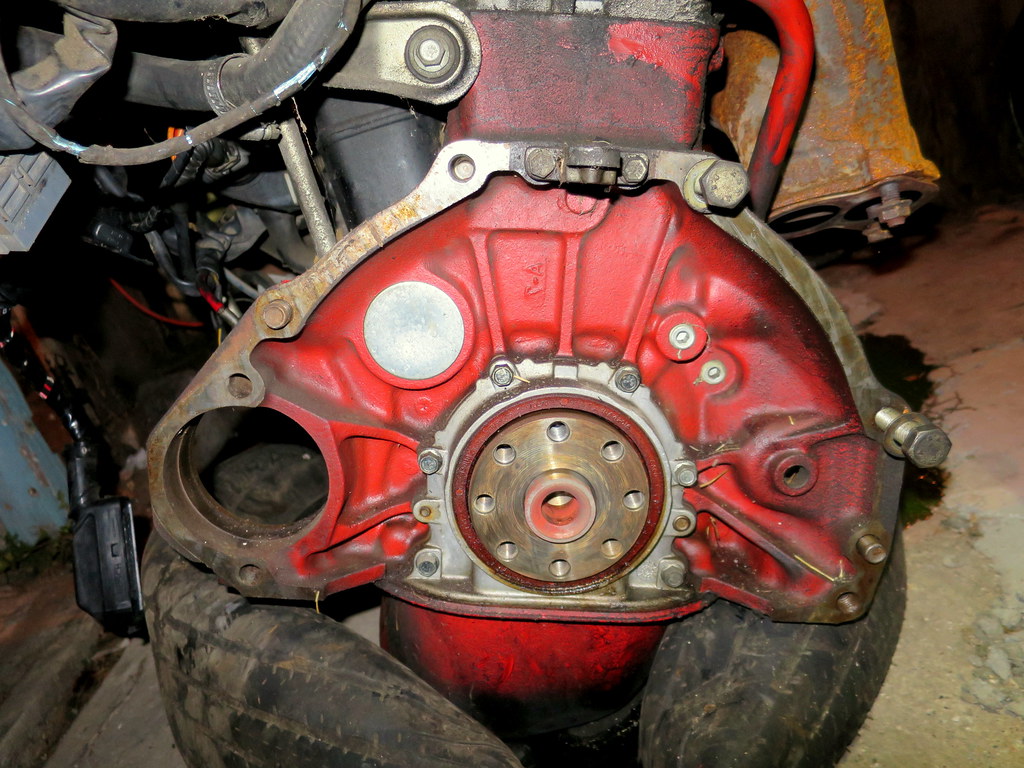
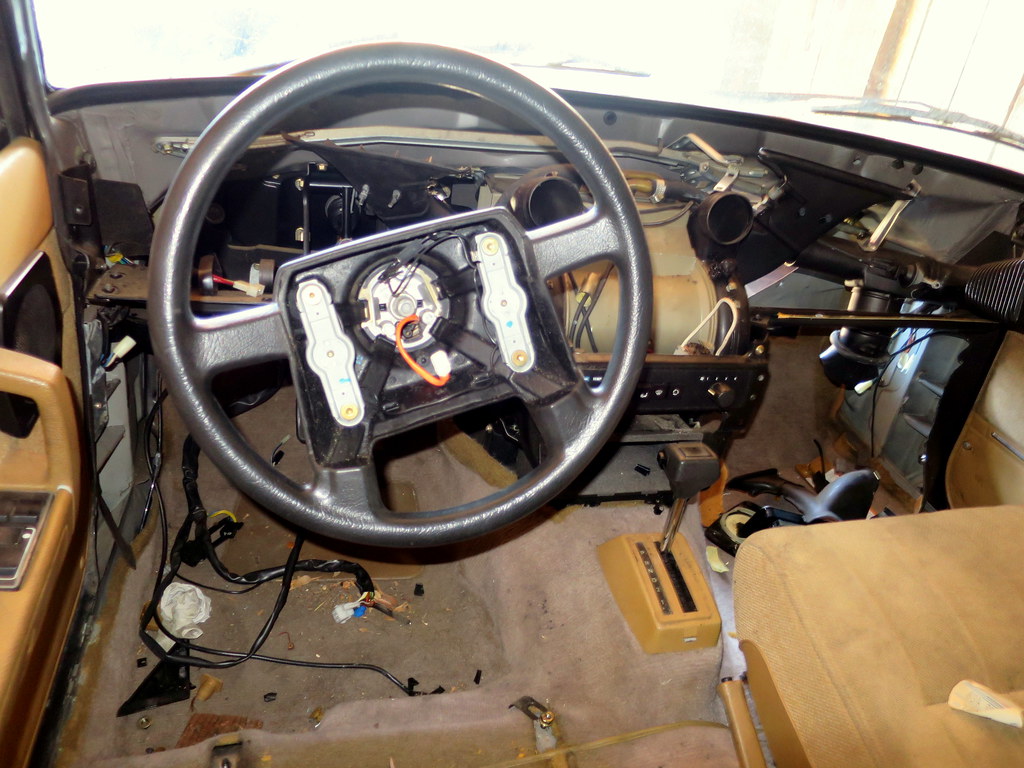
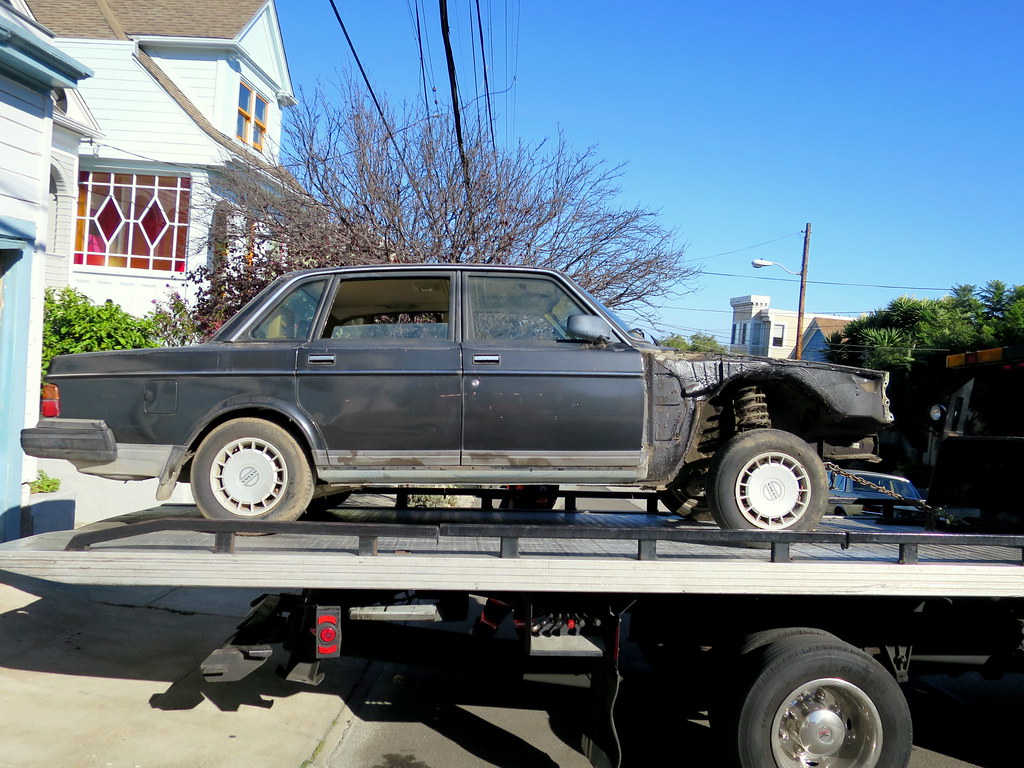
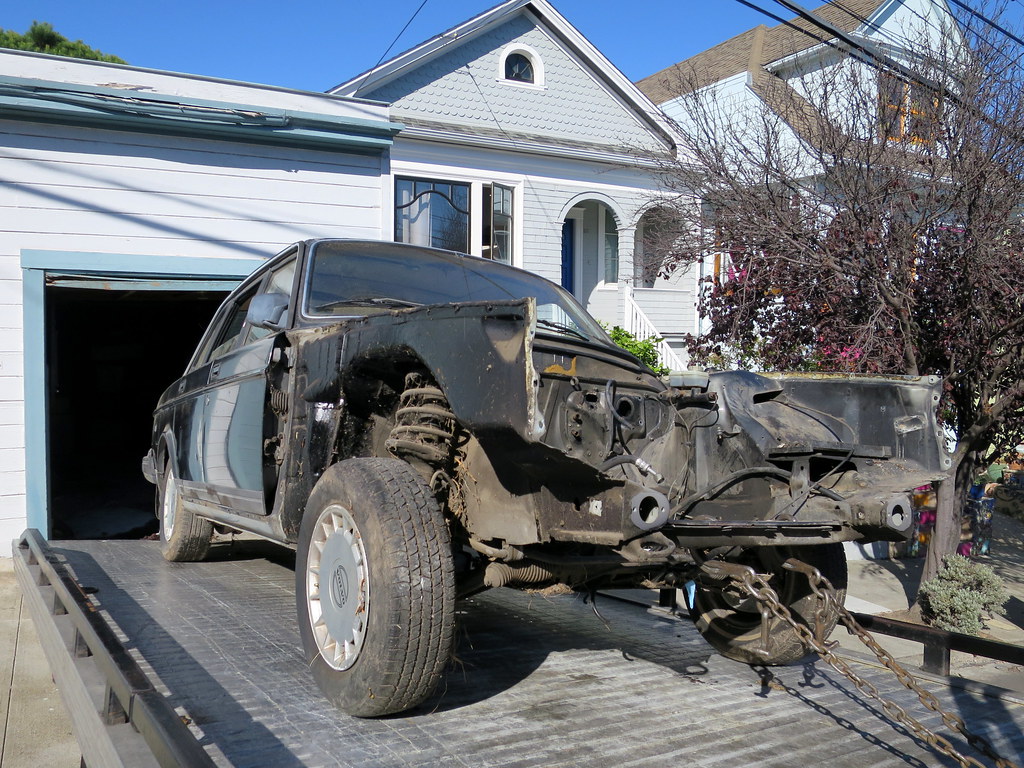
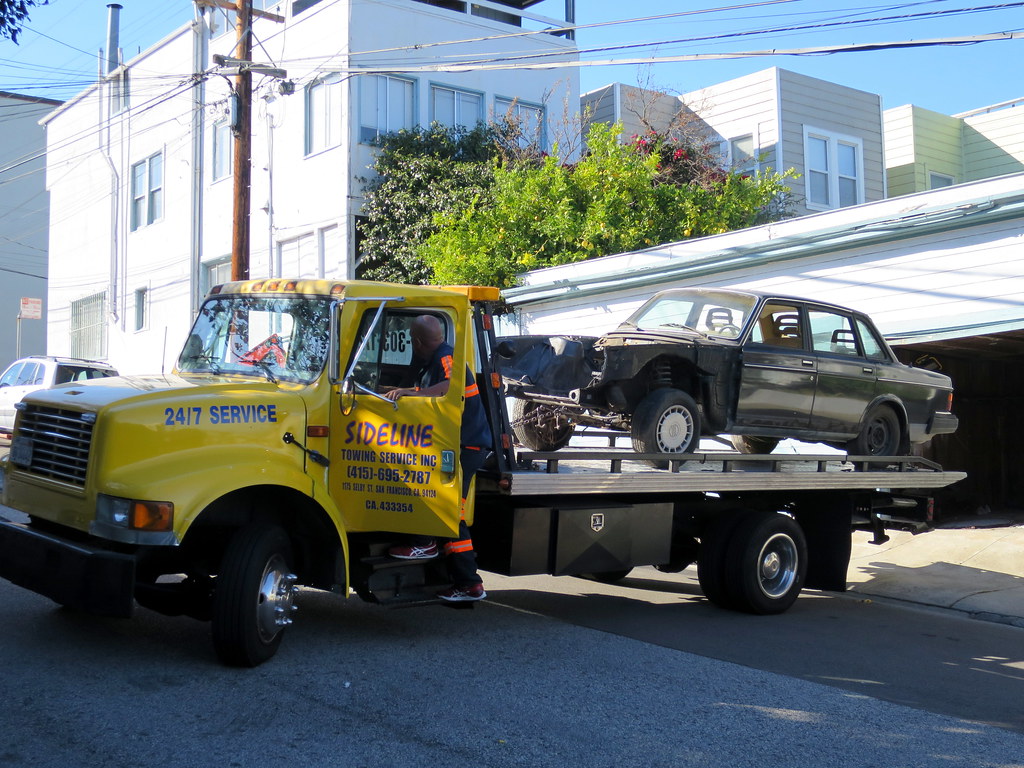
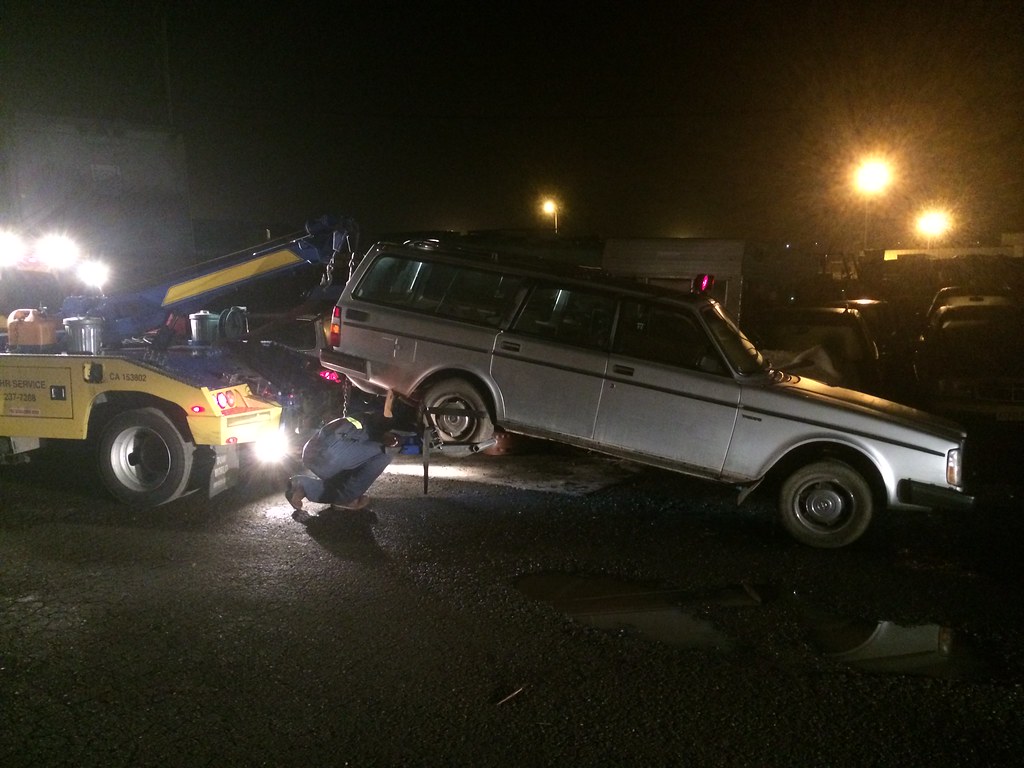
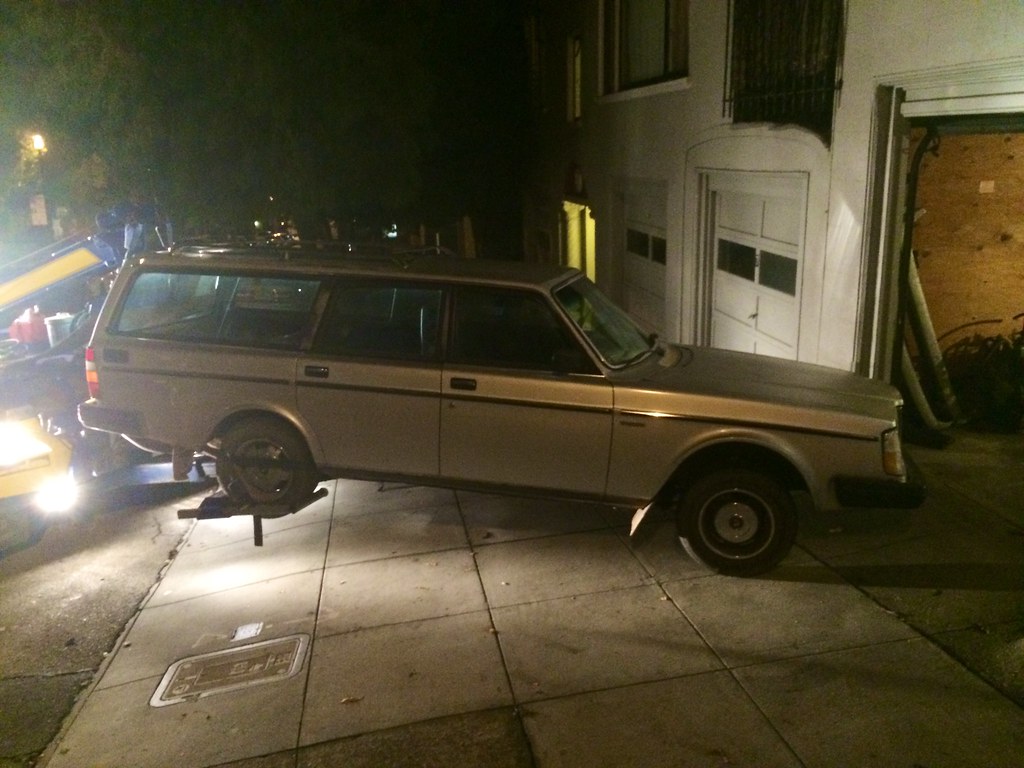
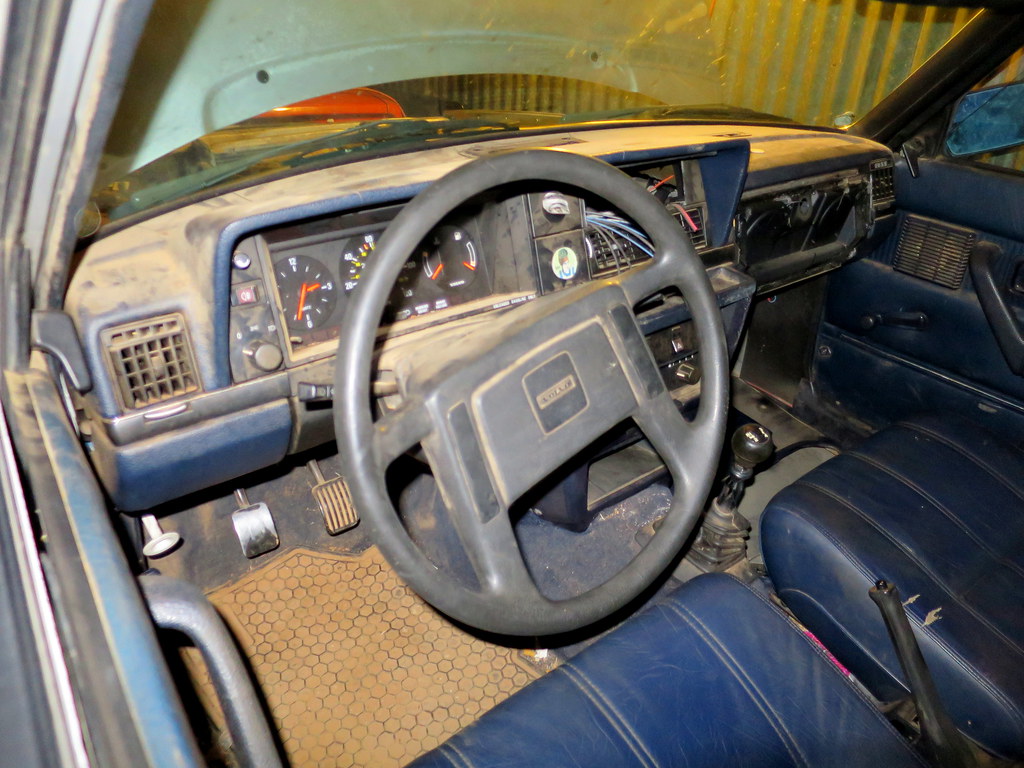
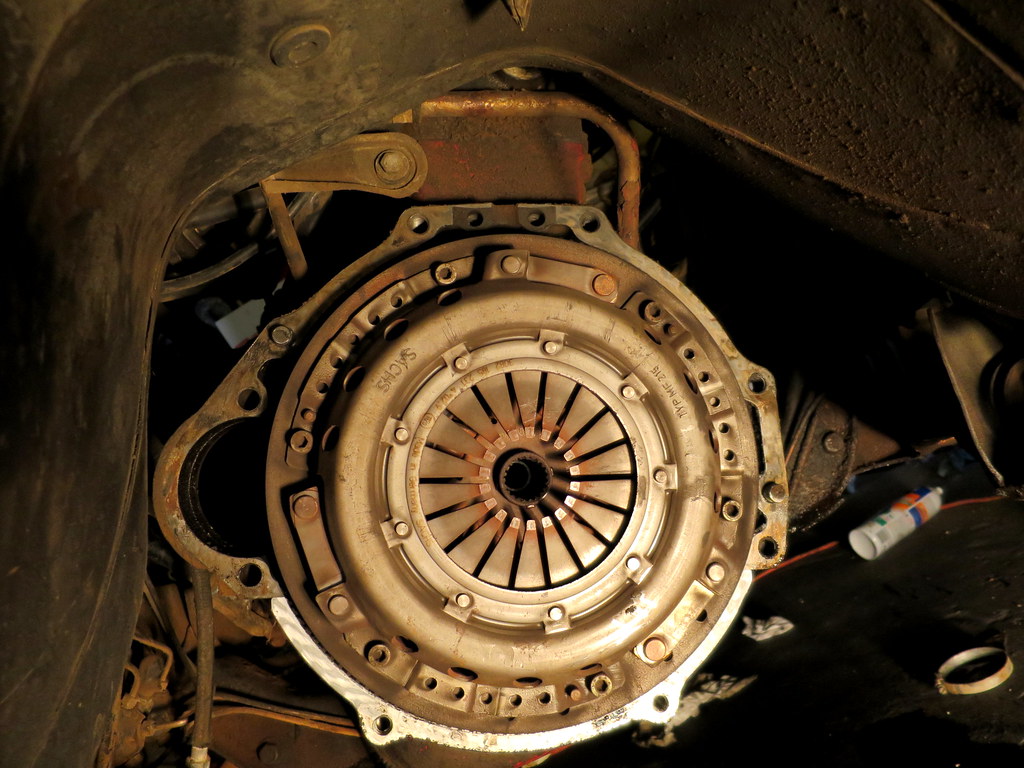
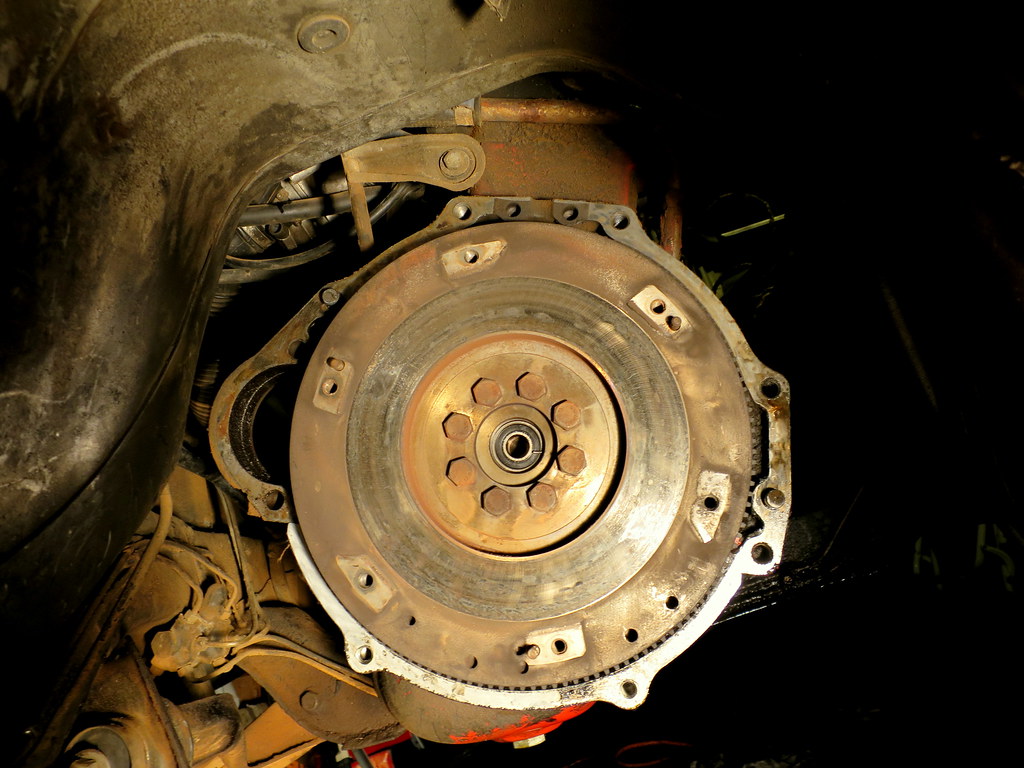
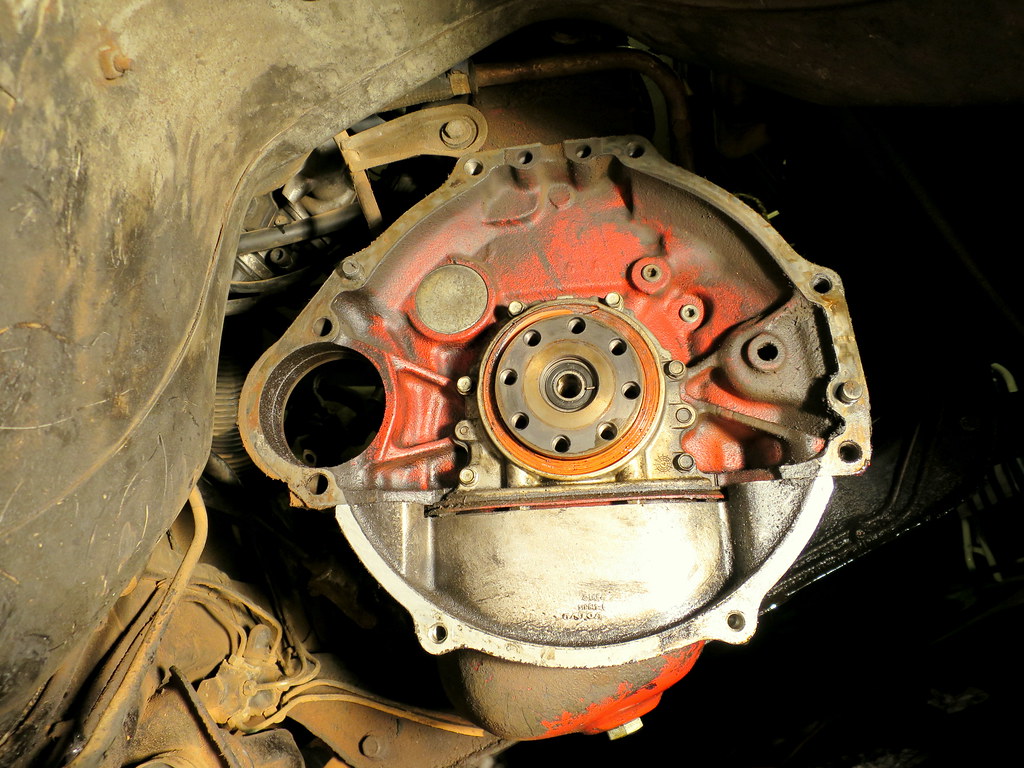
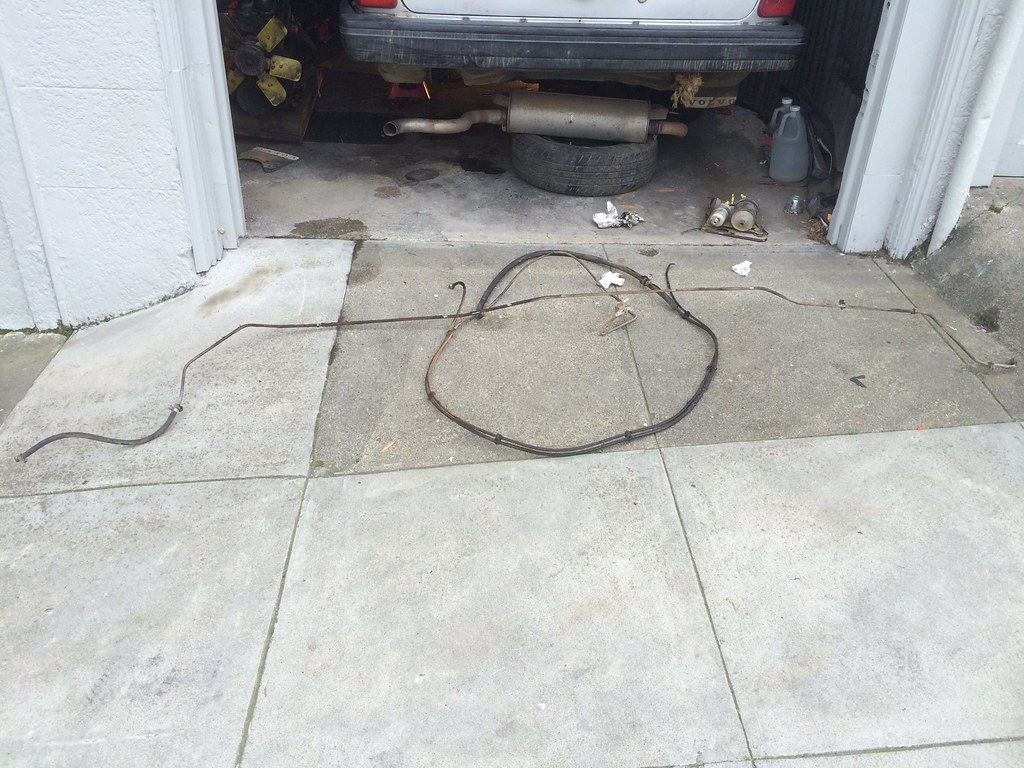
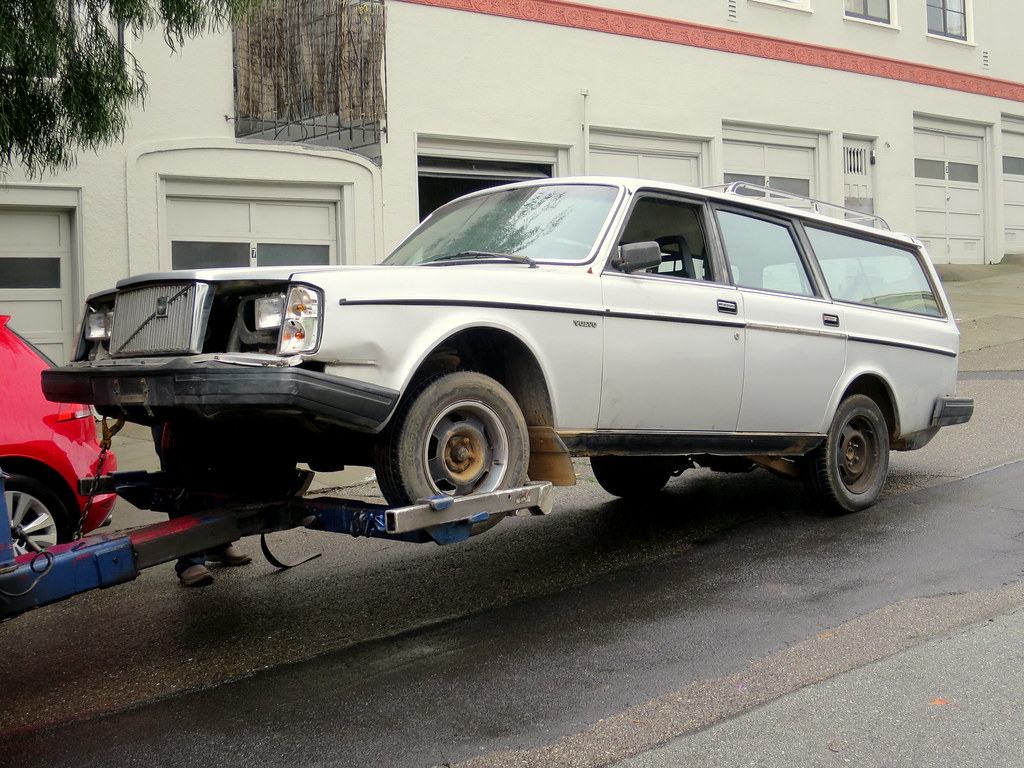
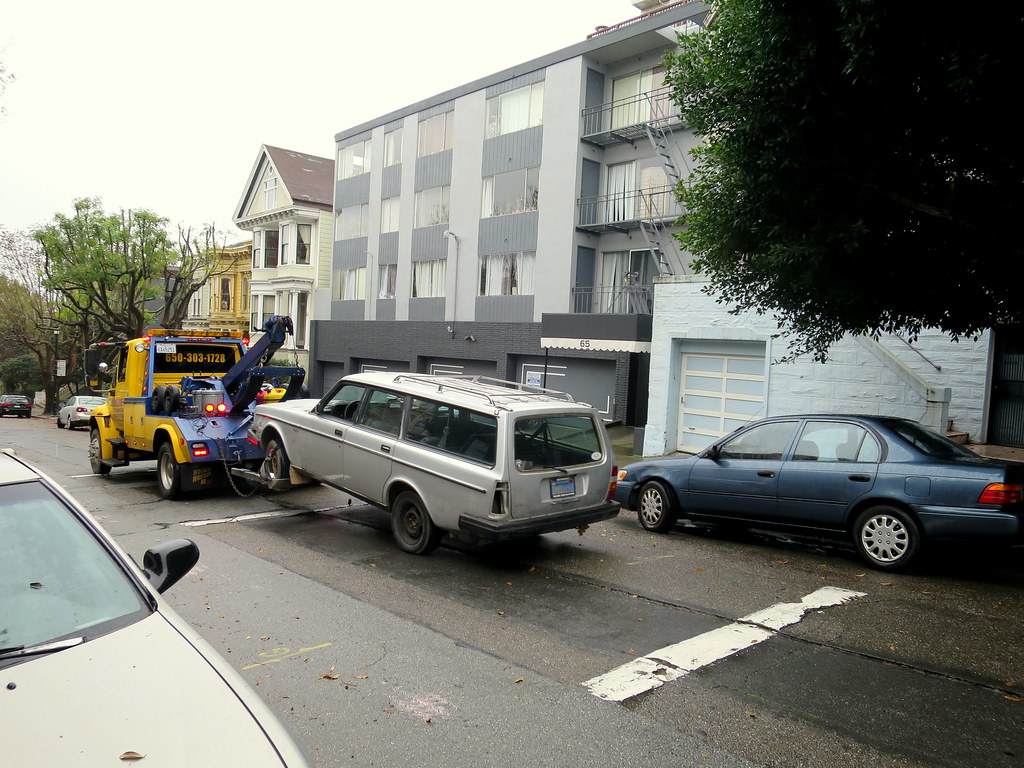
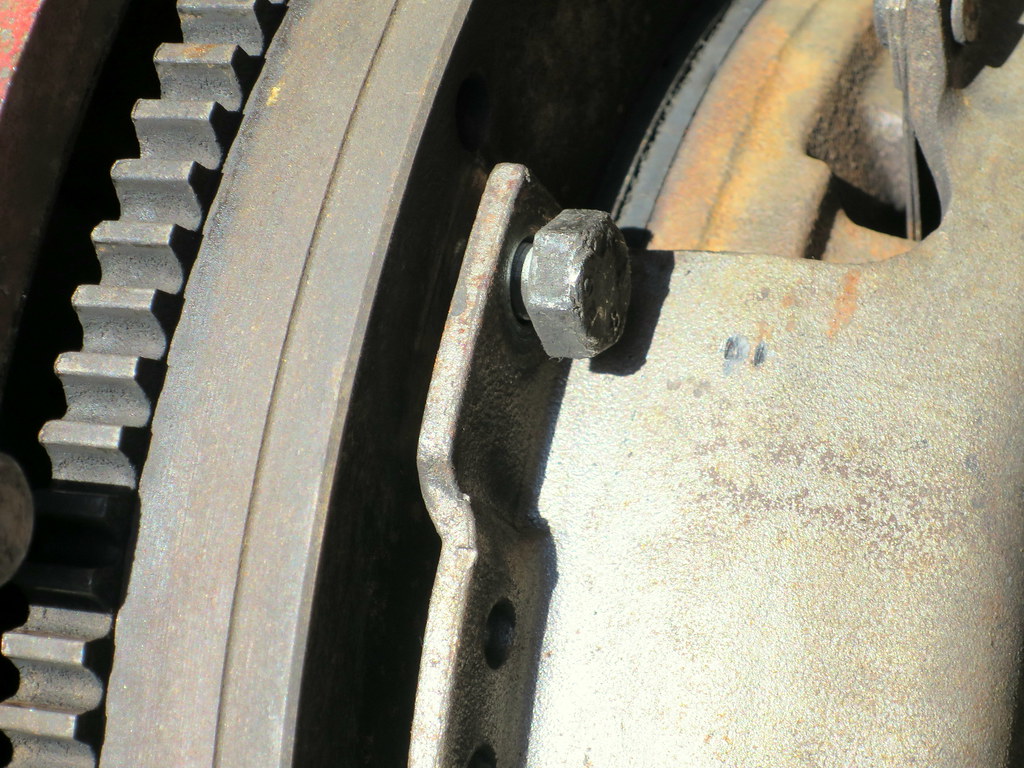
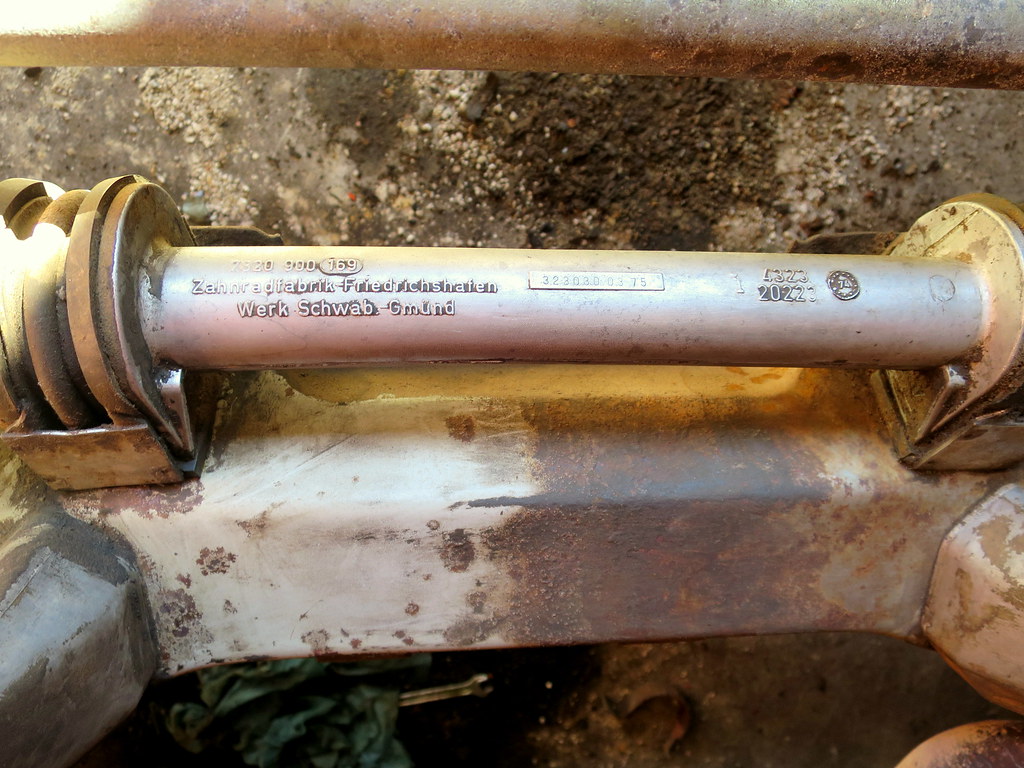
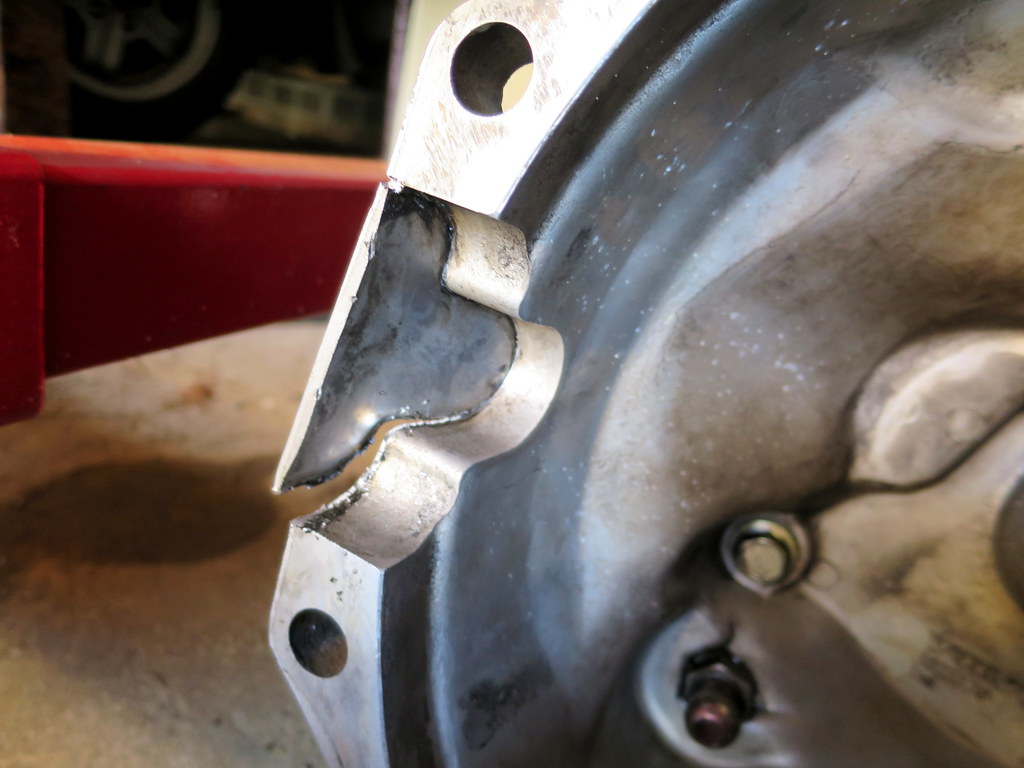
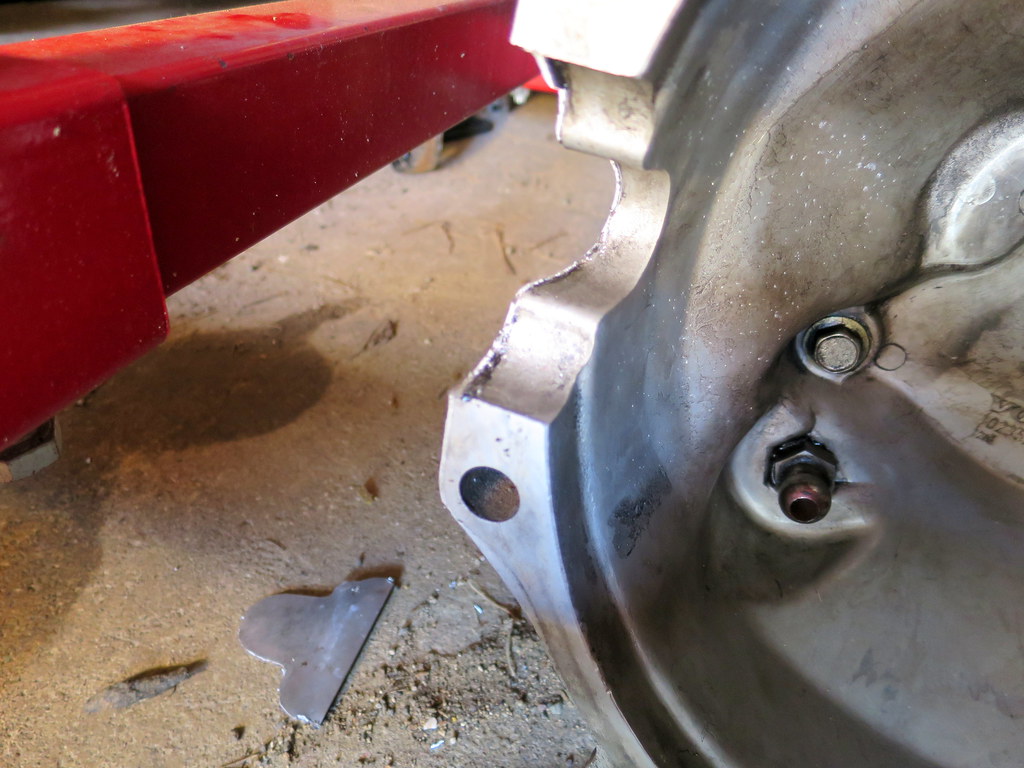
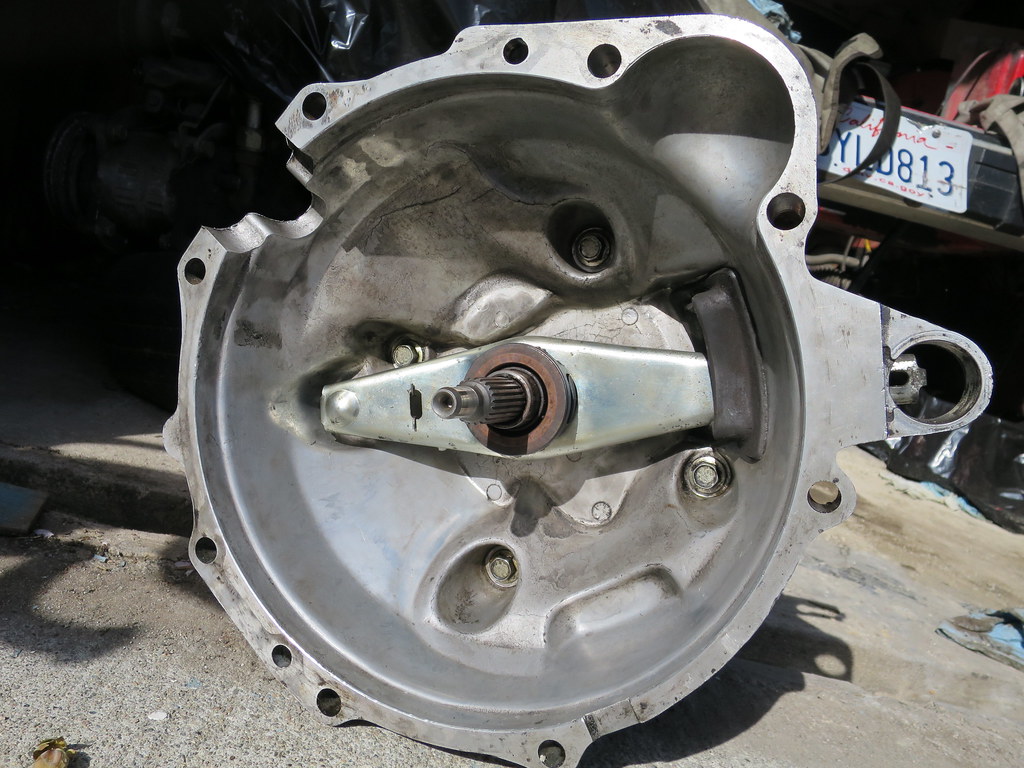
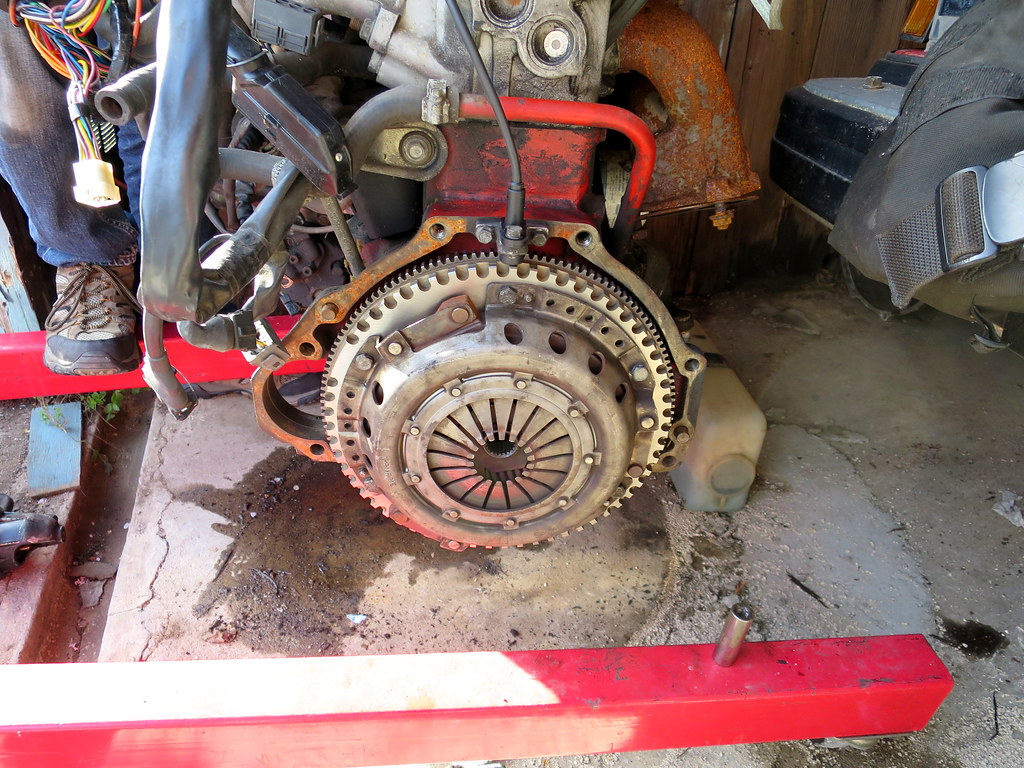
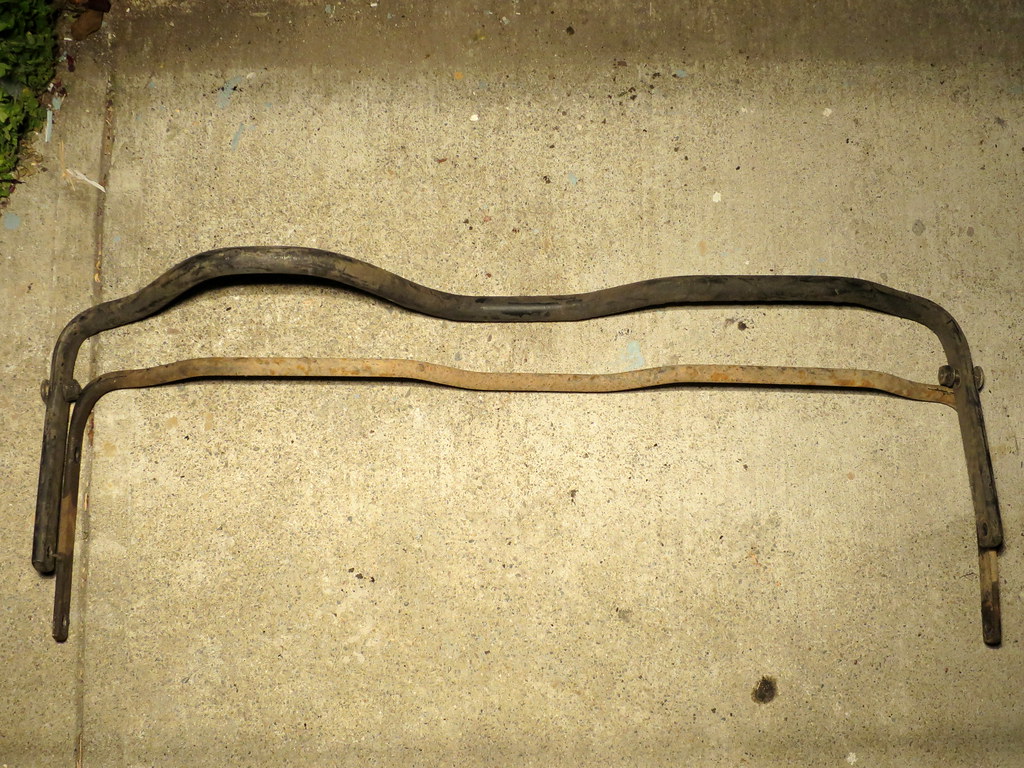
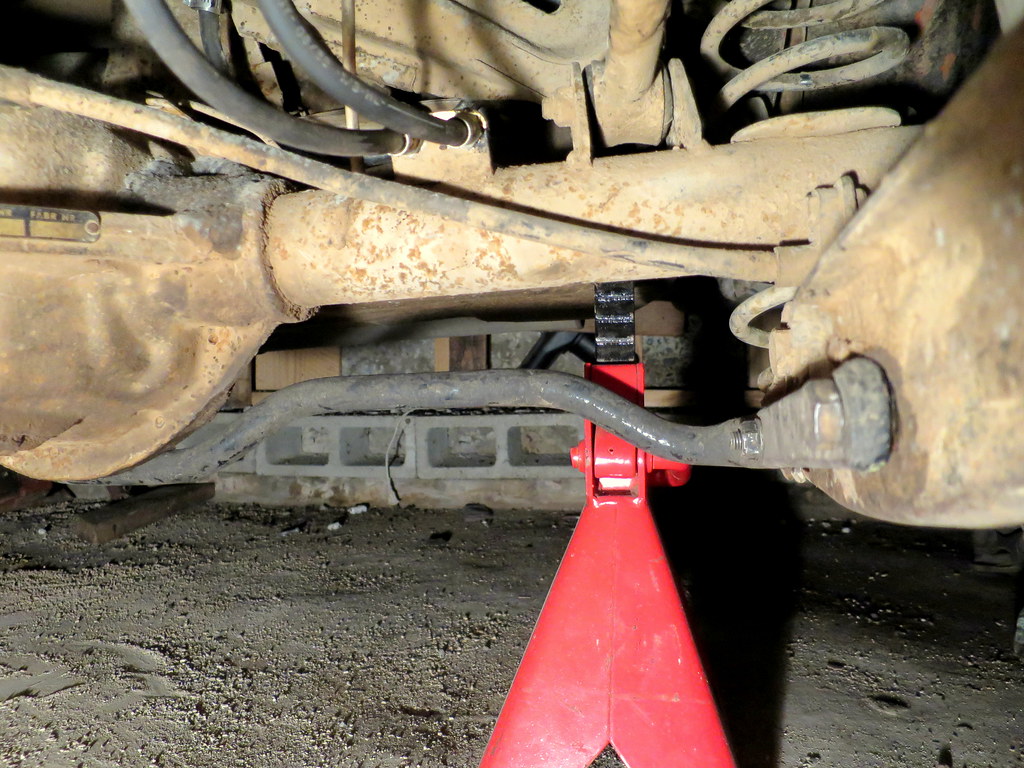
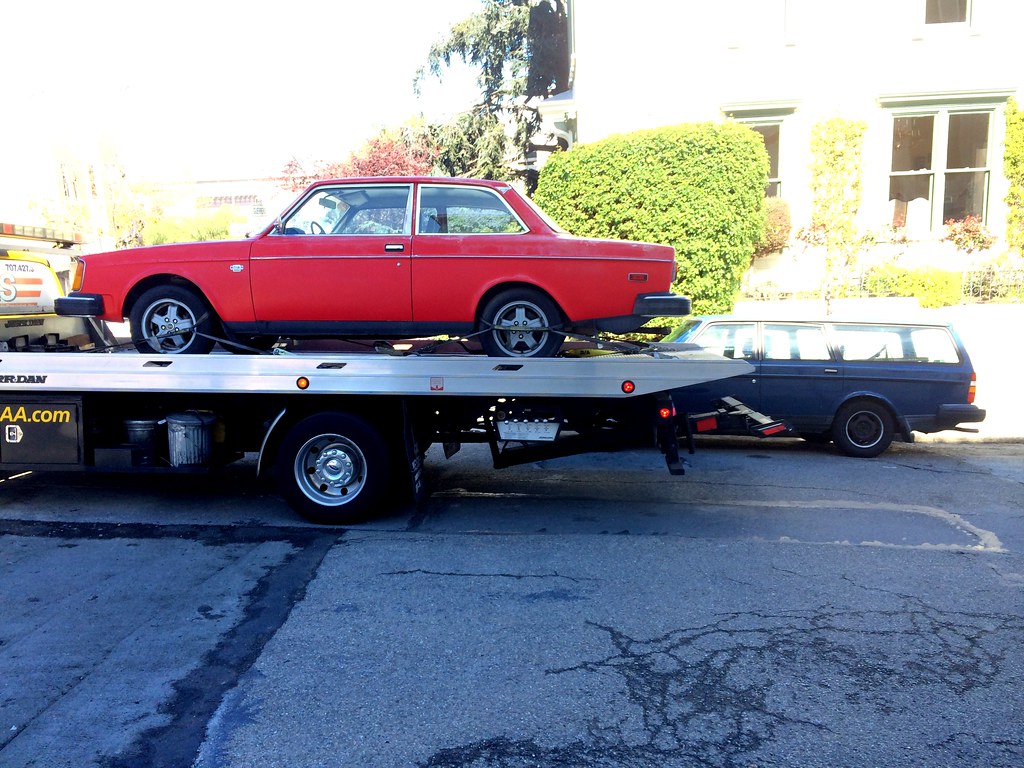
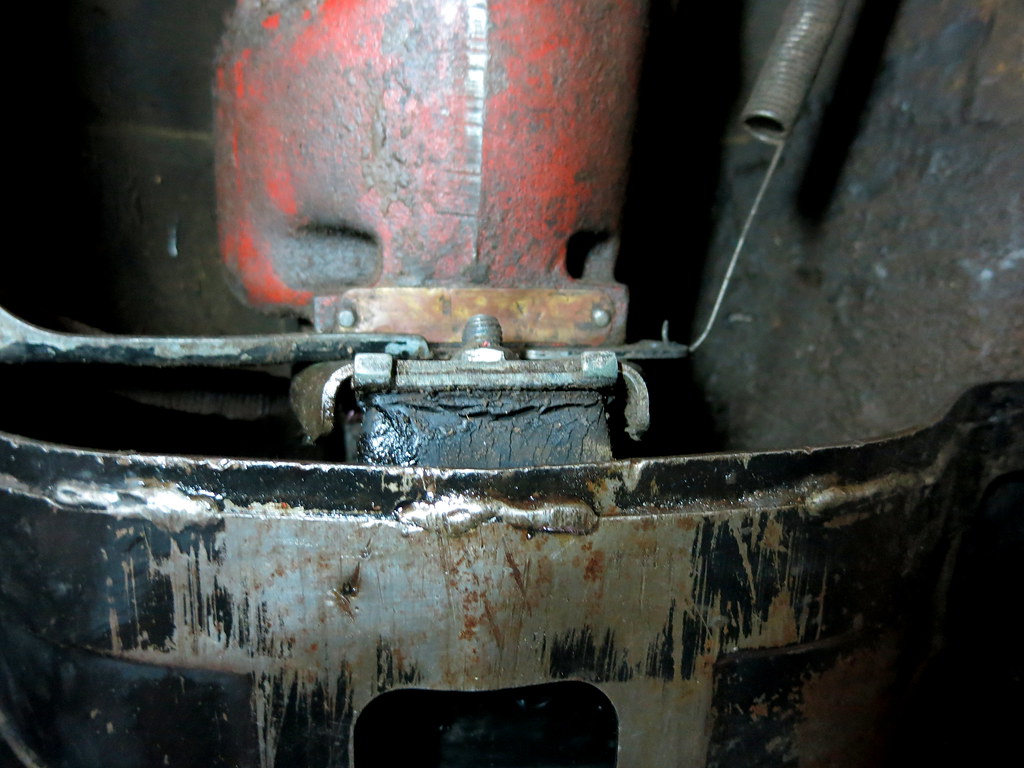
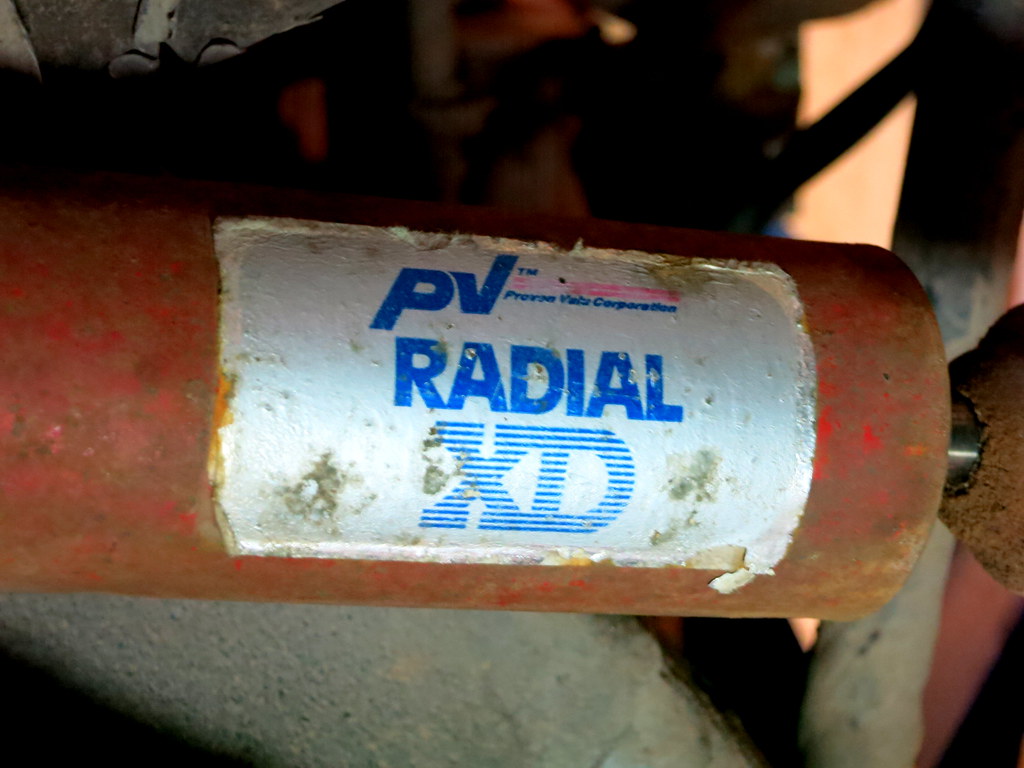
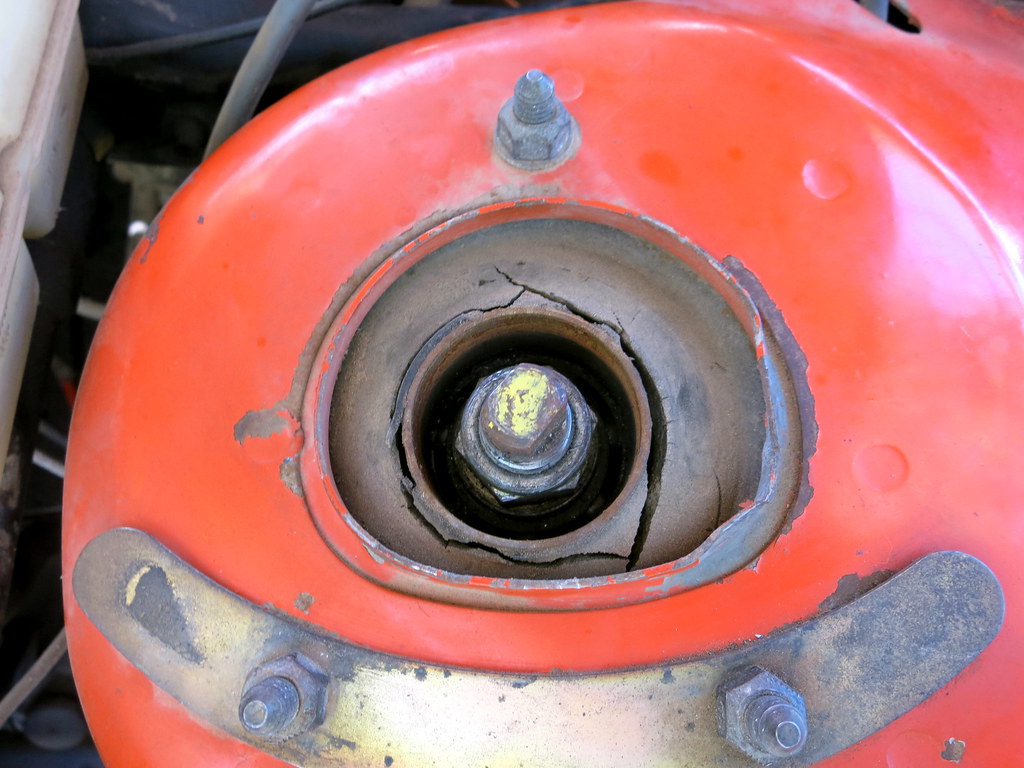
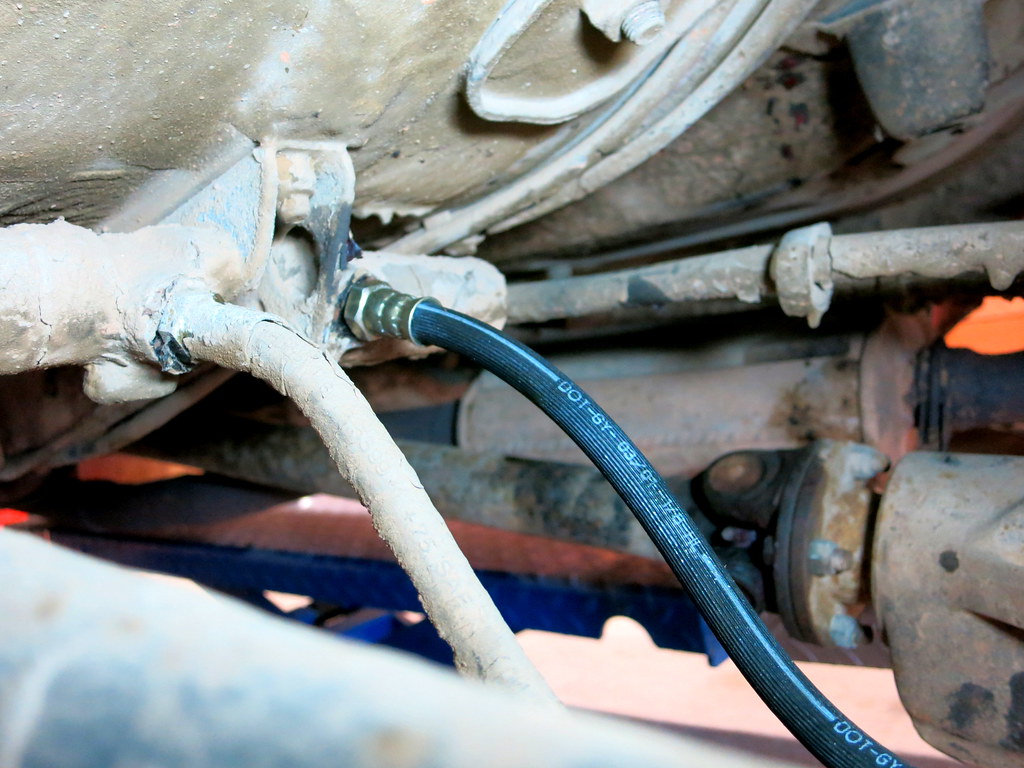
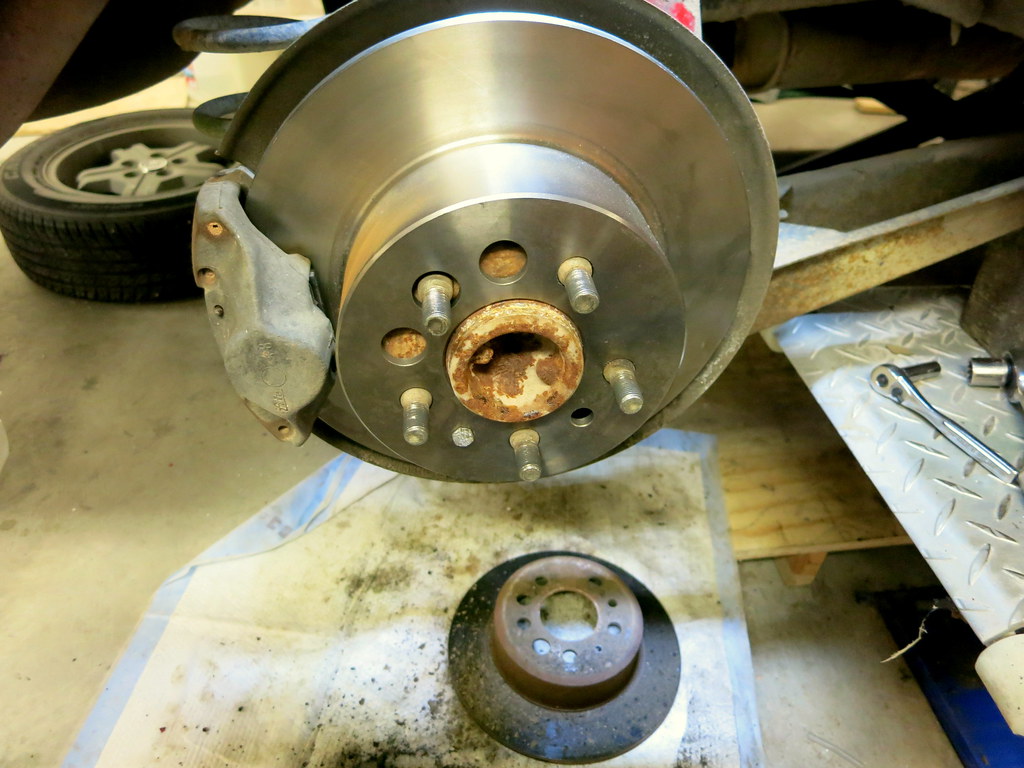
The next weekend I had the car flatbedded back to San Francisco. The next couple months was spend addressing the various issues on the 242. A new M40 bellhousing was sourced and that was installed onto the car. The ancient shocks were replaced out, new brake rotors installed, new rubber brake lines were put in as well as fbleeding the brakes with fresh, new brake fluid. In addition added an IPD 25mm swaybar up front to help tighten the suspension a bit. During a trip to the junkyard came across a 242DL and pulled out the passenger front seat and rear bench seat. These seats were originally destine for the 1970 142S but decided to take the black interior out of the 242 and put that into the 142S instead.

12894415664_6a6b246d89_b.jpg


12894400124_5894de532f_b.jpg


14140958869_0c777f17bf_b.jpg


14141101767_150ab5c536_b.jpg


14268083256_15d47ce471_b.jpg


14326936344_a5f4cb8519_b.jpg


14484173215_20898e3812_b.jpg


14482923632_01e93a2d4d_b.jpg


14297600818_af11cbfd1e_b.jpg


14297753557_977057eabf_b.jpg


14504304523_86a0dc1c22_b.jpg


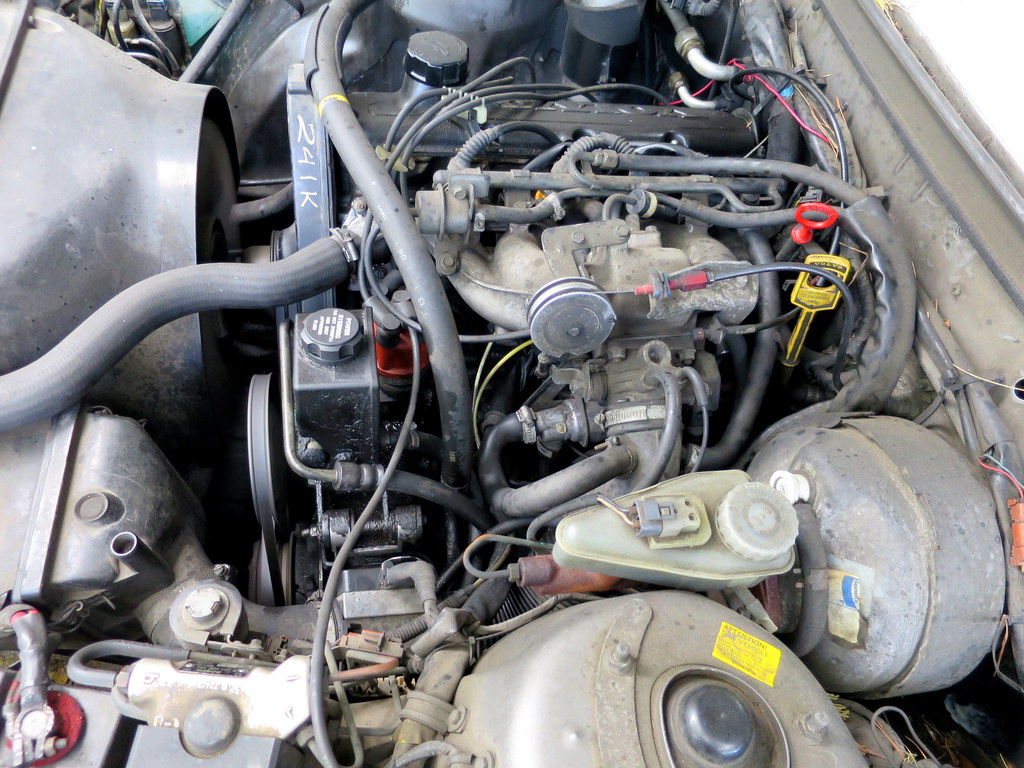
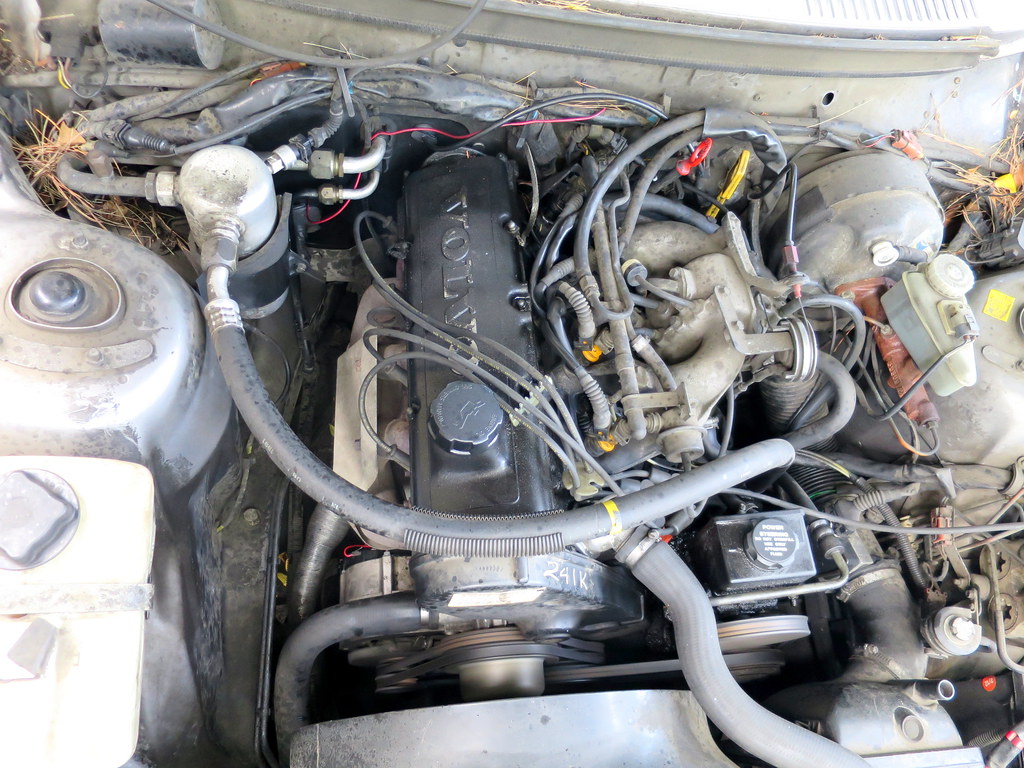
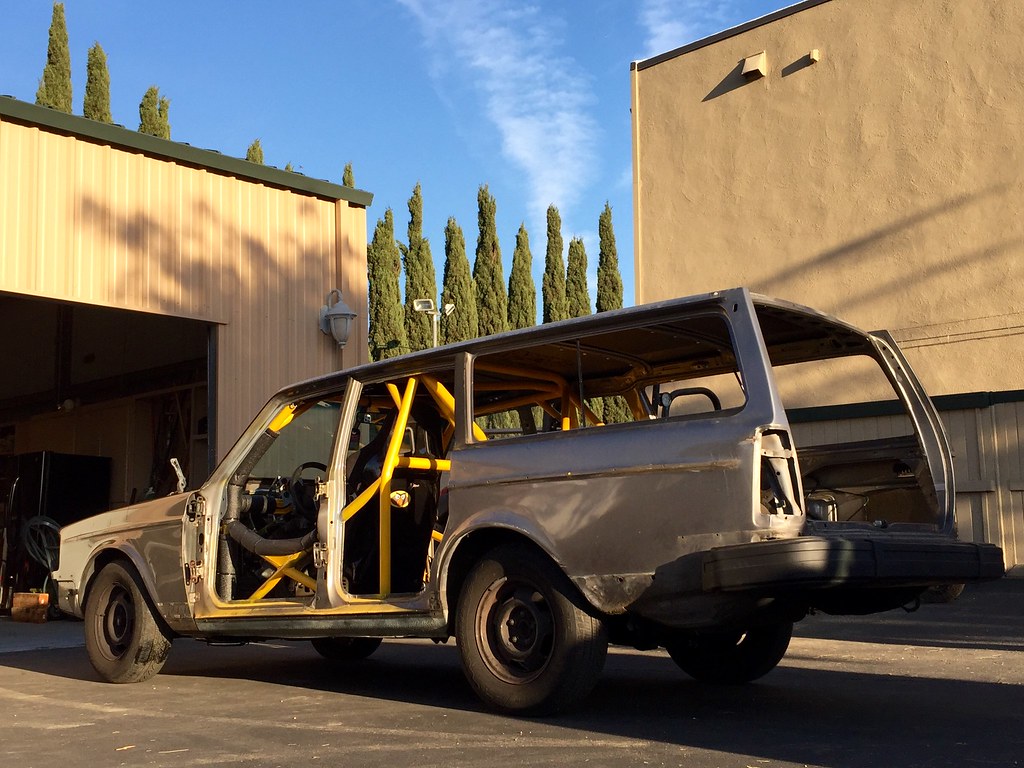
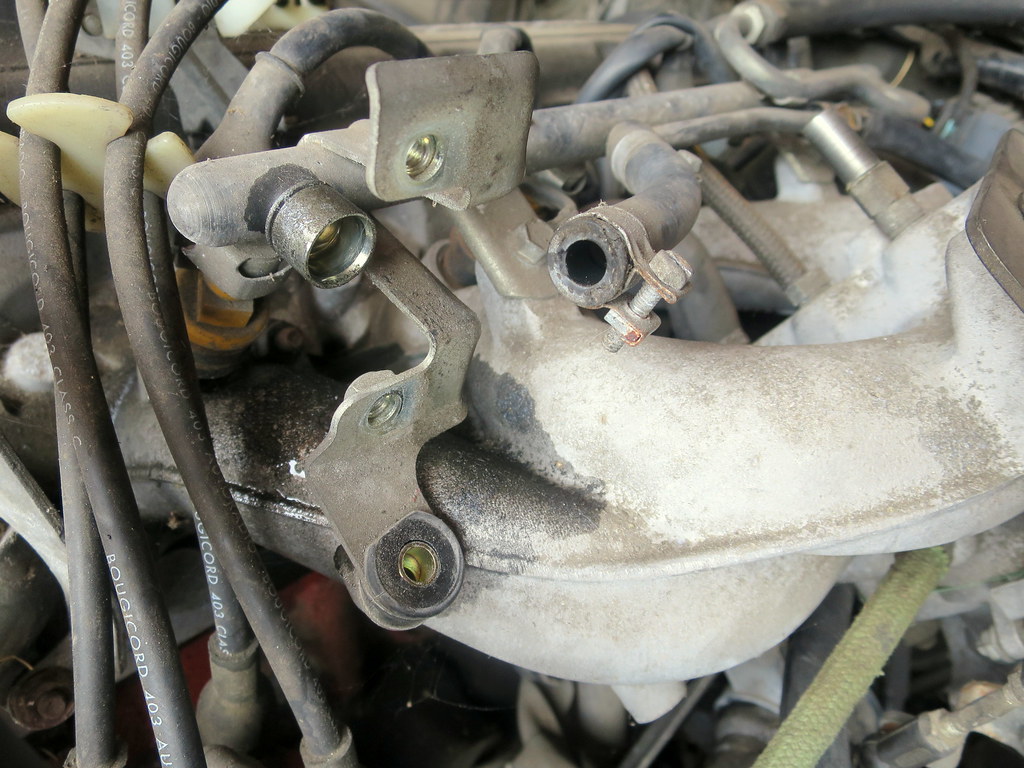
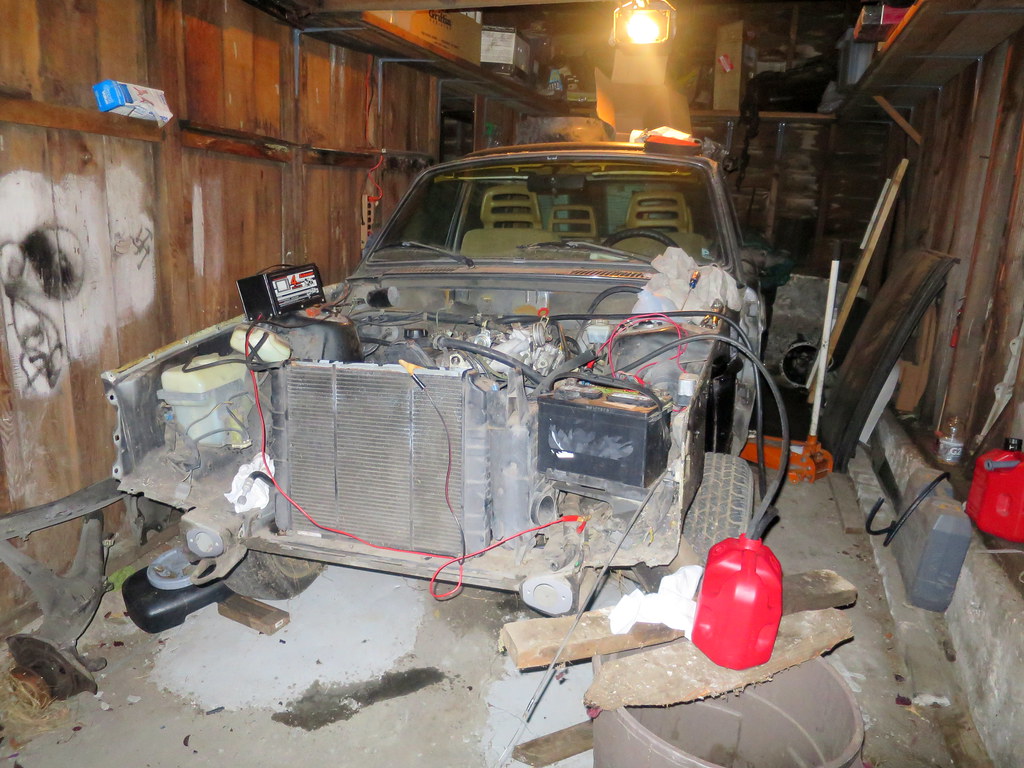
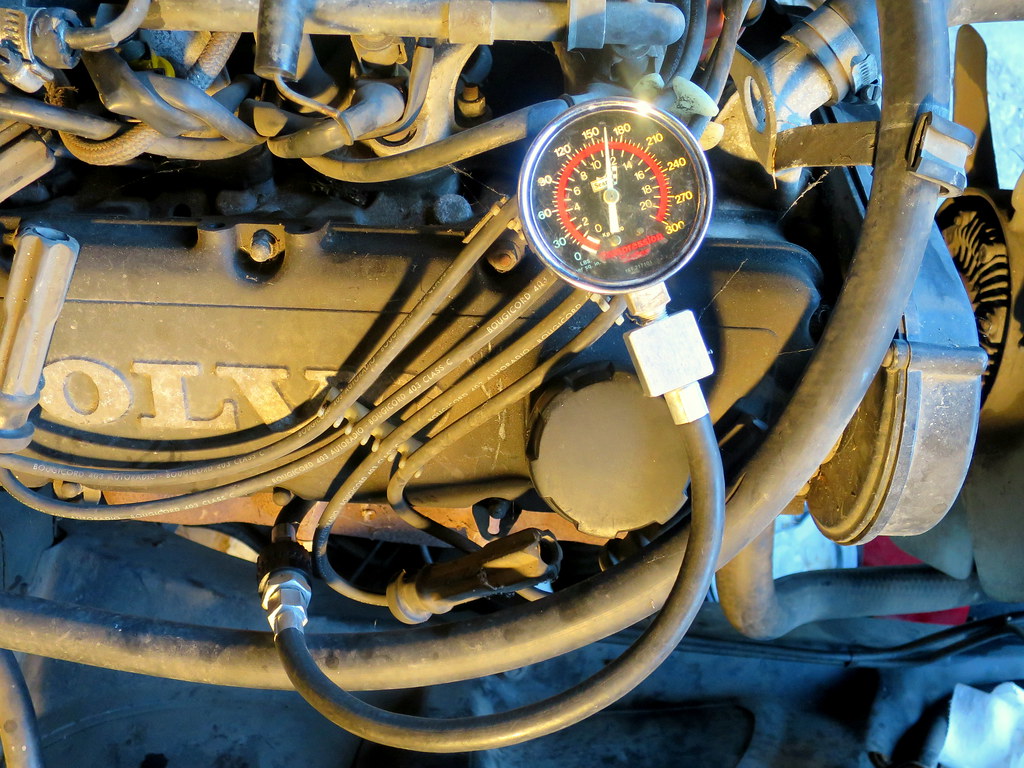
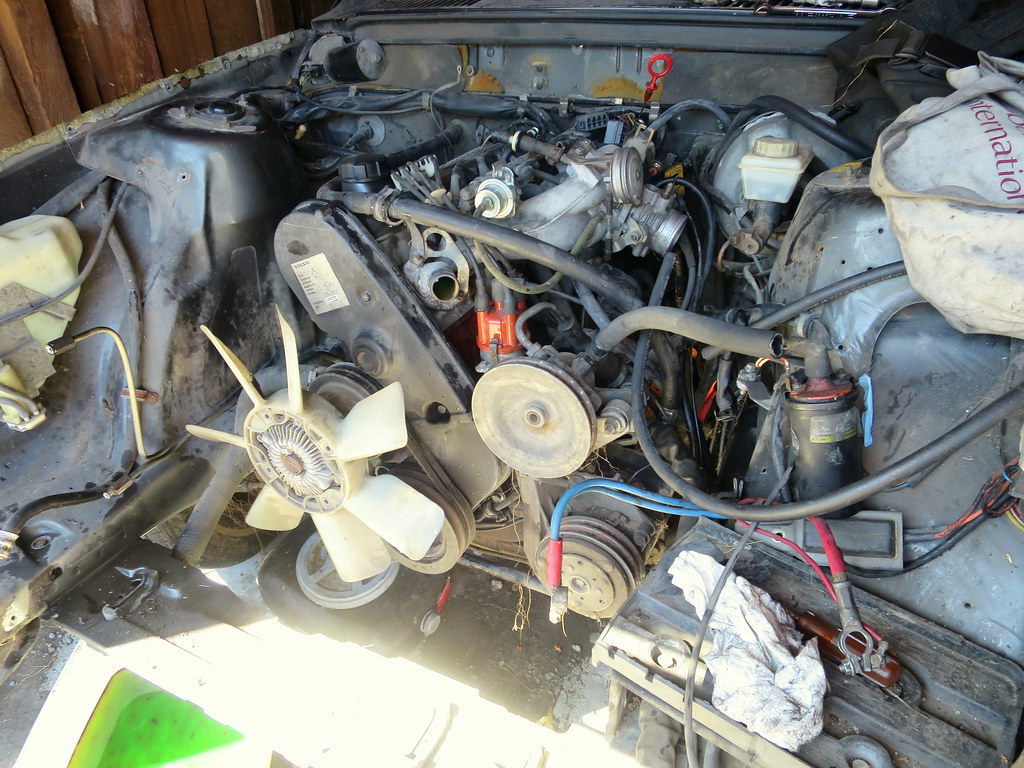
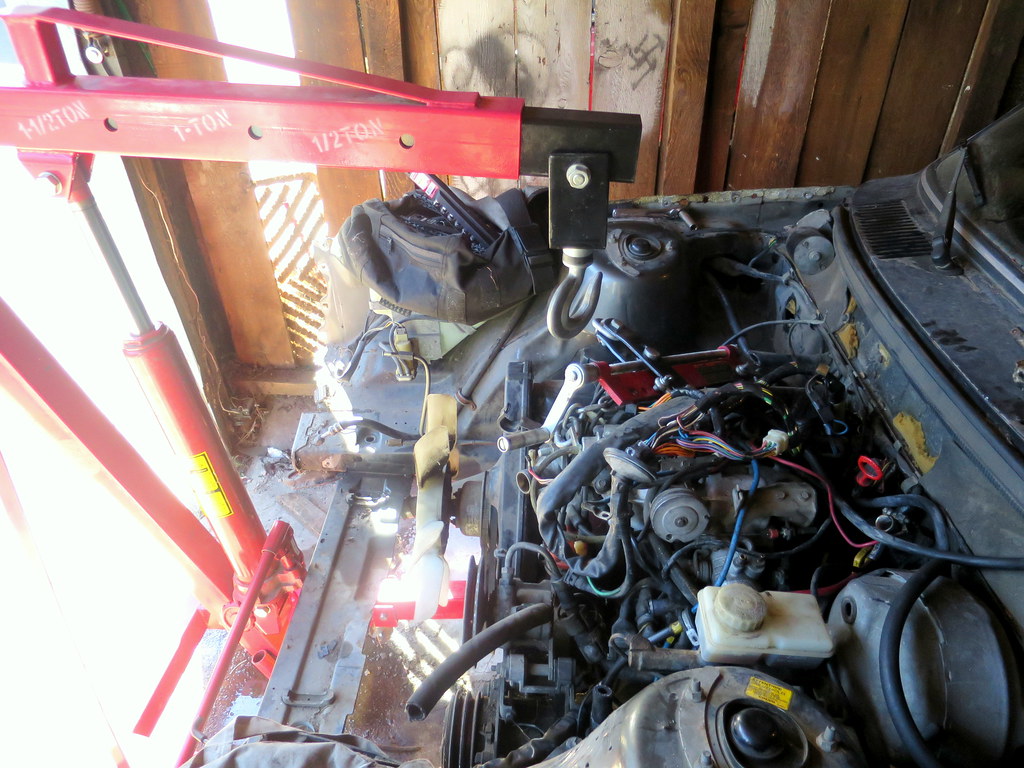
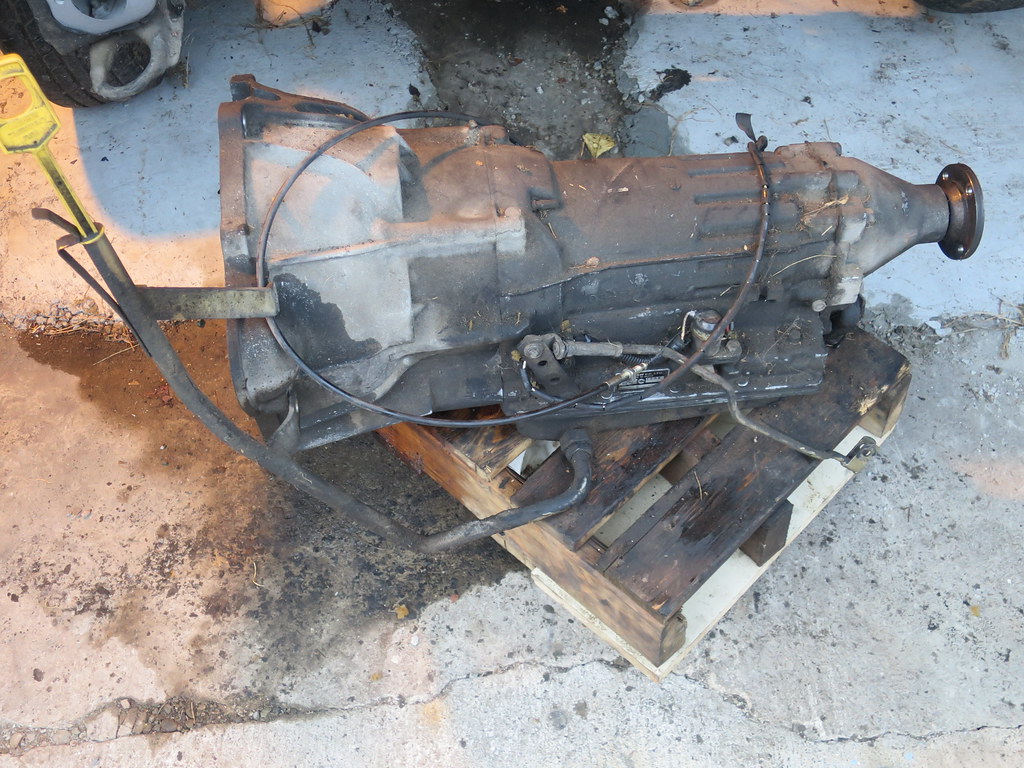
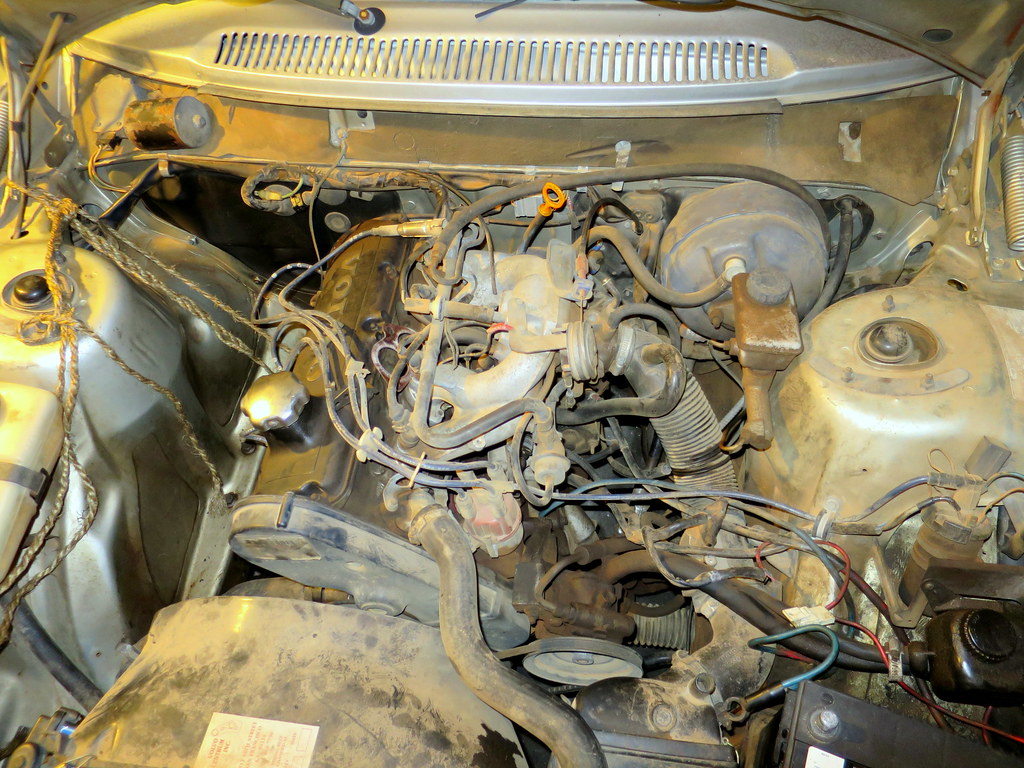
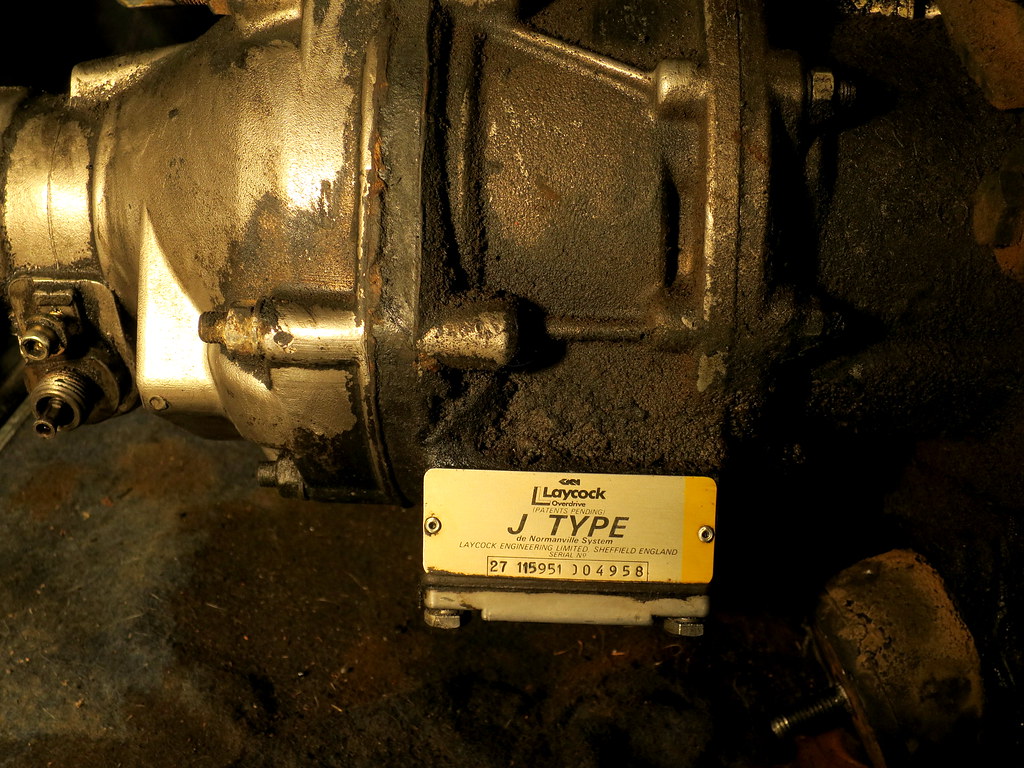
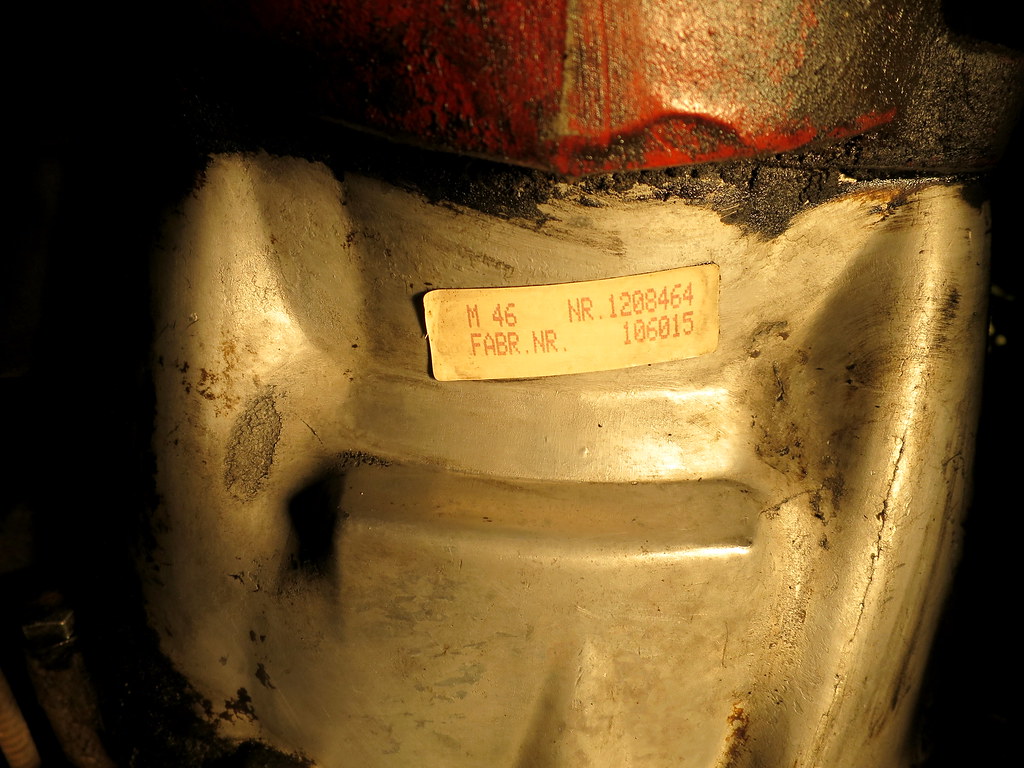
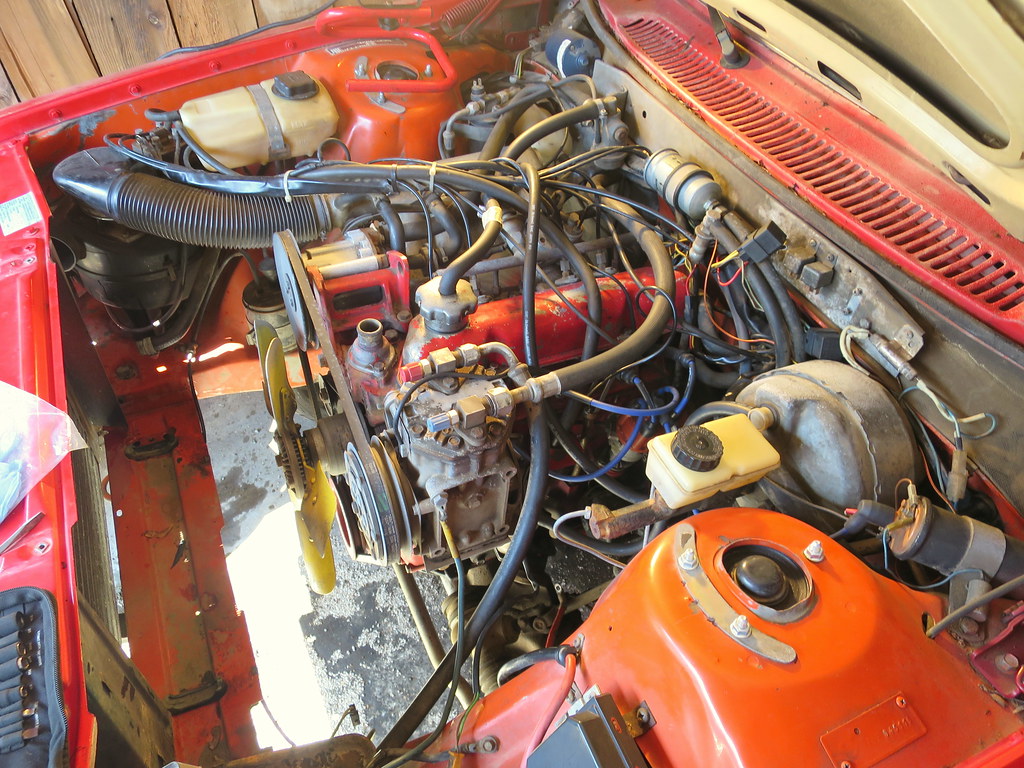
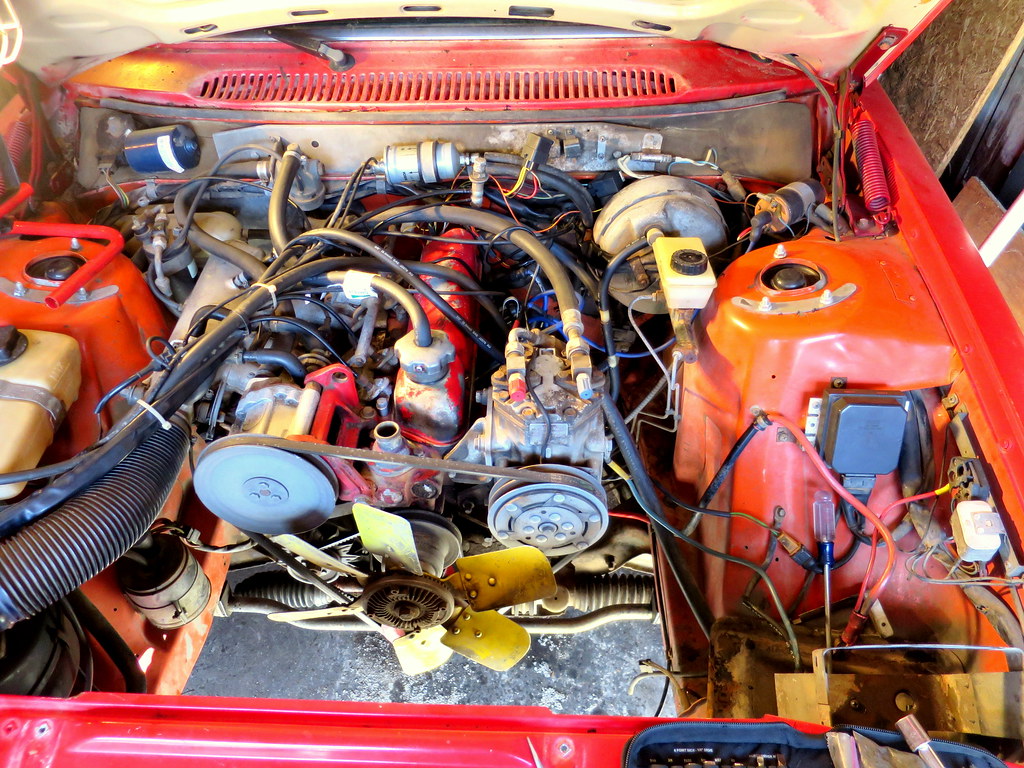
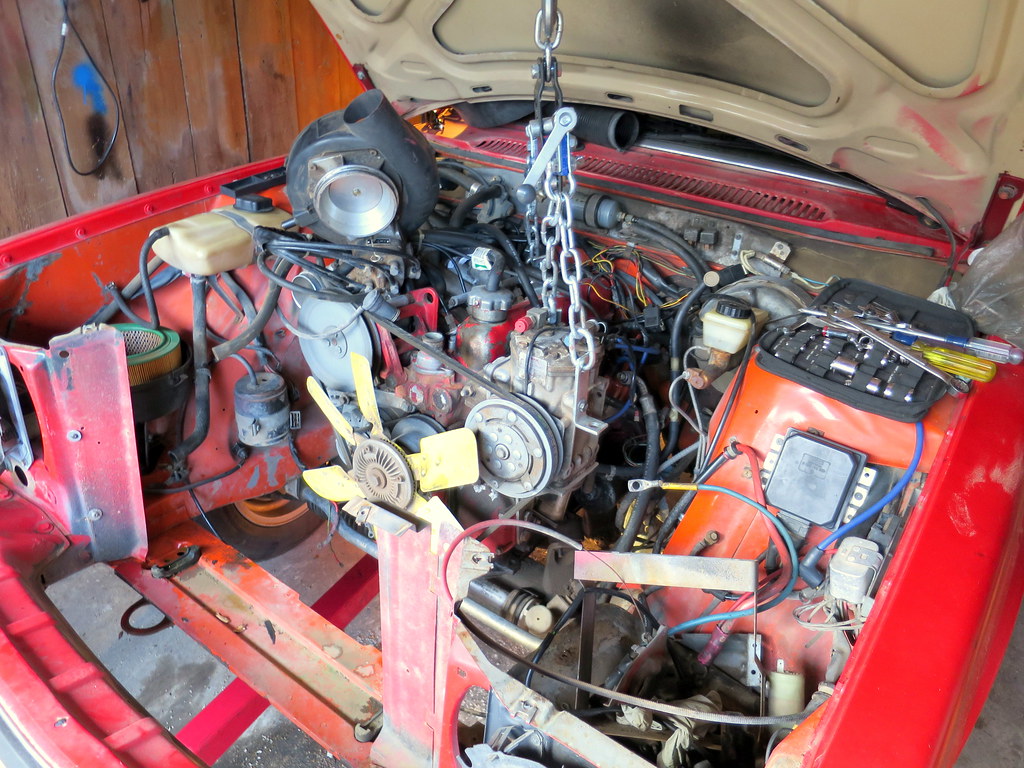
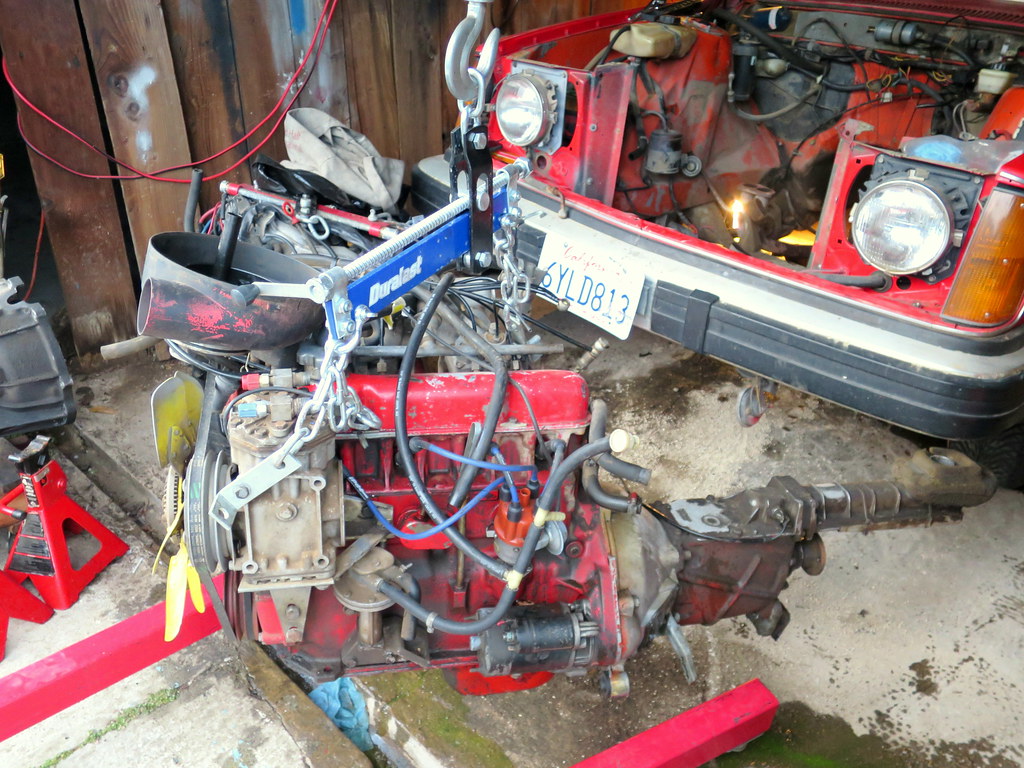
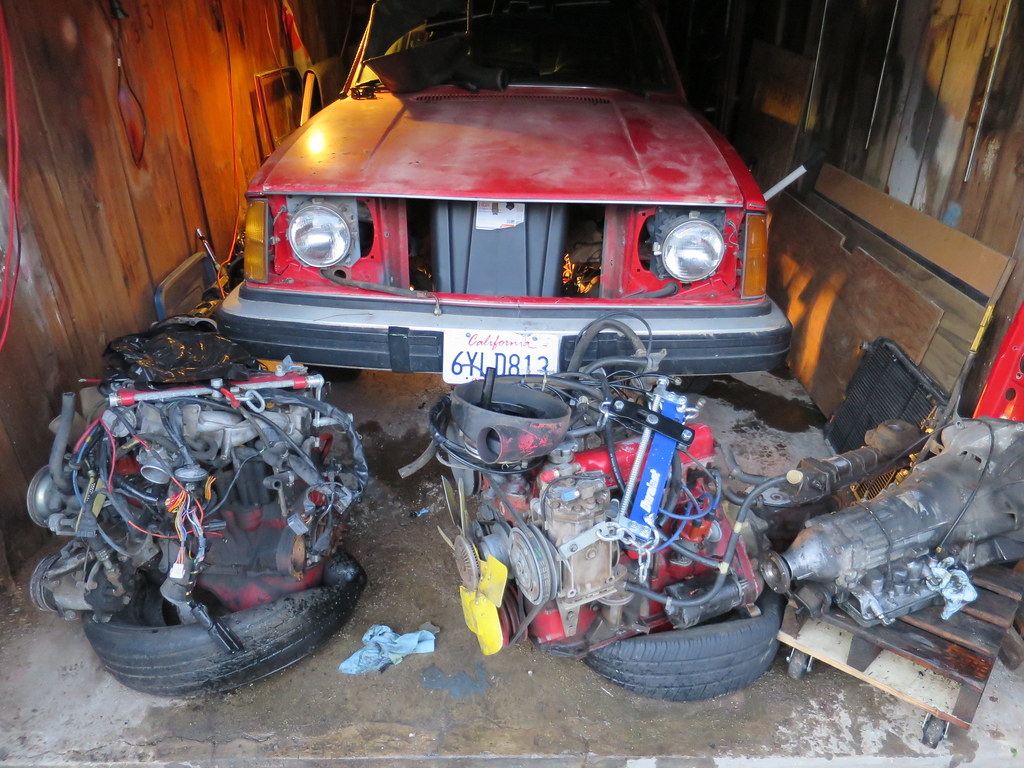
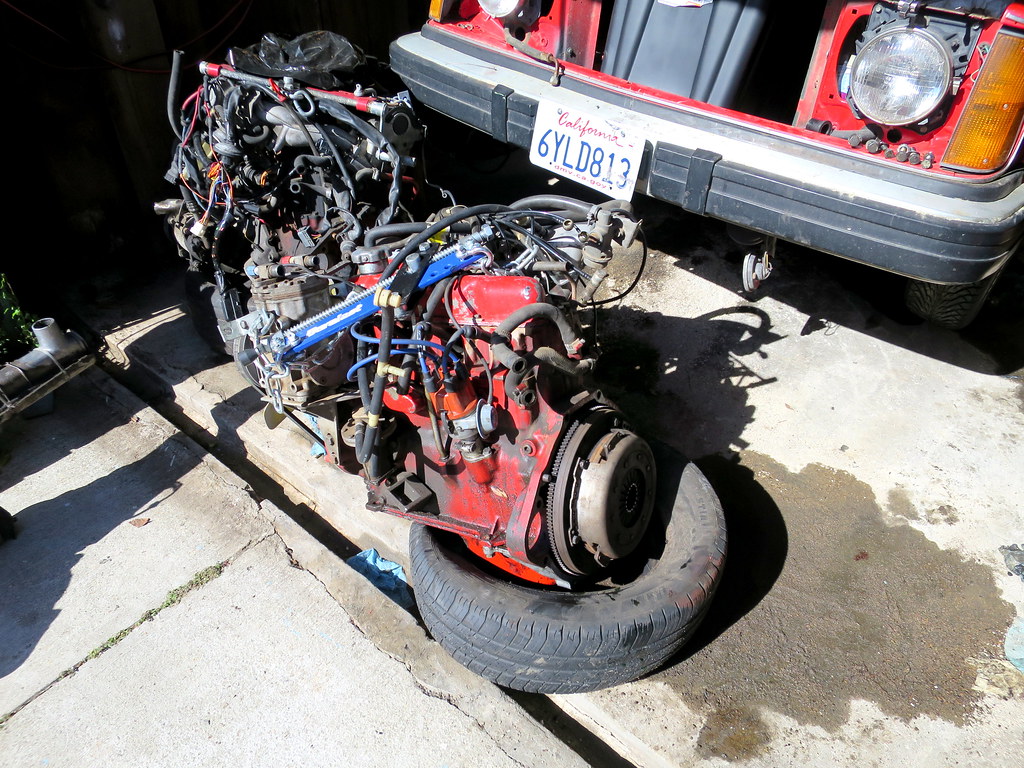
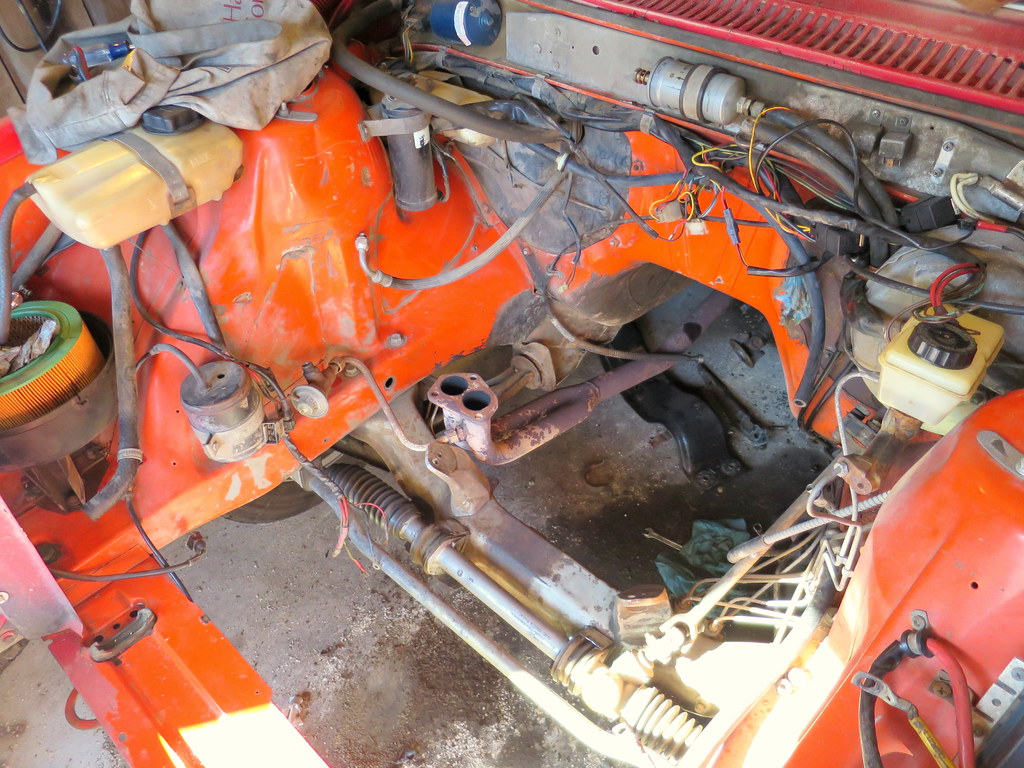
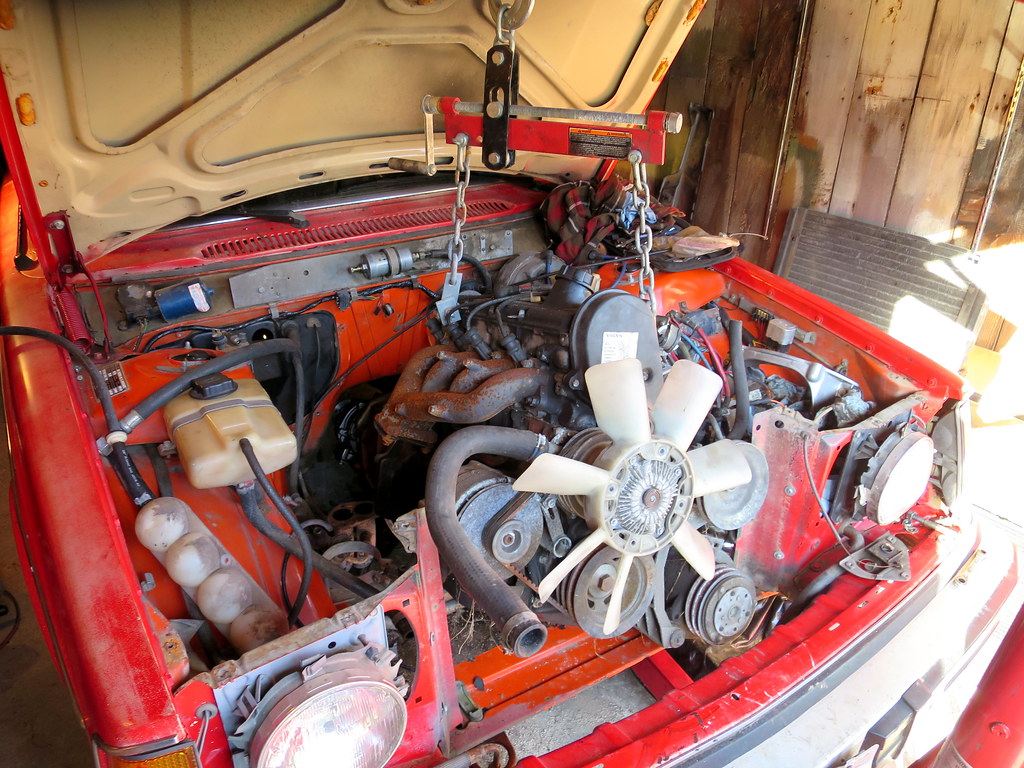
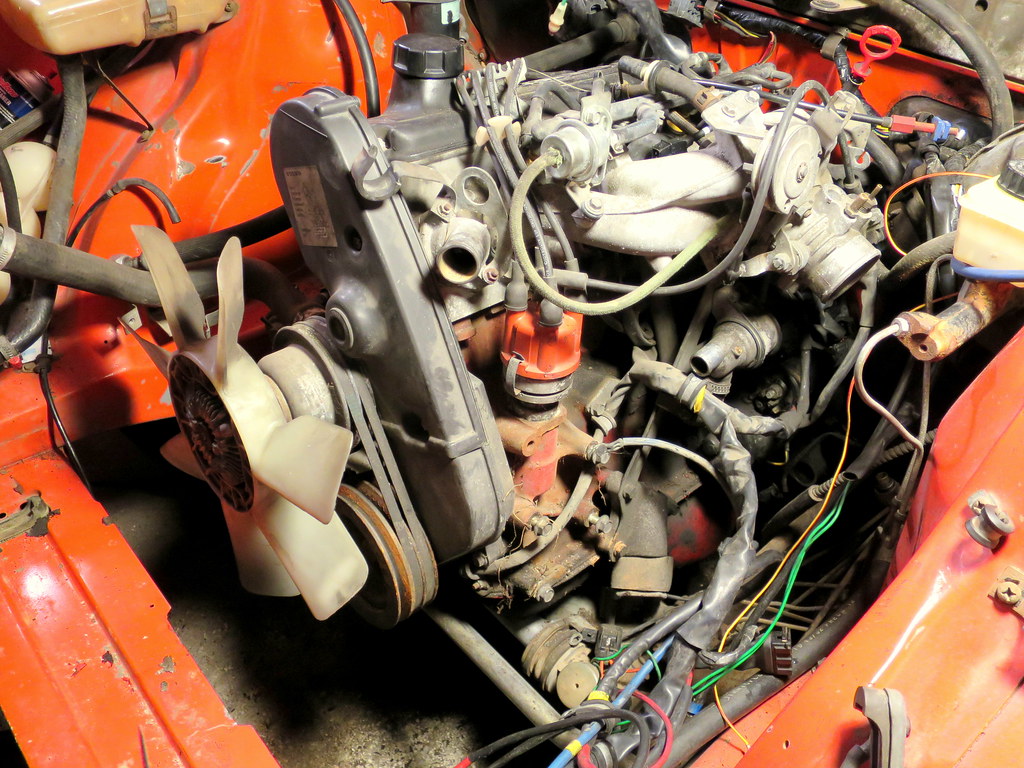
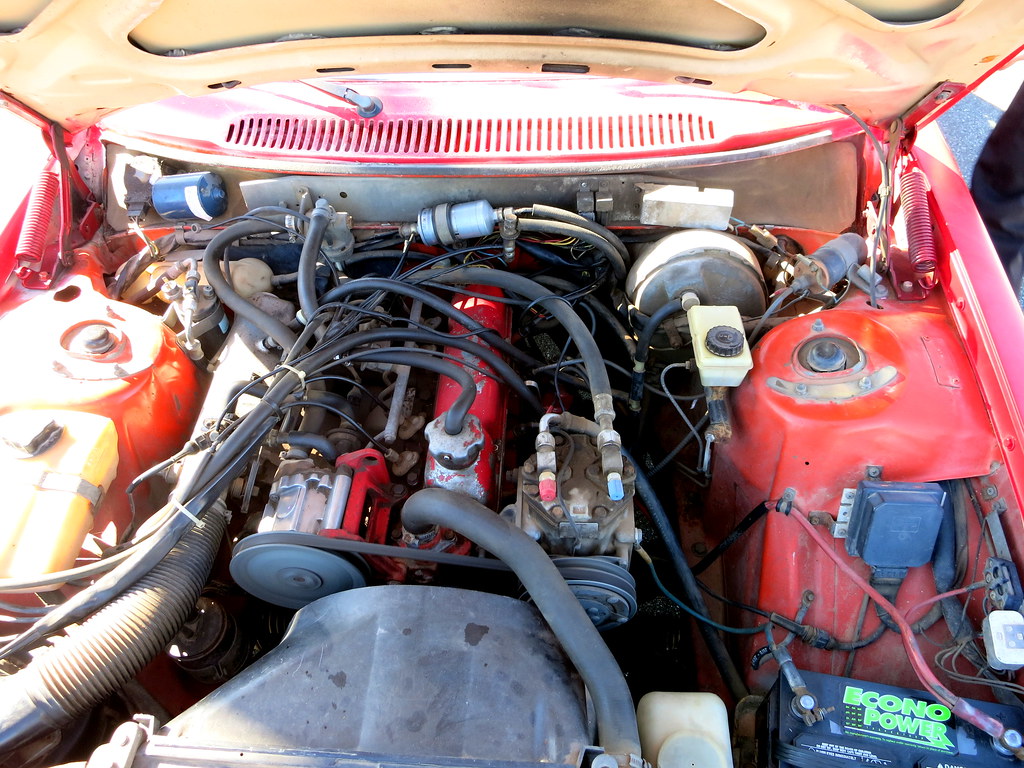
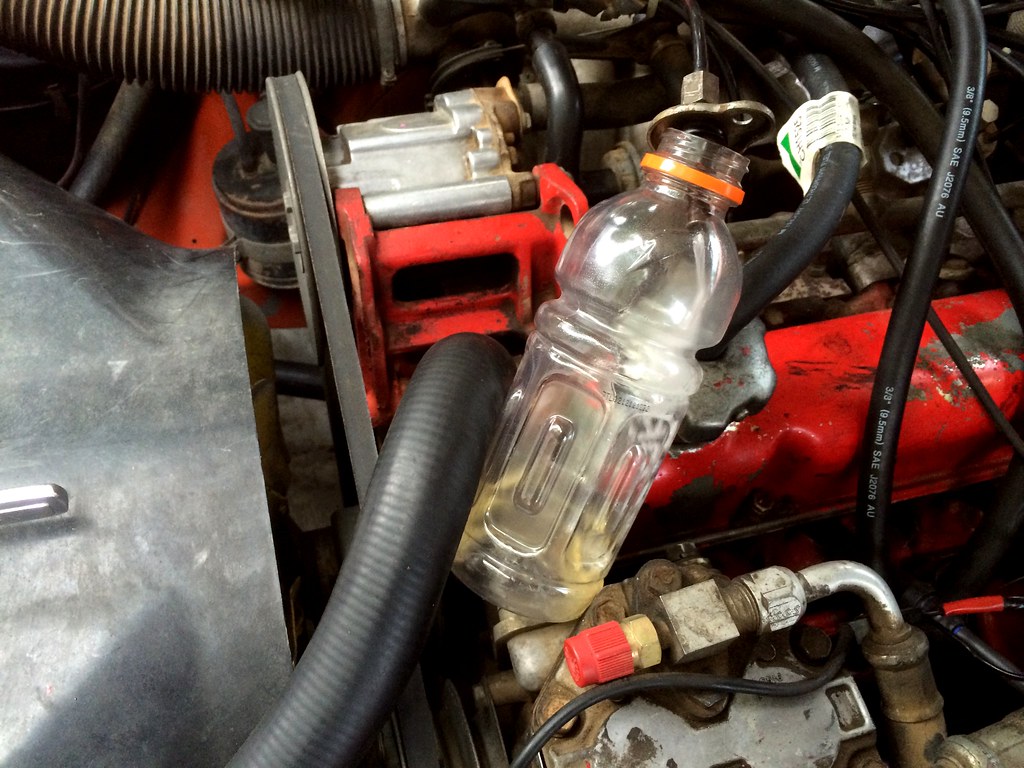
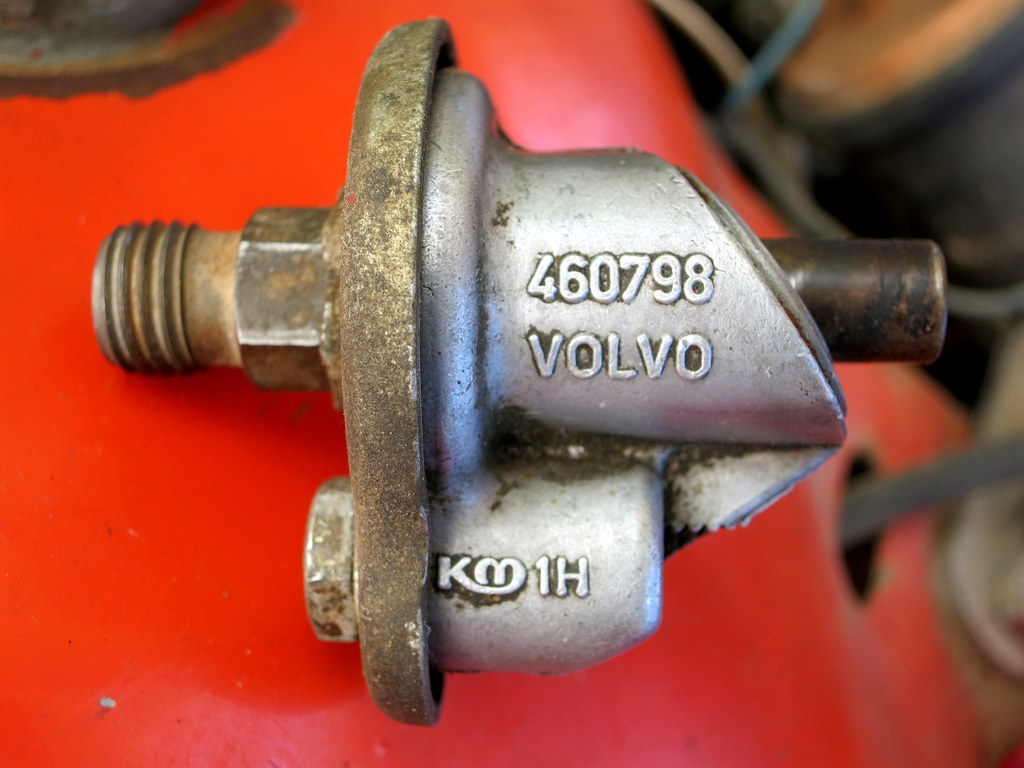
During the summer, the fuel injection system was really acting up. When cold the car would barely start as it seemed to be initially running on one cylinder. Keeping it running was quite the chore and slowly it would smooth out. Only after about 5-7 minutes would it be ok (aka warmed up) enough to be able to drive. The contemptuous nature of the car relegated it into the garage rather than a dependable daily driver. Additionally not a fan of the K-jet fuel injection system so I while I figured the issue was most likely the fuel pressure regulator, I really didn't want to dig into that much. The plan since acquiring the 242 was to upgrade the powertrain to something in B23/230 family with a Lh FI system and a M46 transmission so needed to concentrate on that.

14842112537_47141595f1_b.jpg


14189793833_6aea805148_b.jpg


14952411201_9c9f7341c2_b.jpg


14932509956_608540c4b1_b.jpg


15667319900_9352167e2d_b.jpg
 
The Search Begins

In January 2015 I began the search for a donor car. I wanted to find a working/running donor with a 1983 or 84 B23F or a 1990-1993 B230 for the engine for under $500. On Craiglist posted a wanted ad for a 83 or newer 240 and every day or two I would scan the ads for potential acquisitions. Over the next couple of months I came across various potential candidates but the owners flaked out when trying to schedule times to check out the cars.

At the end of June a 1992 wagon appeared on Craigslist located in one of the SF suburbs about 15 minutes away. While it had an automatic transmission, I figured it would be worth checking out since it was close by. The 245 seemed not in bad shape as it had been maintained but it was also somewhat worn at the same time. The odometer read 270K which was a little higher than I wanted but still acceptable. The owner offered it a $650 after taking it for a test drive and told him I would need a couple days to think about it. Since it wasn't exactly what I was looking for I decided not to make an offer on it. Wrote him back saying I was going to pass on it since for me the value of the car was more in the neighborhood of $400 and that amount was probably below his expectations of the worth of the wagon. About an hour later I receive an email asking if I would be interested in the wagon for $300 which at that point was worth acquiring. Two days later I took ownership of the the wagon and now had an engine, fuel injection and wiring donor for the 242.

19254270100_a1ed9d0a6a_b.jpg


19254274988_32a07ea4d5_b.jpg


19446062731_9400f1032b_b.jpg


19254277230_21a7cf0cf2_b.jpg


18821226073_1d432ff969_b.jpg


Some initial work was done on the car and figured it would be worth seeing if the car passed smog. Turns out it passed with flying colors. At the same time I conferred with a couple people of the 24 hours Lemons Team I belong to as they wanted to get a second race car. Since we already have an 1984 245 the team wanted to get another RWD Volvo but to make the second race car more performance-oriented with either a turbo engine or a larger engine. Once I pulled out the engine the race team planned to take the roller to use building a race car.

18821231123_3319b988e4_b.jpg


19446088631_c053665461_b.jpg


19302720929_88ec500bc8_b.jpg


When I told a friend of mine about acquiring the wagon, he then told me about someone he knew who had gotten a 1990 240DL which had been sitting for 10 years and had 94K miles on it located near Sacramento. A car with that low amount of mileage was worth investigating. The guy who owned it just wanted the front body work for one of his cars and was not interested in the engine, FI or wiring. After a couple phone calls bought the car for $350 plus delivery to San Francisco.

A couple days later our Lemons team was competing at a LeMons race in Washington state when they blew up the engine in the 84 245. Emailing the team captain, I offered up the 1992 wagon with the engine for what I had into it ($450) and the decided to take it which they would be able to use the 92 engine in the 84 wagon. This 92 wagon did get turned into a Lemons car. Under the hood is a BMW straight 6 engine and transmission and its livery is of a SF Muni Bus.

26201290066_17ef3a7d68_b.jpg


26201289666_2fd107f650_b.jpg


26134749732_30288e3eda_b.jpg


26592466374_70326cb43e_b.jpg


26592653444_42cf66aea5_b.jpg


26592761864_a0d6d537e7_b.jpg


27703029955_c4062be66e_b.jpg


27529401712_524fa64a43_b.jpg
 
The 1990 Donor

During last week of August, the 1990 240 was delivered and work began on the transplant project. Since the car had sat for many years I wanted to make sure the motor actually worked before pulling it. Starting with a gas container hooked up a spare D-Jet fuel pump and several feet of fuel hose into the fuel rail, at the same time swapped out the fuel pressure regulator. Inside the car installed a spare instrument cluster to monitor engine temperature and the idiot lights. Hooked up the pump to the battery made sure there were no fuel leaks and then turned the key. The engine cranked for a little while and then started to stumble as if the verge of starting. The engine caught and rumbled to life for a couple seconds before stalling out. Had to restart it several times as it would run, stumble then die. Modulating the throttle finally kept it running and the engine smoothed out as it warmed up.

29107156946_32ebce88bf_b.jpg


29107154356_33fb74a2b8_b.jpg


29107155456_50db5e3ec6_b.jpg


29107149676_563b267539_b.jpg


29107146276_b8eee2f3ea_b.jpg


29107146996_a6a425de68_b.jpg


29140027405_48bbcaf3f2_b.jpg


The engine ran for a couple more minutes before coughing and sputtering then completely dying out. Made several attempt to restart the engine but it just didn’t want to start. After looking around I figured out my oversight. When hooking up the fuel lines, I overlooked the return line. The gas can was now empty having pumped the contents into the gas tank. Obtained more fuel then put together some hose to act as the return line and routed that back into the gas can. The engine was restarted and encountered the same stalling issues until it warmed up, figured it was due to a vacuum leak somewhere. Ran the engine for over an hour in total to see if there was any overheating issues, strange/expensive noises, fluid loss or any other issues. Other than the check engine light being triggered, the engine seemed to be in great shape. Ran a compression test and all cylinders checked out around 170PSI. Now it was time to start removing the engine out of the car.

29140022925_f0c6381069_b.jpg


First job was to drain the coolant undo the coolant hoses & transmission lines then removed the radiator. Next was detaching the fuel lines, vacuum lines, heater hoses, throttle cables power steering hoses, AC hoses and unconnecting all the electrical connections & components. Inside the car the engine wiring harness for the ECU and fuel pump relay were threaded back through the firewall. Going under the car removed the driveshaft, disconnected shift linkage & transmission electrical connectors and separated the exhaust system from the manifold. Lastly was detaching the motor mounts and the transmission cross member. Attached a leveler to the engine and rolled up an engine hoist to the front of the car and started to raise the engine out of car.

After some general wrestling and adjustments with the leveler, the engine and transmission finally emerged out from the car. The starter was harvested as well as all of the bellhousing bolts and the AW-70 transmission & torque converter were separated from the engine. The engine was lowered onto an old tire casing at the corner of the garage.

29140011265_00d694c67f_b.jpg


29034598712_ca1e6e808b_b.jpg


29034597812_d6f37fc34a_b.jpg


29034596572_3d7c0b07bf_b.jpg


28852748140_a409c2780c_b.jpg


28852750310_788c4b31e9_b.jpg


Over the course of the next two weeks the dash was removed to gain access to the wiring and connectors. The engine bay wiring harnesses was pulled through the firewall back into the interior. The driver seat was removed in order to pull back the carpet to with wiring harness for the seat heaters switches lighting in the center console and the transmission. The connectors leading to the rear of the car were undone and the fuse panel was detached from the side wall. All of this wiring was then removed out of the car and put into a box waiting to be reinstalled into the 242.

28852744460_389bea53dd_b.jpg


28852742930_426fd59e16_b.jpg


Under the car the fuel pump and tray were harvested along with the fuel lines. From the interior and engine bay any useful parts were removed. In total it took about a month to strip out everything I wanted from the donor car. Since I had received a title with the car I was able to call one of the local junkyards and a flatbed was sent by to retrieve the shell of the 1990 240 and haul it away. Now the focus turned to finding an m46 transmission for the 242.

28852740790_857db1f198_b.jpg


28852740010_2044f72577_b.jpg


28852738980_994e1c6876_b.jpg
 
Last edited:
The Transmission Donor

During the rest of October and November, overall progress slowed down on the 242 but the search for a M46 & driveshaft continued. At the beginning of December, a 1985 245DL appeared on Craigslist as a mechanics special. The ad mentioned the engine was seized up, but since it did contain an M46 transmission I felt it was worth taking a look at. Talking to the owner I heard a tale of woe of loaning it to her ex-boyfriend. He then lent it to couple of his friends who proceeded to run the car out of oil and destroy the engine. She related they were driving it along dirt roads up in the mountains near Clearlake when they had an issue with the oil filter leaking. They attempted to patch it with duct tape since that was the only tool available to them. The inevitable occurred soon after when the engine seized after the oil weakened and then leaked out from the duct tape bandage.

The wagon was marooned at her mechanic?s shop across the bay in Richmond, CA about 40 minutes away. When arriving, her mechanic seemed a little surprised someone was actually interested in the car since the engine was fubar?d. The 245 was certainly not immaculate but the overall condition was not that bad. The interior was a bit neglected but was intact. Under the hood found both the battery and exhaust manifold were missing. My assumption was the mechanic repurposed the battery and had scavenged the manifold for another car or customer. The interior and the engine compartment were coated with various amounts of tan dust from driving it on the dirt mountain roads. After my inspection I figured the car would be worthwhile as a donor for the project.

28852738130_559578d068_b.jpg


28852737230_5d719f05c9_b.jpg


The next day I met up with the owner and after talking for a bit came to an agreement for $200 for the 245. I handed over several presidents and received the title from her. Talked to her mechanic about having the car towed out and we figured out the best evening to make it happen. Two days later after rush hour dissipated, I drove out the mechanic?s place to retrieve the wagon. In preparation of AAA arriving I needed to inflate a flat tire and then pushed the car out of its spot to make it easier for the tow truck to access. Before hoisting the 245 up on its front wheels and hauling it away, the driver tied down the exhaust system with rope so it wouldn?t bounce around because of the missing engine manifold. Once in SF, the driver was able to maneuver the 245 up a small incline and into my garage space with impressive precision.

29062572411_3d85ac6f2b_b.jpg


29062570961_d4ee126e6e_b.jpg


29062570391_bfe3d13692_b.jpg


The next weekend I threw a battery in the car to see the condition of the electrical system. All the idiot lights came on but when turning the key to try and start the engine, there was the click of the starter solenoid and then silence. Attempted to hand-turning the engine with a breaker bar and it was not budging at all. Looking at the right side of the engine, I could see the remains of duct tape on the oil filter which is now resting on top of the sheared motor mount. On the other side of the engine, the left motor mount had also failed in a similar manner.

29062568131_dcc1718e5f_b.jpg


29062567491_02d28838bf_b.jpg


29062565001_48d39825f8_b.jpg


One interesting aspect of the 245 was how much clearance the front end had. Looking at the strut assembly, I was a bit surprised to see a second smaller spring housed inside. A couple days later while talking to the previous owner about a few things left in the car, I mentioned the spring set up. She said it had been set up that way for driving the back mountain roads and that she through they came out of a Mercedes. Now it was time to harvest the transmission from the 245.

29062569541_b8beca3499_b.jpg


29062569041_b069394102_b.jpg
 
The Extraction

The garage space used to house the 1985 245 during dismantling is fairly narrow, so I was limited to working from the drivers side of the car only. While not optimal, it?s a workable situation. Using a trolley jack, raised the wagon up from the rear axle and jack stands were positioned under jack points. A chock went under the front tire and the car was lowered down onto the stands. The left rear tire was removed and large sheet of cardboard was put down under the car.

29062566981_2a8d9a4a31_b.jpg


Crawling under the car, began the operation by loosening the bolts holding the transmission cross member in place. Next up was undoing the nuts and bolts connecting the driveshaft to the transmission. After the bottom two fasteners were removed, the car was taken out of gear, hand brake released and the driveshaft was rotated 180 degrees to access the second pair. The center support mounts were loosened but not totally removed. The rear driveshaft fasteners were removed in the same manner as the front set. The support for the center bushing was undone and the driveshaft was now free of the car.

29062566511_64e09e5552_b.jpg


29062565971_7ee920eea5_b.jpg


28852718460_01e29937cb_b.jpg


Back inside the wagon, the rubber shift boot was undone and pulled upward around the shift knob. Using a pair of circlip pliers, compressed & removed the circlip to expose the base of the shifter. Going back under the car the wiring to the reverse light switch, 4th gear switch and overdrive solenoid were undone. An allen wrench was used to take out the locking/centering set screw freeing up the pin holding the shifter in place. Once the pin and nylon bushings were taken out it was back inside the car to remove the shifter assembly. In the engine compartment the all the wiring to the starter was undone.

Using a couple shop towels, wiped off the back and underside of the overdrive unit where it would be handled when separating and removing it. Removed the inspection cover then undid the bolts for the starter after removing all the wiring going to it. Next to come off was the speedometer cable after unscrewing the end collar. Joined together several 3/8? extensions to access and loosen the two bolts at the top of the bellhousing. Much to my surprise, one of them was barely tightened and the second one wasn?t even finger tight. I expected these to be a fight to pop them loose. The final two fasteners on the right side were taken off and transmission cross member was removed as well. To enable better access to the transmission, the muffler system from was detached from the car. It had come time for the transmission to come out.

29062562251_f4964bc0df_b.jpg


29062563711_8b21565b2d_b.jpg


29139980445_863d905bde_b.jpg


Even with all the bolts extracted, the transmission remained snug against the back of the engine block. Grabbed the output flange and began to wiggle the transmission and a gap began to form at the bellhousing juncture. Positioning a trolley jack under the transmission, utilized a large screwdriver as a lever at the bellhousing to separate it. It became a bit of a juggling act of keeping the transmission on the jack and sliding it back while lowering it at the same time. Finally the input shaft cleared the clutch plate and the whole unit could be lowered onto the floor then placed in the rear cargo area of the 245.

Work slowed down significantly during the holidays but then picked up again at the start of the New Year. On New Year?s Day afternoon, the clutch and clutch plate were taken off the back of the engine. The flywheel came off next after removing the eight bolts holding that in place. The fuel lines from the engine to the gas tank were removed off the car along with the fuel pump and mounting tray. The front seat was removed and the carpet lifted up in order to remove the wiring harness to the rear of the car.

29034580642_ebf2ac9b4f_b.jpg


29034579992_c9cbc1b4f1_b.jpg


29034579462_c8b2a75ffa_b.jpg


29034578372_0663383f71_b.jpg


28852717930_be925f2711_b.jpg


Inside the car, the dashboard, glove box and center console was taken out. Like the 1990 sedan the main wiring harness was removed out of the car. The harness to the engine and FI system was left in place as it suffered from insulation rot being the original harness and not a replacement one. The clutch cable, speedo cable and throttle cable were harvested as well. I reluctantly gave up on extracted the manual pedal unit as I was unable to loosen two of the 12mm mounting bolts after several attempts. The in-tank fuel pump assembly came out and using the D-jet pump, hoses and a battery, removed the gas from the tank into a portable container.

28518162684_b763f1606c_b.jpg


28518151604_4ee8f99b97_b.jpg


The following weekend was spent readying the M-46 for installation. A thick layer of grease, grime and road dirt coated the casing as well as inside the bellhousing. Before installing the transmission into the 242, this would need to be cleaned. The main tools for this job consisted of a roll of paper towels, latex gloves, a can of brake cleaner and expired credit card. I wanted to limit the amount of brake cleaner so that was used sparingly. Scrapping with the edges of the credit card helped break up and remove the layers of grime. The paper towels were then used to clean off the remaining residue. This procedure was repeated for the next three-some hours. The inside of the bellhousing contained the most tenacious coating of greasy sludge and where I had to resort to the brake cleaner the most. Every nook, cranny and crevice was attacked and by the end of the cleaning, the M-46 was looking respectable again.

28518161744_0cb97b52c1_b.jpg


28518161044_4f51e0a004_b.jpg


28518160484_d5d3b3cab2_b.jpg


28518159814_98ac241449_b.jpg


28518154224_6440fbfe6e_b.jpg


28518157434_01f1fdaf7a_b.jpg


28518156524_b05ceaee53_b.jpg


28518155664_f69c7b466d_b.jpg


28518153544_bd48f3d15b_b.jpg


28518152874_e013613acb_b.jpg


28518152334_687c2977b7_b.jpg


As the various parts came off the wagon, they were moved over to the garage space where the 242 resided at. Items such as the cross members and the inspection cover were taken to a friend?s garage which included a parts washer. It was much easier scour the grime off these parts with a bath of mineral oil. An amazing transformation from when the parts came off the donor wagon and when they emerged from the parts washer.

28518149744_7c1a968bdb_b.jpg


28518149194_ec7cdb1be2_b.jpg


28518148584_3204d671d7_b.jpg


Six weeks after arriving, time had come to send the 1985 wagon to Valhalla. The 245 was taken off the jackstands and placed on the garage floor. Mudflaps, a taillight and other assorted parts worth keeping were saved as spares. Contacted the same junkyard and arranged for a tow truck to claim the 245. With very little ceremony, rolled the wagon out of the garage and was it was quickly secured by the tow truck and taken away. With pretty much all of the parts needed for the full transplant work then started on the 242.

28518148004_33591ca5a4_b.jpg


28521316633_8a39efc1ec_b.jpg


28521316173_985fe2ff52_b.jpg
 
Prepping the 242 for the transplant

Now that all of the conversion parts assembled and collected, and since I did not have a need for the B20F/M40 combo, it was time to remove them to get them posted on Craigslist. On a late Saturday morning, the B20 was fired up for the last time in the 242. After getting it warmed up I took several videos of the engine running and revving in order to help sell it. After letting the engine sit for about an hour work commenced on the engine and transmission removal. Much like the 240 sedan, work started with draining the coolant and undoing the coolant hoses from the radiator.

29034306322_cef6e2f1dd_b.jpg


29034305512_54c676f0ef_b.jpg


The fuel injection system was focused on next as the fuel line from the firewall mounted fuel filter were detached as was the return line back to the gas tank. From there it was onto the electrical connections on the engine, distributor, starter and alternator. Vacuum lines were then unhooked and then gear shifter was removed from the transmission.

Going under the car the exhaust down pipe was separated from the manifold then the driveshaft was disconnected from the back of the transmission. The clutch & speedometer cables were detached as well as the wiring for the reverse lights. The fasteners for the engine mounts were loosed and then the transmission cross member was taken off. Once the valence and front end metal work were removed, the engine and transmission were ready to be pulled out of the car.

A balancer was attached to the engine and then the engine hoist was moved into position. My friend Alex joined me to provide a second set of hands for the engine/transmission removal. Raising up the engine, we quickly ran into an issue clearing the firewall of the 242. After several attempts the engine had only raised up an inch or two and then stopped. Lifting the a bit engine higher, it was clear something was unhappy.

28517875774_4dd61fdc04_b.jpg


Alex went to find a breaker bar to help persuade things. As I turned and walked out of the garage to check my phone, there was a loud ?Snap!? followed instantly by a large crash as the engine fell down into the engine bay. Next to me several metallic clangs rang out as something tumbled along the ground. One of the chain links had failed on the leveler. It was then I realized we had been lifting up the car when the engine was caught up on the firewall. While the leveler was rated to hold an engine and transmission, the weight of a car was beyond its capability.

28517872964_ecb2520322_b.jpg


The chains were rigged up again and after a more careful approach, the engine and transmission finally emerged out of the engine bay. The M40 was unbolted from the engine and set off on the side of the garage. The clutch and clutch plate were removed from the flywheel. While used, they both still had a lot of life left so they were added to the parts pile. The K-Jet fuel injection parts were harvested off the engine and put into a box.

28517874394_a090a58b02_b.jpg


28517873774_34a7a024ec_b.jpg


28517872354_fe4a6aa898_b.jpg


28517871514_bc410071f8_b.jpg


Diving back into the now empty engine compartment, started to remove the dirt and grime from the paintwork as well as the cross member and the steering gear. The paint soon when from dull to shiny and layers and layers of dirt build came off the steering rack to reveal the part numbers and ZF name cast into the top of it. A few other remaining K-jet parts were removed out of the engine bay and now it was time to concentrate on the interior.

28517870904_0aef282ee1_b.jpg


28517870074_470d425422_b.jpg
 
Removing the interior wiring and drivetrain

With redoing the wiring, I needed to take out the dashboard which also meant the removal of the steering wheel. Once the steering wheel came out the dash board soon followed along with the center console and turn signal & wiper stalks. Next was uncoupling all of the electoral switches and other connectors off the wiring harness. The fuse panel was the only part of the wiring harness which was left mostly untouched. Once that was completed, threaded the engine compartment wiring back through the firewall into the interior of the car and the fuse panel was unfastened from the footwell wall.

28517868664_8ee7795175_b.jpg


28517867534_cf4e1a0fc4_b.jpg


28517866924_3db904f5cc_b.jpg


29062235211_a8199bb79e_b.jpg


The full harness was then fully removed from the car, leaving only the wiring leading to the interior lights and the rear of the 242. Since I would be constructing wiring to bridge the harnesses at these connectors, I needed to figure out the individual wires going to the rear of the car. Getting out the Greenbook for the 242, and going to the wiring diagram tagged and marked the connections going to the rear of the car such as the lighting, fuel pump, brake lights and turn signals.

29139653215_b20f9a2e60_b.jpg


The last task in the interior deconstruction was removing the passenger side firewall panel and replacing it with the one from the 1990 244. The reason I replaced out the panel is I would not need to enlarge holes for the Lh-Jet wiring loom. In retrospect, it is probably easier to leave that panel in place and redrill larger holes into the metal. While a straightforward job, there are two fasteners with very limited access with the heater unit still in place. Removing them took contorting under the dash and an extreme amount of patience. The 1990 panel fits into place but the contours of the metal are different leaving a gap between the panel and the firewall in one place which will need to be sealed to cut down on airflow from the engine bay and overall noise. The AC hoses were then rerouted through the panel and back into the engine compartment.

29062234611_2c1778f76d_b.jpg


29062232511_cf2db0dc11_b.jpg


29062233021_c300d15cee_b.jpg


29062231691_eb58905e21_b.jpg


Going back under the car, the driveshaft and center bearing support were extracted. Decided to compare the several 240 driveshafts (M40, M46, AW70,) so see the difference in overall length, then installed the M46 driveshaft onto the rear diff as well as installed the center bearing support.

28517857204_c999473fb0_b.jpg


29062230271_a31b0a7b09_b.jpg


28517856104_2c749b4e98_b.jpg


28517855404_d3a479bc8f_b.jpg


Since I was not planning on retaining the B20F or the M40 transmissions, started prepping them to be posted up on Craigslist. Harvested some remaining K-Jet parts and then moved it outside to take pictures of it in the daylight. The car has spent time in Wyoming before coming to the bay area so one of the upgrades on the engine was a block heater in one of the freeze plugs. The engine and transmission were tucked back in the garage and it took about week before the B20 was snapped up by someone wanting it for their 1966 122S Wagon. A week later a 145 owner picked up the M40.

28852443410_3ef63cccd9_b.jpg


28852442920_e69b8f42f5_b.jpg


28852441340_87e9bf3f94_b.jpg


29062218191_6729819e2e_b.jpg


29034266892_4586cbc595_b.jpg


29034266892_4586cbc595_b.jpg
 
Installing the B230 into the 242

While the B20/M46 were posted up on Craigslist, the B230 began its prep for journey into its new home. Since I was installing a Lh 2.4 FI system, the engine would require a flywheel with crank position sensor (CPS) markers. A month or so previously, I ordered a Lh-2.4 compatible lightened flywheel from 77Volvo245/STS Machining and installed it onto the B230. The M46 bellhousing needed to be updated as well and this was an easy thing to do. The top of the bellhousing is where the CPS would be mounted. While the 1985 FI system doesn’t use a CPS, the bellhousings are cast in such a way this section could be easily removed to permit the use of this sensor. Starting on one side of the CPS area, utilizing a bladed screwdriver and a mallet to start cutting through the metal. Continuing around the outer seam, the thin metal skin easily separated. After making it about halfway around the cutout area with the screwdriver it suddenly popped off in one piece.

29062215771_ceed58ae08_b.jpg


29062215031_1dd5e169cf_b.jpg


29062214511_5fb85f6f4e_b.jpg


29034270512_a2dc5dd804_b.jpg


With the engine on the hoist, installed the clutch disk and clutch plate onto the flywheel and tightened down the fasteners. At the same time swapped out a new CPS with the one originally on the engine. Bringing the transmission over to the hoist, lifted it up and it slid into position without too much wrestling. The starter joined the assemblage as well as all of the fasteners to hold the transmission into place.

29034269742_74daa1413b_b.jpg


29034269332_73529d7d70_b.jpg


Raising up the hoist and moving it into position, the installation of it into the engine compartment commenced. After two attempts, the hood needed to be removed in order for the engine to be able to drop into place. Once that was removed from the hinged, this allowed enough room to get the hoist over the engine compartment and it still cleared the garage door. The engine dropped down into the depths but still would not align correctly with the motor mounts. After a bit of wrestling with my friend Alex assisting, the passenger side mounts came resting into place. The drivers side mount ended up taking a bit more effort and it too finally came to rest in the correct position. While I probably should have done this with the engine still on the hoist and outside the car, installed a VDO 5 bar oil pressure sender from a 240 Turbo motor onto the block. This required the adapter for the larger size sender hole on the B230 engines.

29034268812_058128d673_b.jpg


29034267512_bc68ac0d52_b.jpg


29034268132_4d8d277049_b.jpg


29034265642_4f89cc22a9_b.jpg


One item left on the car during the engine installation was the exhaust system. I had assumed the B20/B230 systems would not be compatible to each other, the mismatched position of the downpipe made it truly obvious. One of the parts I did save was the entire exhaust system from the 1990 240. Since I did not plan to keep the M40 exhaust, borrowed a Sawzall from Alex and in less than 10 minutes the exhaust system came out of from under the car in 3 sections.

Installation began on the 1990 muffler system and after getting the rear most section mounted I encountered an issue. As I attempted to get the middle section on the rubber hangers the exhaust pipe became impeded by the swaybar. The 1975-77 mufflers feature an over the axle design also impacting the profile of the rear swaybar. In my collection of parts I did have several swaybars, including a set of IPD bars. I did not want to install a 25mm sized one, instead opted for a 23mm rear bar scavenged from a 1979 242GT at the junkyard several years back. Once the 242GT sway bar went into place, the 1990 muffler slipped into place without an issue or rubbing/banging against the suspension components.

29034264882_40876684d3_b.jpg


29034264162_a722ea57b0_b.jpg


The next step involved reinstalling the driveshaft onto the rear of the transmission. This is when I noticed the next issue of the installation, the transmission cross member mounting. I initially thought the M46 cross member would bolt right up, but it did not line up at all. The 1975 cross member could be installed, though not perpendicular to the transmission mount which would not be a long-term solution. Leaving the cross member on through misaligned, this allowed me to keep working on getting the 242 operational and researching a solution in the mean time. Completed the work on the exhaust system after connecting together the downpipe to the catalytic converter.

28521038033_aea9162dec_b.jpg


28521036463_68179e5a25_b.jpg


28521029793_718d216c99_b.jpg


28852425490_58c0dd413c_b.jpg
 
Last edited:
Do the STS flywheels come with the marks to make sure they line up correctly during installation on LH2.4 cars with manual transmissions?

Flywheel_940.gif
 
Do the STS flywheels come with the marks to make sure they line up correctly during installation on LH2.4 cars with manual transmissions?

Flywheel_940.gif

I was not aware of any marks on the flywheel, the procedure I followed was posted up on the For Sale thread for the STS flywheels. This is to align the non-divoted section to where the starter sits. This is visible in the pictures at the 9 o'clock position of the flywheel.

29034269742_74daa1413b_b.jpg
 
Reconnecting all the pathways for electrons

With the drivetrain mostly in place, work now centered on the electrical system and wiring. Inspected the 1990 wiring harness for any issues, then started the process of reinstalling it into the 242. Placed the harness inside the interior and threaded the two sections through the driver side firewall into the engine bay. While I wanted to keep the 1990 harness pretty much intact, I knew I wanted remove a few unneeded subsystems on the 242 such as the automatic door locks and the electric windows. The wiring for these two features can be easily extracted from the wiring harness and it reduces the amount of wiring behind the dash.

After routing the wiring looms to the respective areas of the dash and engine bay, I began to reconnect the various switches and circuits. Having several wiring diagram manuals and print outs on hand made the job a lot easier so the rewiring operation went fairly smooth. A few temporary puzzles did pop with items such as the slightly different connectors for the headlight switch and wiring for the blower motor.

One issue I knew needed to be solved with the Lh 2.4 system is the lack of the pickup in the rear diff for the FI computer. With the 1985 transmission and its speedometer cable, I planned on using the 1985 & earlier mechanical speedometer cluster rather than an election one. One option would be swapping out the rear diff to a 85 or newer one but I wanted to retain the original 4:10 rear end. A posting on Turbobricks suggested a speedometer pickup for the older cruise control systems (79-85) could be utilized on the mechanical speedometers to supply the needed signal for the FI computer, so decided to try that approach.

28521024123_c220bd73a3_b.jpg


19119986783_99548e927d_b.jpg


One of the wiring differences on the mechanical and electrical speedometer instrument clusters is which connector the power to the cluster is situated at. On the electrical speedometer type it is the small three prong plug on the rear of the speedo. On the mechanical type it is in the crescent shaped connector. In order to keep the wiring harness as original as possible and not hack it up too much, I built a jumper between the two connectors.

28521025883_b59513a3c7_b.jpg


28521024813_f089d07f61_b.jpg


Since the Lh 2.4 wiring had been left on the engine reconnecting all the subsystems turned out to be pretty straightforward. The biggest issue in reattaching the engine compartment wiring turned out to be getting the rubber grommet sealed against the firewall. It comes out next to the brake booster so there is not a lot of access on the one side, so it did take some effort to get put in place. The other area to take time in checking is to make sure all of the grounds in the engine compartment are installed. Helping this detail out lay in having a 1987 240 green service manual for the electrical system as it shows where all the grounds are for the electrical system. This turned out to be pretty much spot on for the 1990 wiring.

28521023583_5c47388ffb_b.jpg


Work centered on getting the put back enough to get the engine ready for a test run. Finally drained the oil out of the engine and changed the oil filter as I assumed those to be at least 10 years old. Reinstalled the front metal work so the radiator could be hooked up and the engine filled with coolant.

28521027473_b71a643196_b.jpg
 
Back
Top