
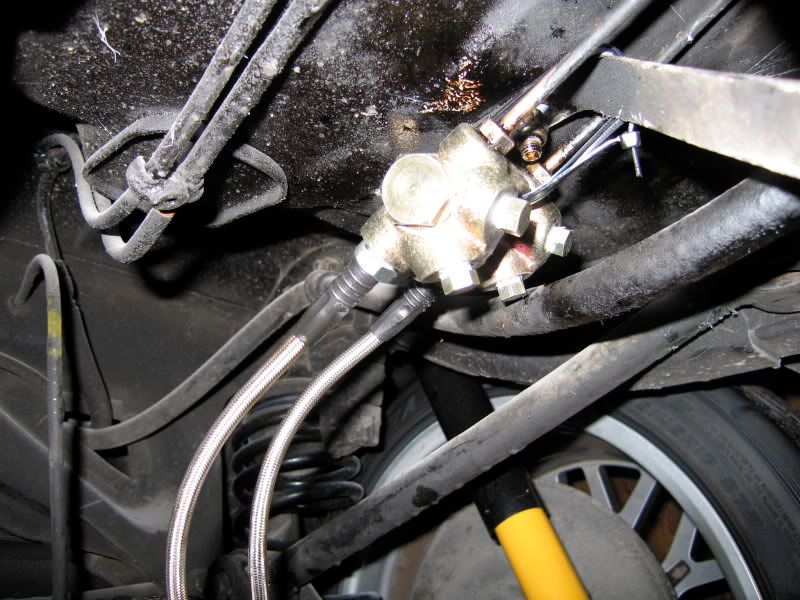
looks great. did you get all the calipers on or just the one test fitted?
Both fronts are installed, new braided and hard lines run, and the brake booster/MC reinstalled. I forgot what a PITA the inside upper brake booster nut can be to access.
Hello Guest, welcome to the initial stages of our new platform!
You can find some additional information about where we are in the process of migrating the board and setting up our new software here
Thank you for being a part of our community!
looks great. did you get all the calipers on or just the one test fitted?
So Clean!!!

Need to re-plumb the front distribution block (per Dave Barton's site) and delete the rear proportioning valves
 .
. 

Charlie, I am going to be calling you in a few weeks to swing over
In full on mode, put about 12 hours into the car this weekend

I've said it before and I'll say it again...pictures do not do that paint justice.PS -- I love this project and I am super jealous of that paint job!

Oh man -- if the paint looks that good now it should be incredible after it's buffed out
Yup it's gonna look like
When you where working at ifcs you didnt by any chance know my dad john grady or hear of shade tree auto?
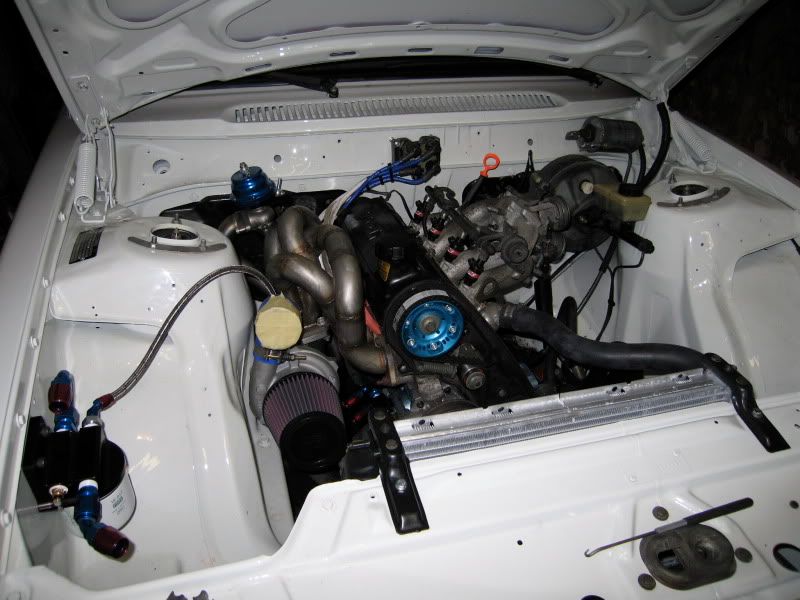
i really like the oil filter relocation. so easy to access. why'd you move it? too hard to get to with the manifold and turbo?
Oh, and the braided stainless line and fittings look sweetI'm using a VDO temp sender in the unused inlet.

Don't they though?! I love stainless lines. Dresses up any build. Spendy though.
Yea, I've also learned to stick with one brand of line/hose end. I tried to mix and match Earl's perform-o-flex line with generic Summit brand hose ends (just for the -4 oil feed) and the hose ends didn't want to fit over the line during assembly (without causing fraying). Once I bought Earl's fittings everything went together much better. Maybe it was just me, but the Earl's line seemed to like Earl's fittings much better.
For now I'm using rubber lines for fuel, but eventually want to do the fuel system in stainless.
